Overview
The HitPay Bukku integration automatically syncs your sales, processing fees, and refund data from HitPay to Bukku. This keeps your books up to date without manual data entry — no complicated OAuth popups, just a direct and secure connection.What Gets Synced
- Sales — Each charge is recorded as an Invoice and Payment in Bukku
- Processing Fees — HitPay fees are mapped to your chosen GL account
- Refunds — Refunds are tracked and mapped to your chosen GL account
Key Features
- Two sync modes: Bulk (daily summary) or Individual (per charge)
- Map your own Bukku GL accounts for sales, fees, refunds, and payouts
- Secure direct connection using your Bukku Access Token
- Built for Malaysian businesses
Prerequisites
Before connecting, make sure you have:- An active HitPay account
- An active Bukku account
- Your Bukku Company Subdomain (e.g.,
yourcompanyfromyourcompany.bukku.my) - A Bukku API Access Token — generate this from Control Panel → Integrations → Turn ON API Access in your Bukku account
Connecting Bukku
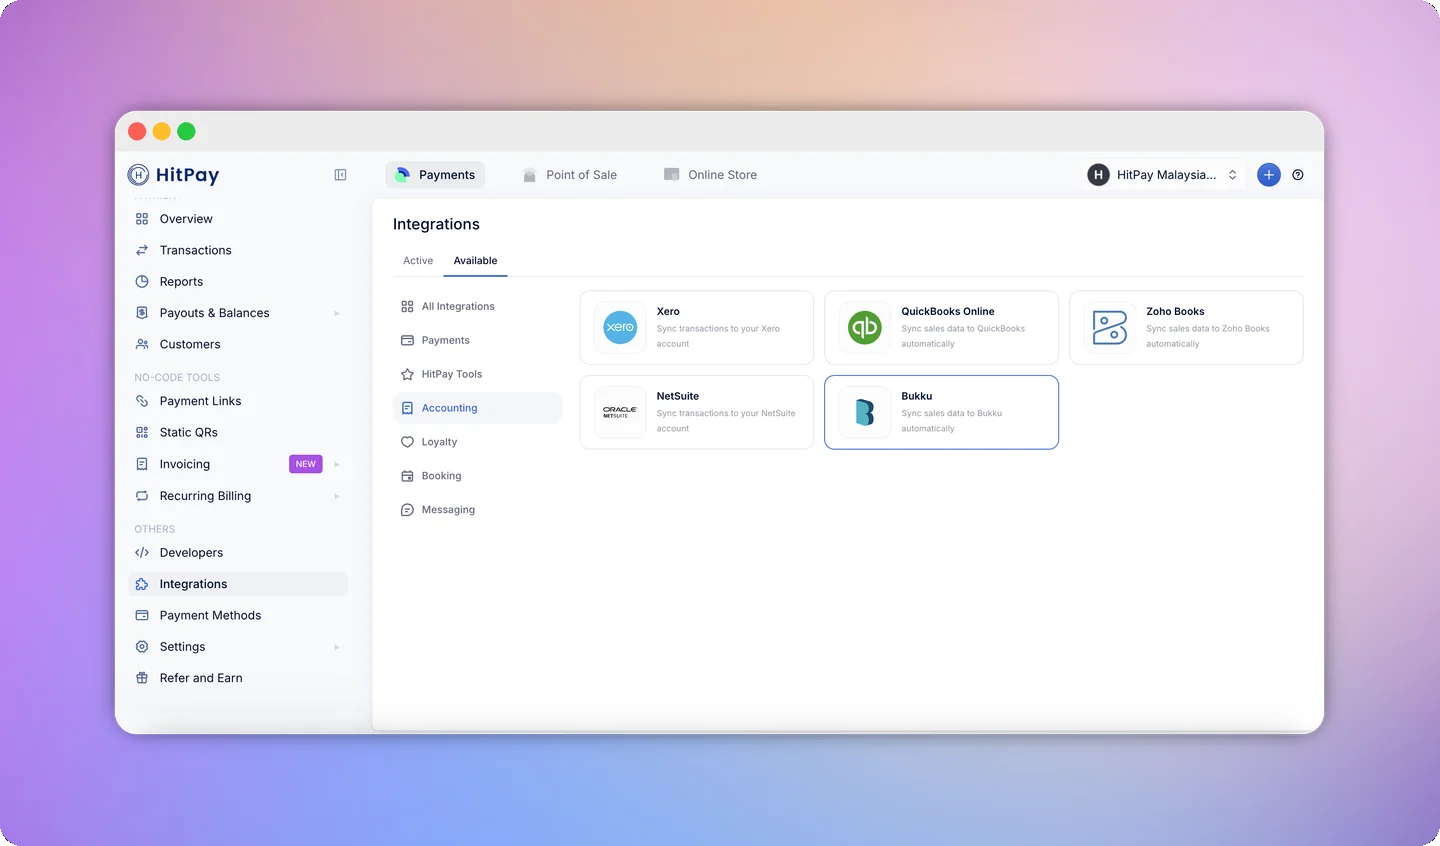
- In your HitPay dashboard, go to Integrations from the left navigation menu.
- Click the Available tab, then select Accounting.
- Click the Bukku card.
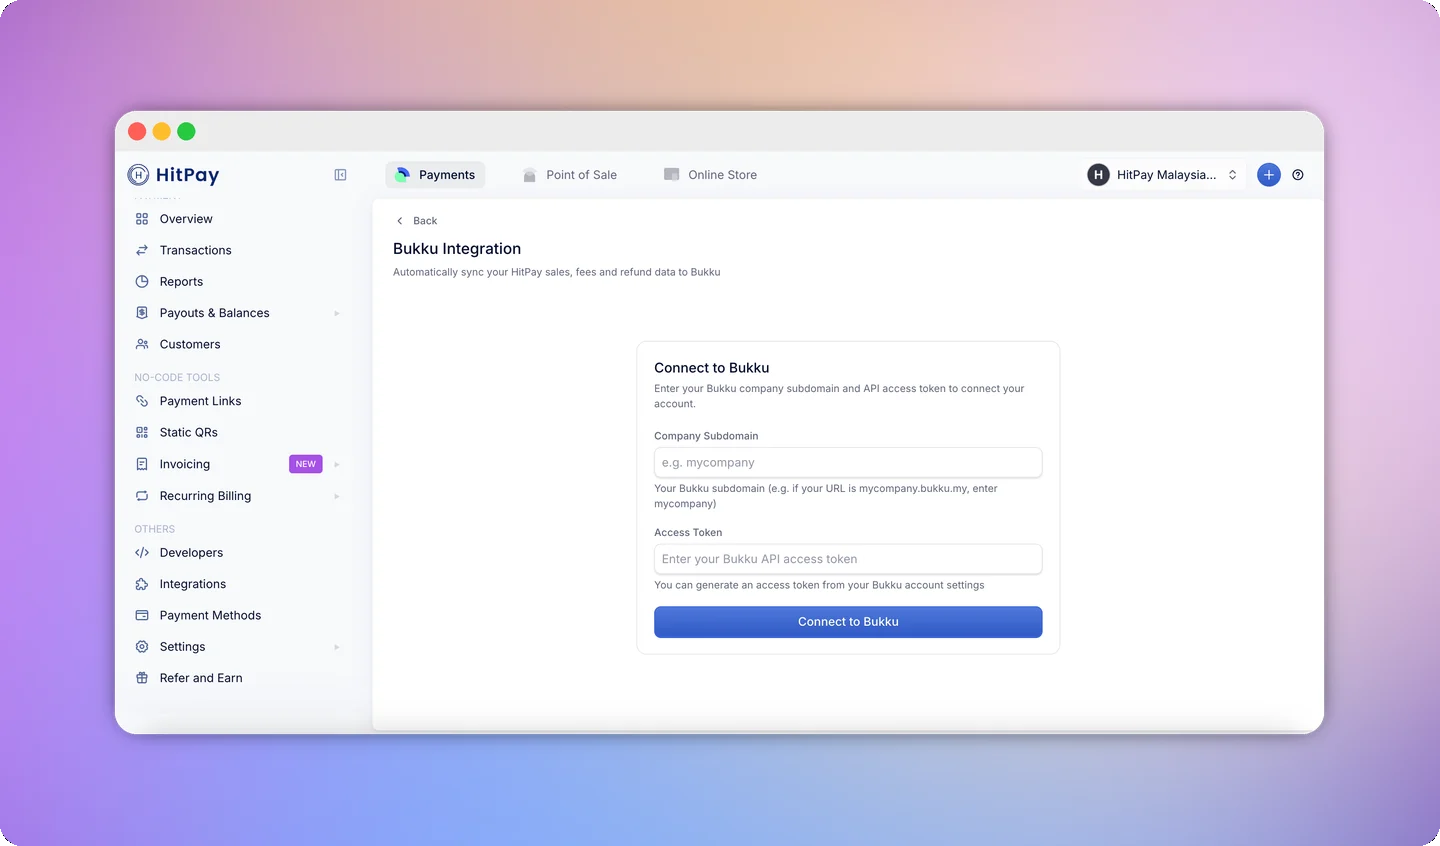
- Enter your Company Subdomain — this is the prefix of your Bukku URL (e.g. if your URL is
mycompany.bukku.my, entermycompany). - Enter your Access Token — generate this from your Bukku account under Control Panel → Integrations → Turn ON API Access.
- Click Connect to Bukku.
Configuring Sync Settings
After connecting, configure how data syncs to Bukku before enabling sync.- On the Bukku integration page, open the Settings modal.
-
Map your accounts. Select the Bukku GL accounts that HitPay should use for each type of transaction:
-
Choose your Invoice Grouping mode:
- Bulk (default) — Combines all transactions from each day into one clean summary. Best for high-volume businesses that prefer a summarized view.
- Individual — Creates a separate invoice record for every transaction. Best for businesses that need per-transaction detail in Bukku.
- Enable the sync toggle to start syncing data to Bukku.
- Click Save to apply your settings.
Disconnecting Bukku
- On the Bukku integration page, click the Disconnect button.
- A confirmation dialog will appear. Click Disconnect to confirm.
Important Notes
- Only future charges are synced. Syncing begins from the moment you enable sync. Past charges are not retroactively synced.
- Re-enabling sync after disabling only syncs new charges going forward. Charges that occurred while sync was off are skipped.
- One HitPay business connects to one Bukku account. Each business account requires its own Bukku connection.
FAQs
Where do I find my Bukku Access Token?
Where do I find my Bukku Access Token?
Log in to your Bukku account, then go to Control Panel → Integrations and turn on API Access. Your access token will be displayed there.
Why are some charges missing in Bukku?
Why are some charges missing in Bukku?
Check the following:
- Sync is enabled — Verify the sync toggle is turned on in Settings.
- Charge timing — Only charges created after sync was enabled are synced. Charges from before that date are not included.
- Last sync time — Check the “Last Sync” timestamp on the integration page. If the last sync was before the charge was created, wait for the next automatic sync or trigger a manual sync.
What is the difference between Bulk and Individual sync?
What is the difference between Bulk and Individual sync?
Bulk combines all transactions from a given day into one daily summary entry in Bukku, which is ideal for businesses with high transaction volumes. Individual creates a separate record for each transaction, giving you per-transaction visibility in your Bukku account.