Overview
The HitPay Xero integration automatically feeds your HitPay sales, processing fees, and refund data into Xero once a day. This keeps your books up to date without manual data entry.What Gets Synced
This page covers the sales data feed. If you want your customers to pay your Xero invoices using HitPay payment methods, see Xero Invoices Payment. If you use HitPay Bill Pay, your vendor bills and bill payments can also sync to Xero — set this up from the Xero (Bill Pay) card under Accounting.
Prerequisites
- A Xero account with access to the organisation you want to connect.
- A verified HitPay business account with admin access.
-
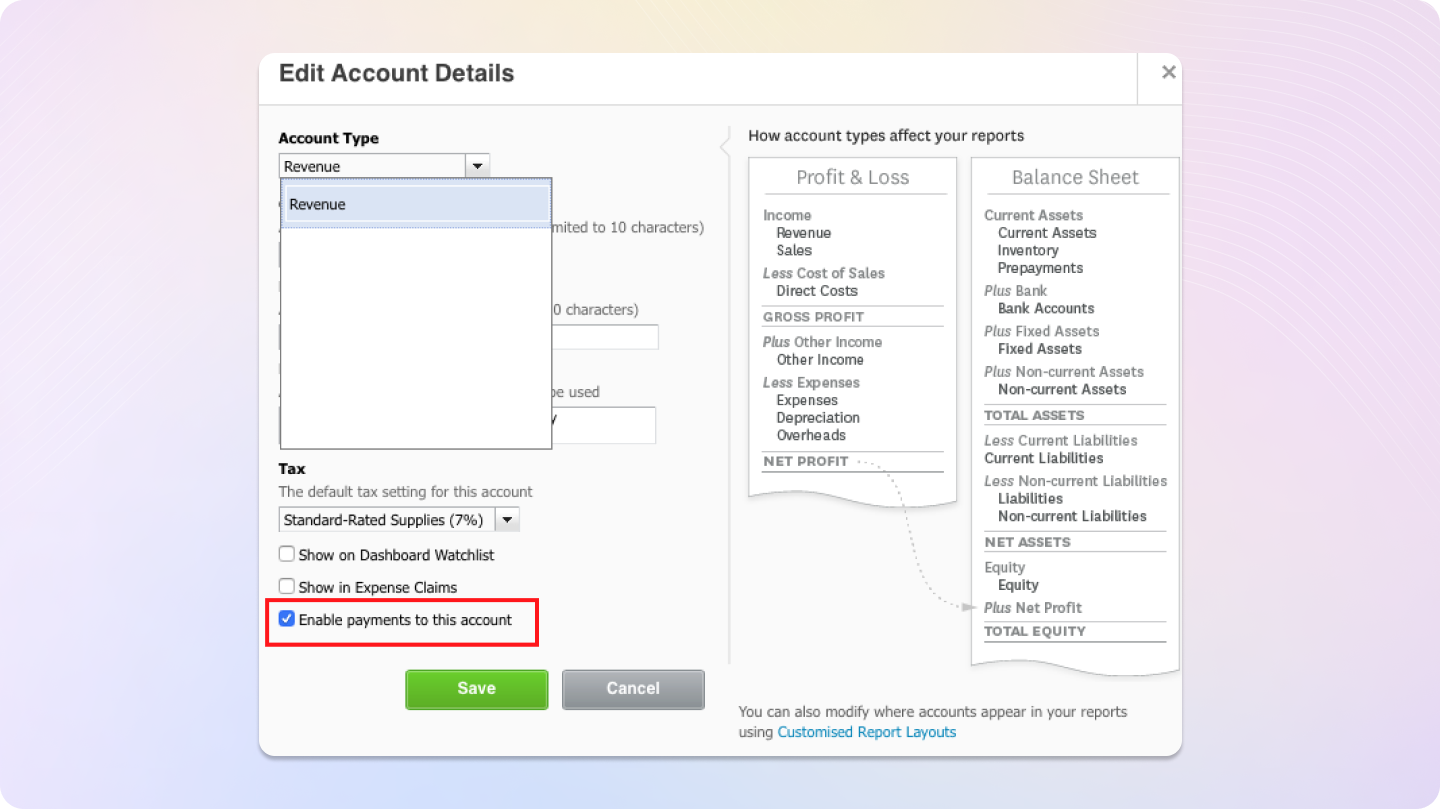
The Xero accounts you plan to use for Sales and Fees must have payments enabled. In your Xero dashboard, go to Accounting > Chart of Accounts, open the account, and tick “Enable payments to this account”. Accounts without this setting will not appear in the HitPay dropdowns.
Each Xero organisation can only be connected to one HitPay account. If your organisation is already connected to another HitPay account, the connection will fail with an error message.
Connecting Xero
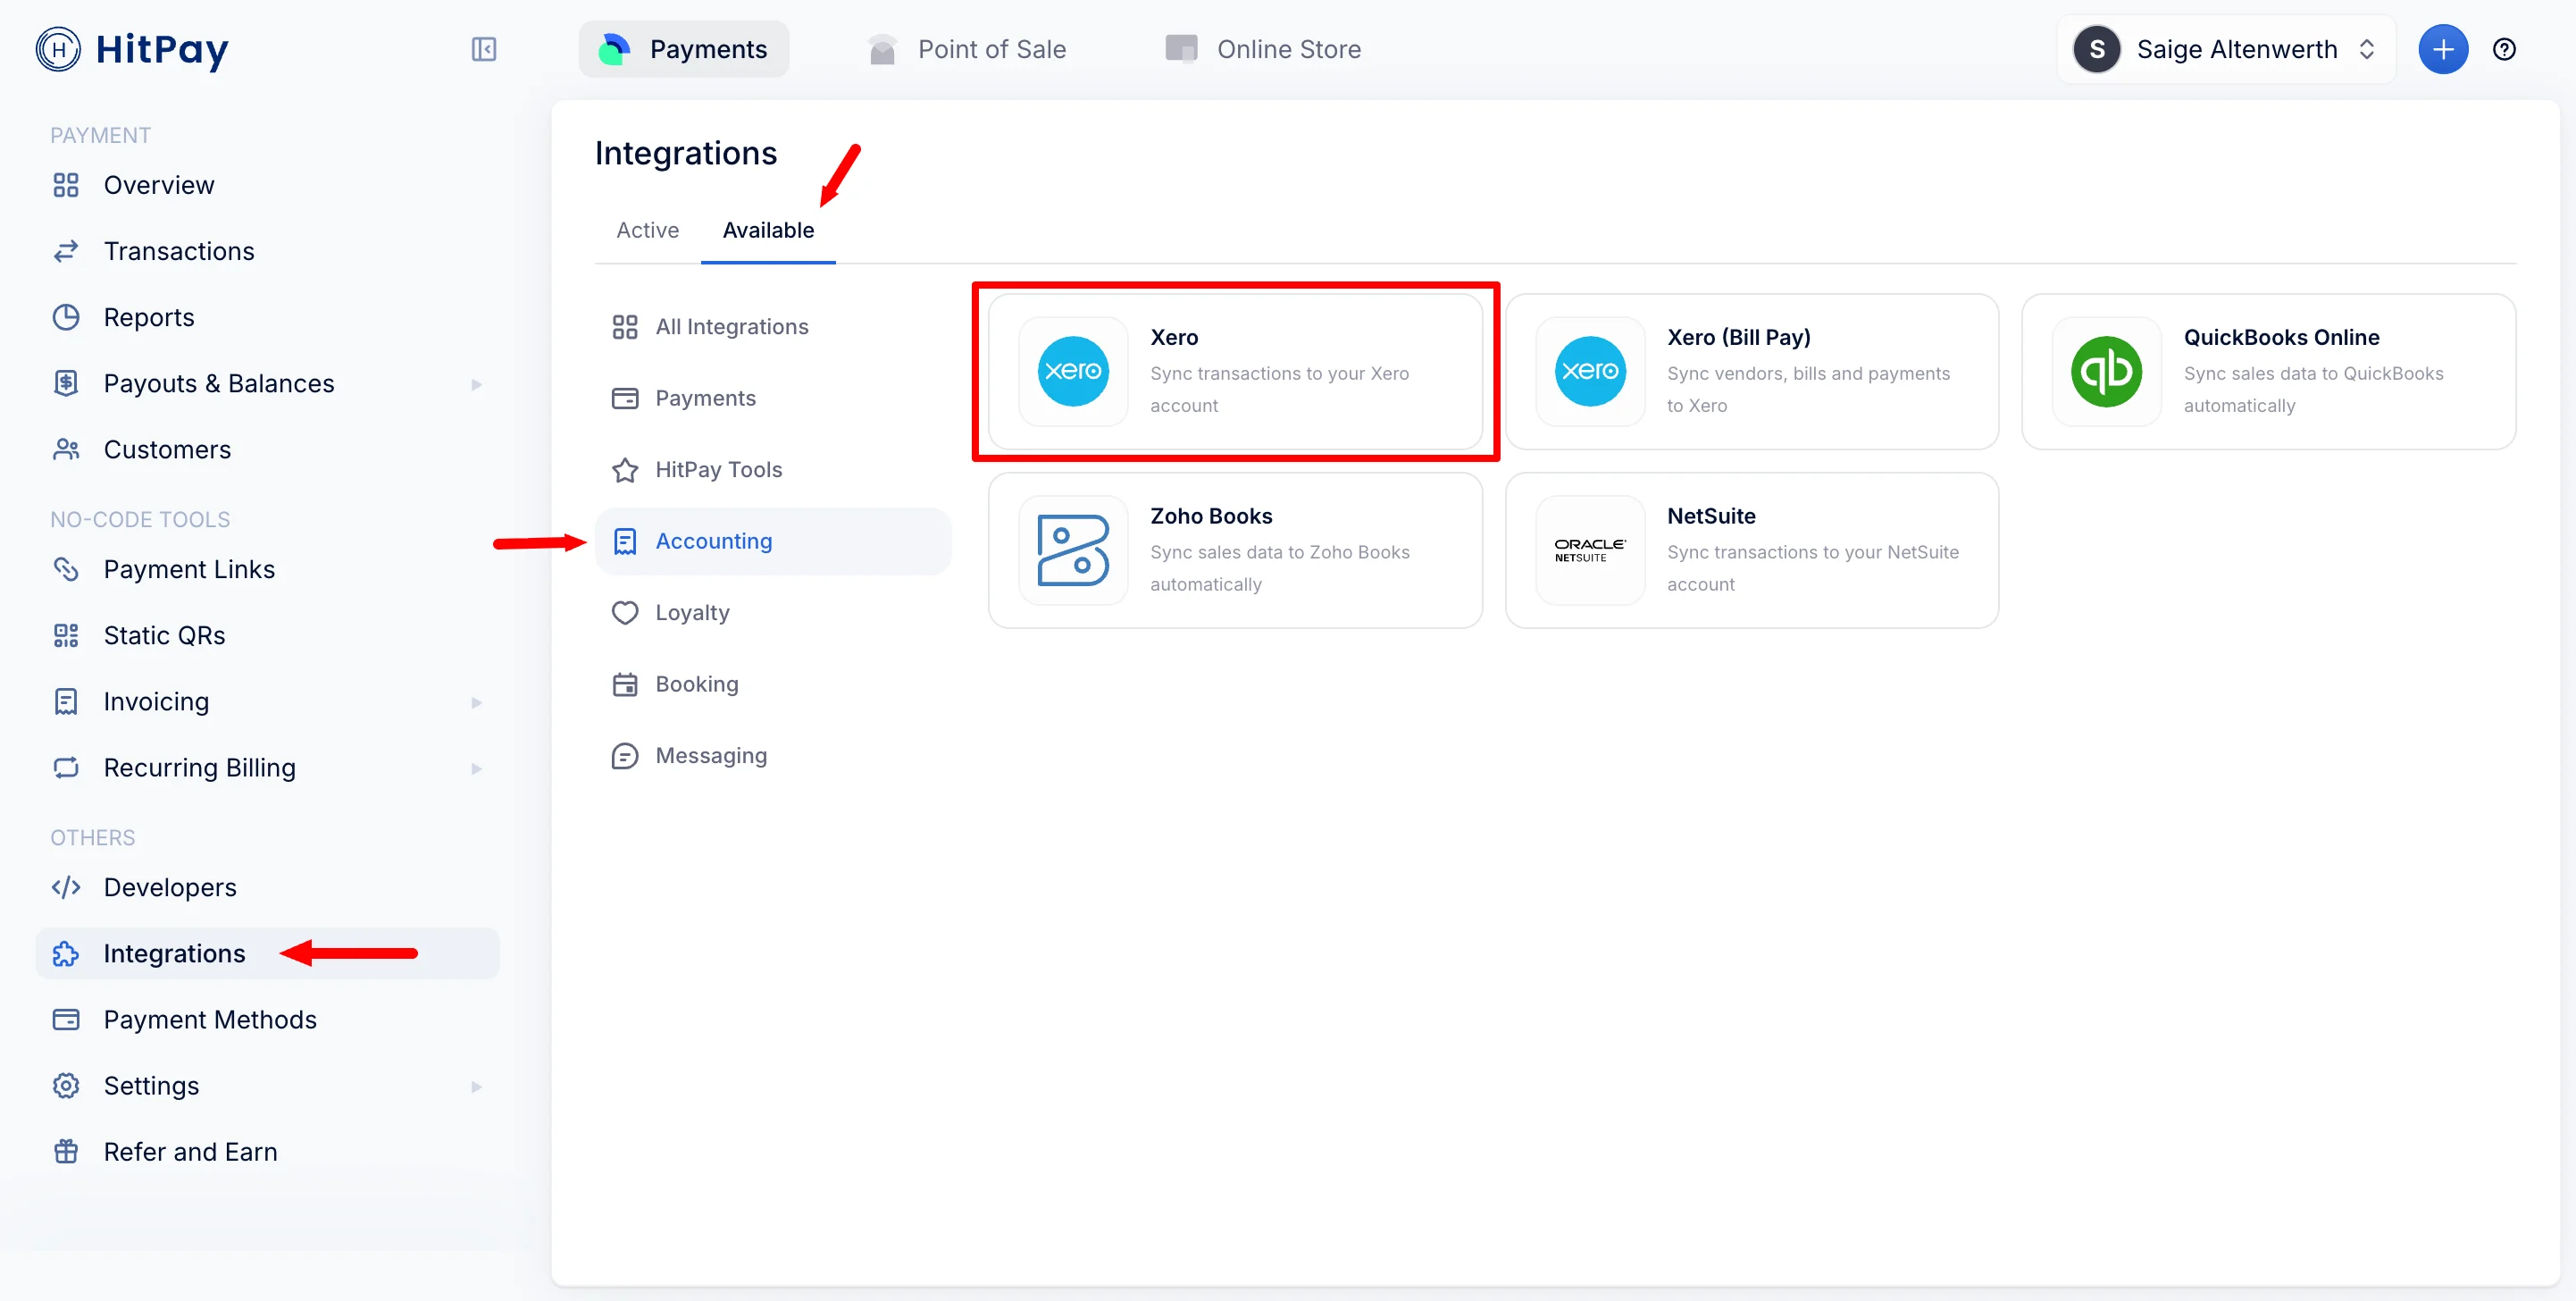
- In your HitPay dashboard, go to Others > Integrations.
-
Under the Accounting section, find the Xero card and click Manage.
-
On the Xero Integration page, click Connect to Xero. A Xero login page opens — sign in and select the organisation you want to connect.
-
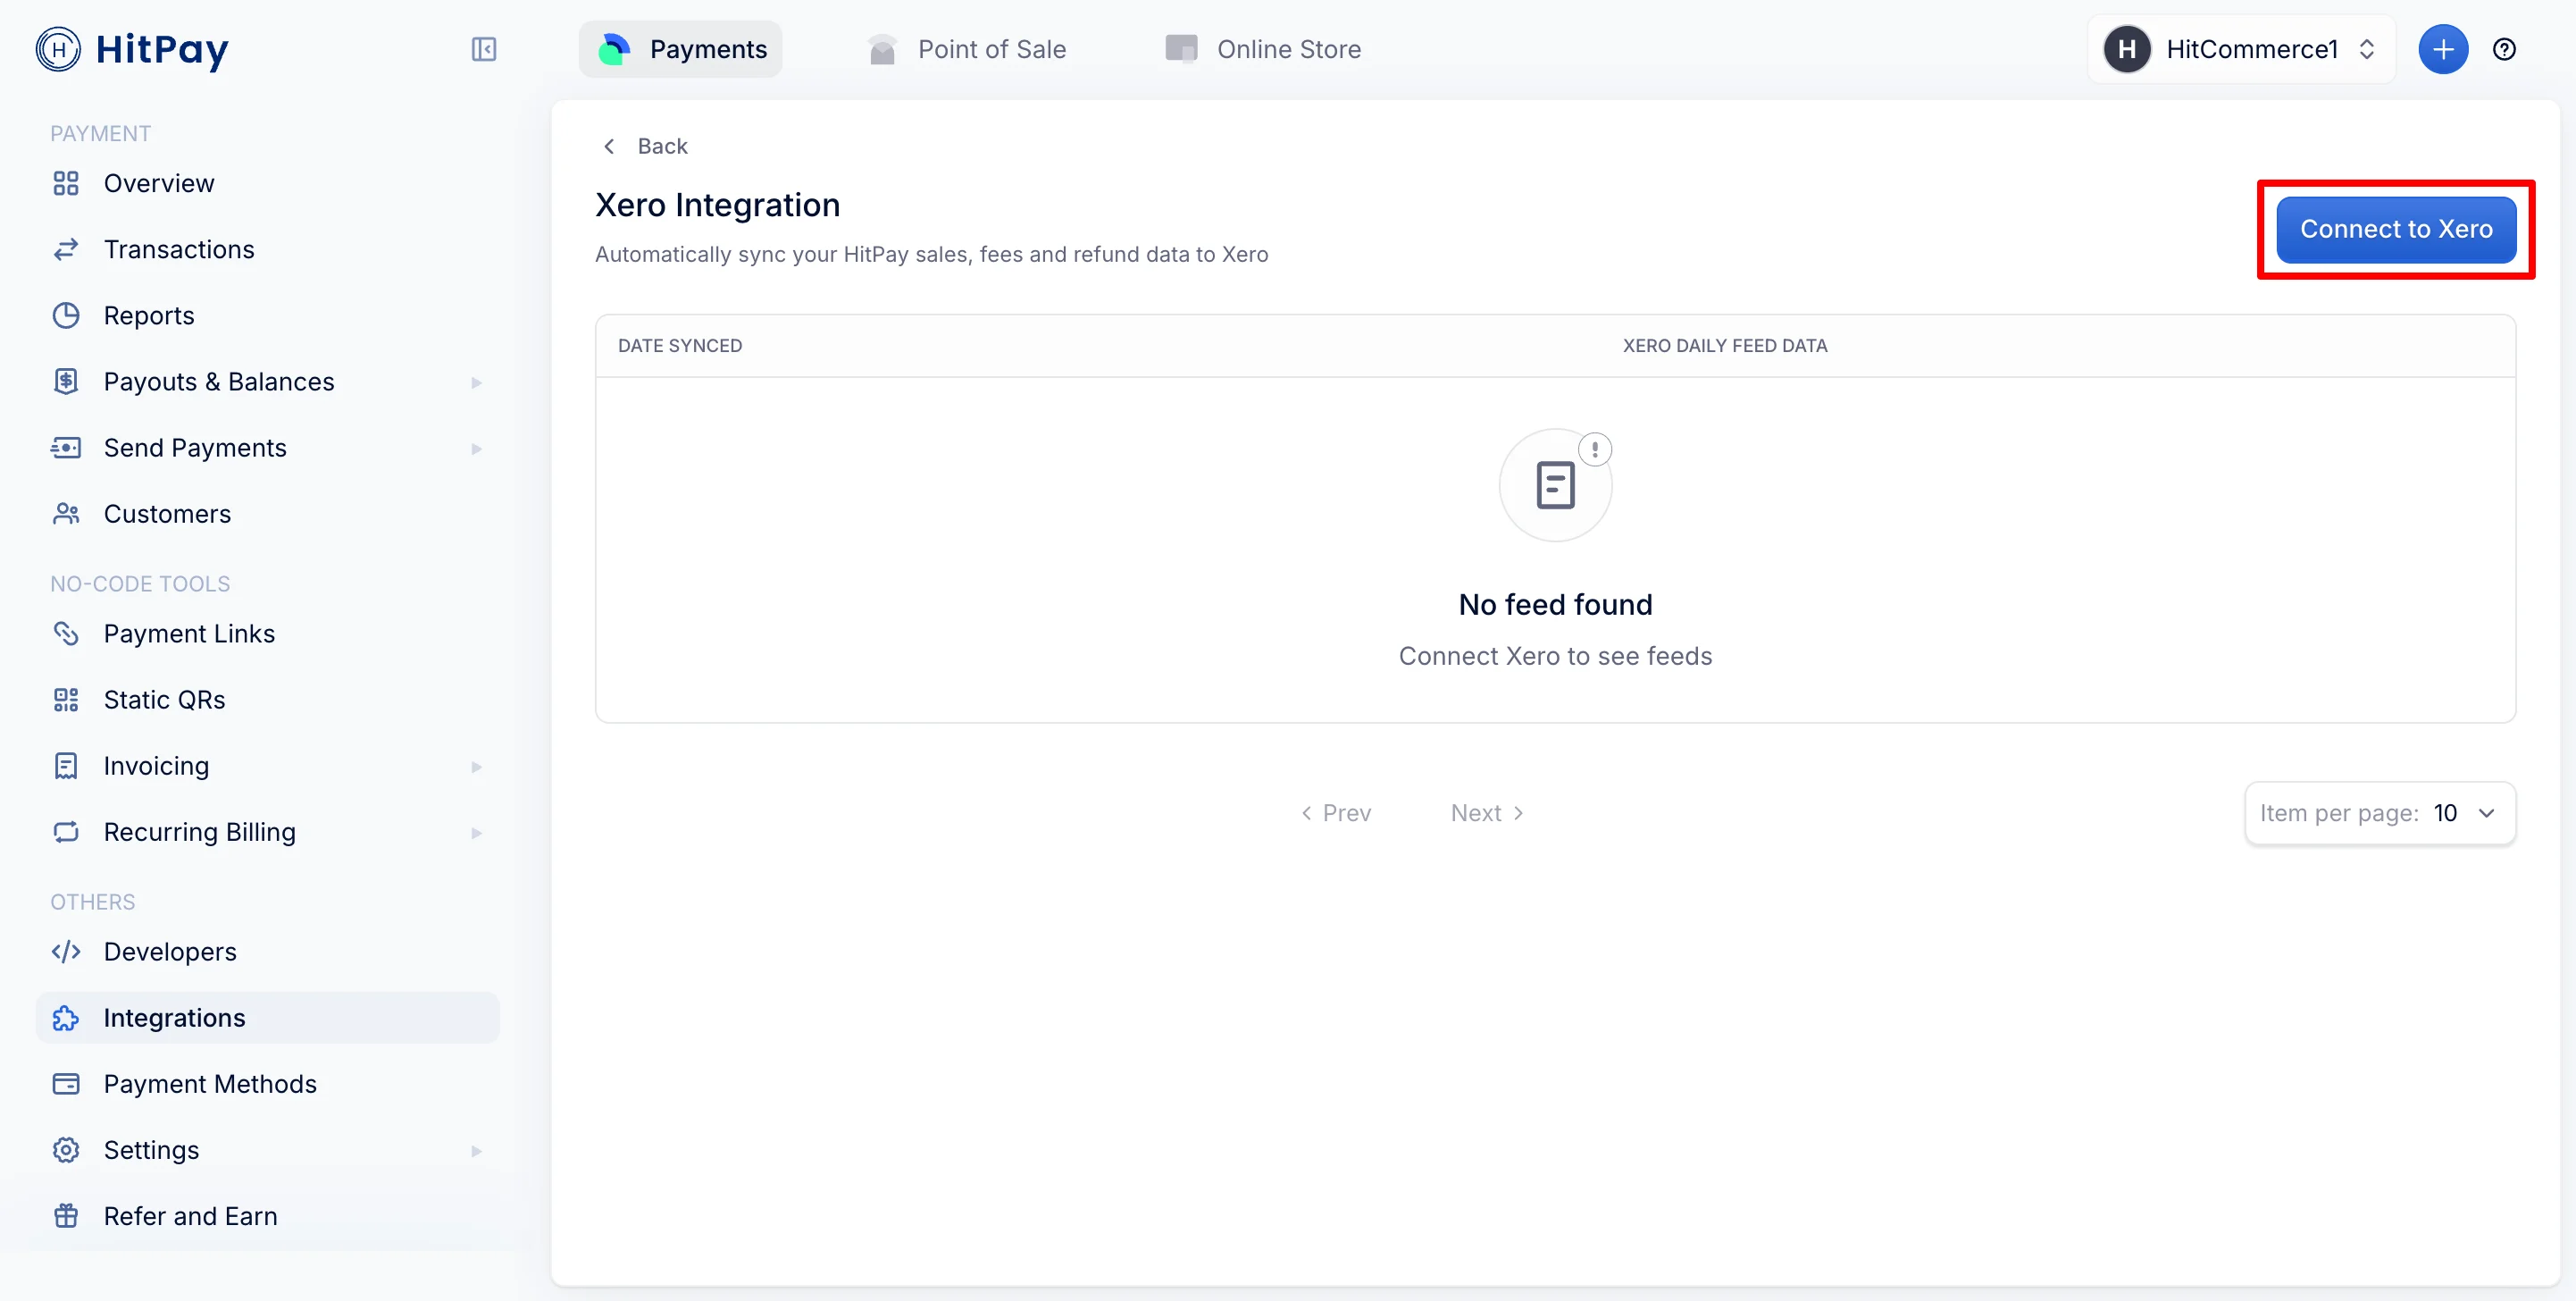
After you authorise, you are returned to the Xero Integration page in HitPay with a “Successfully authorized” confirmation. The page now shows Setting and Disconnect buttons — this means your connection is active.
Configuring Sync Settings
After connecting, click Setting on the Xero Integration page. You’ll see your Connected Email and Connected Xero Organization at the top, followed by the sync configuration: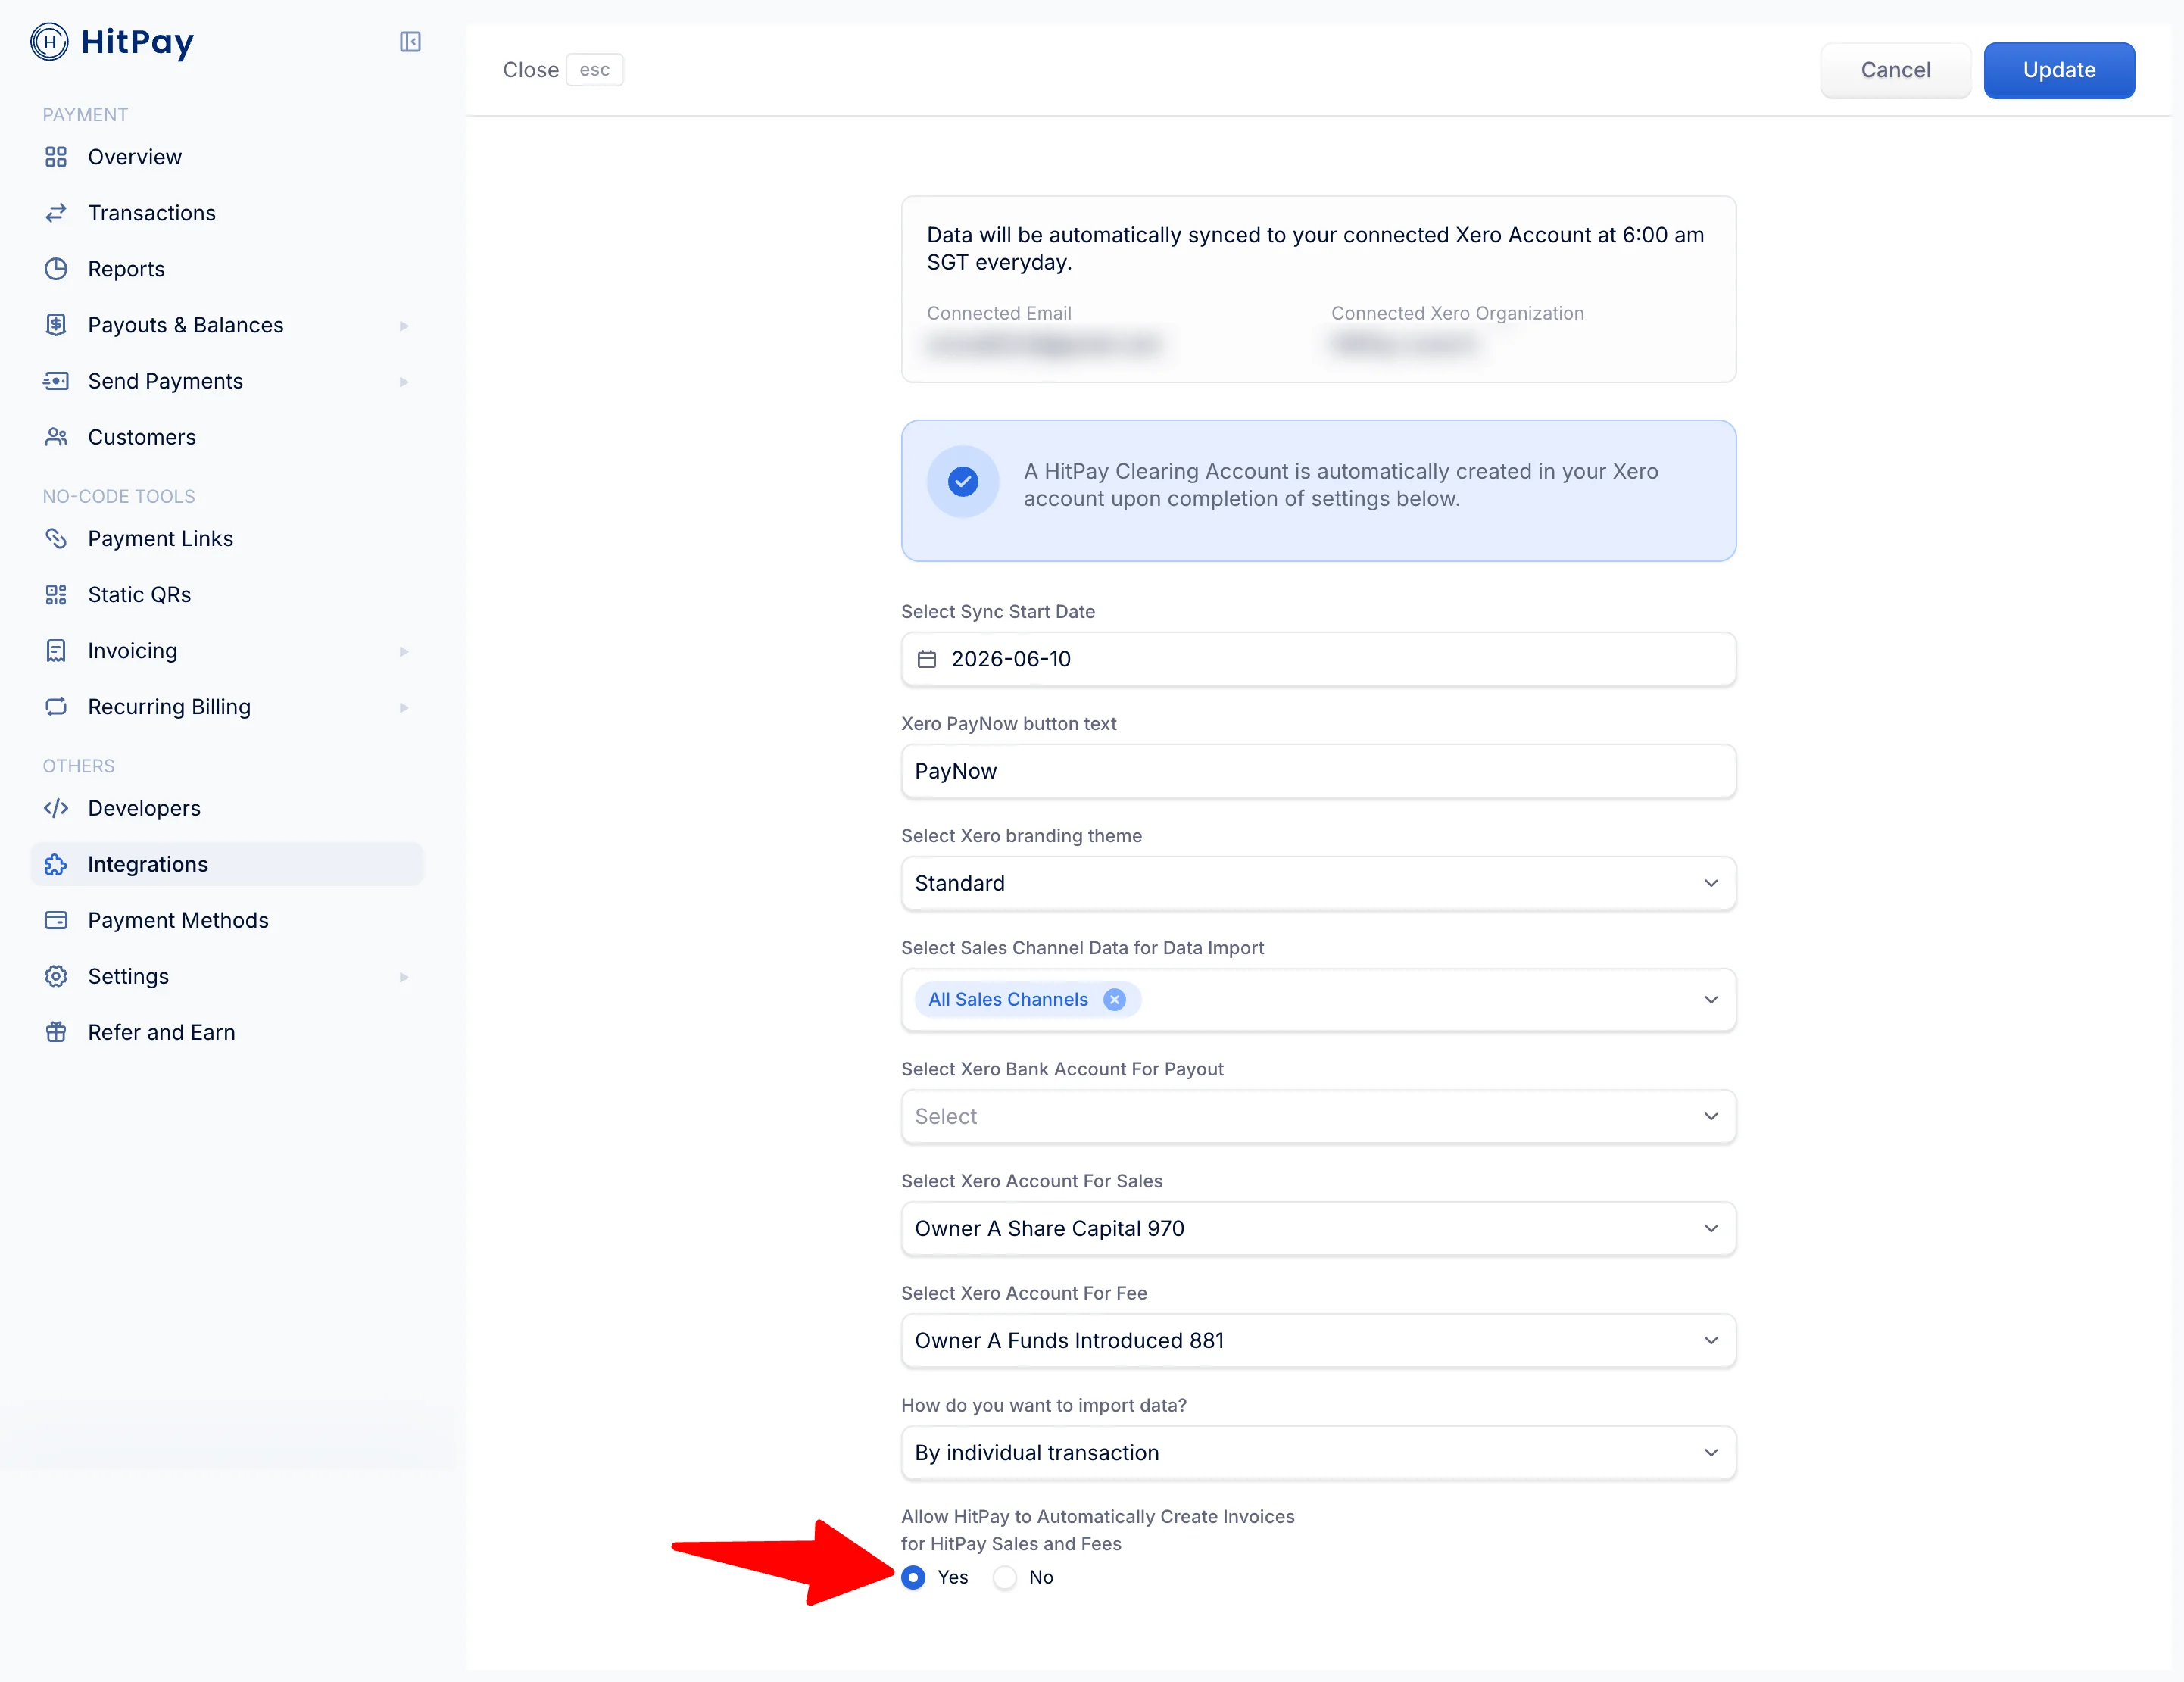
When you save your settings for the first time, HitPay automatically creates a HitPay Clearing Account in your Xero organisation. Sales payments are recorded into this clearing account, and a daily transfer moves the settled amount (sales minus fees) to your selected bank account so reconciliation matches your actual bank credits.
How Syncing Works
- The feed runs automatically once a day in the early morning (Singapore time) — sales first, refunds after, followed by the daily settlement transfer.
- Each transaction is only ever synced once. Re-running the feed never duplicates records in Xero.
- New transactions since the last successful feed are picked up in the next run — including days the feed may have missed.
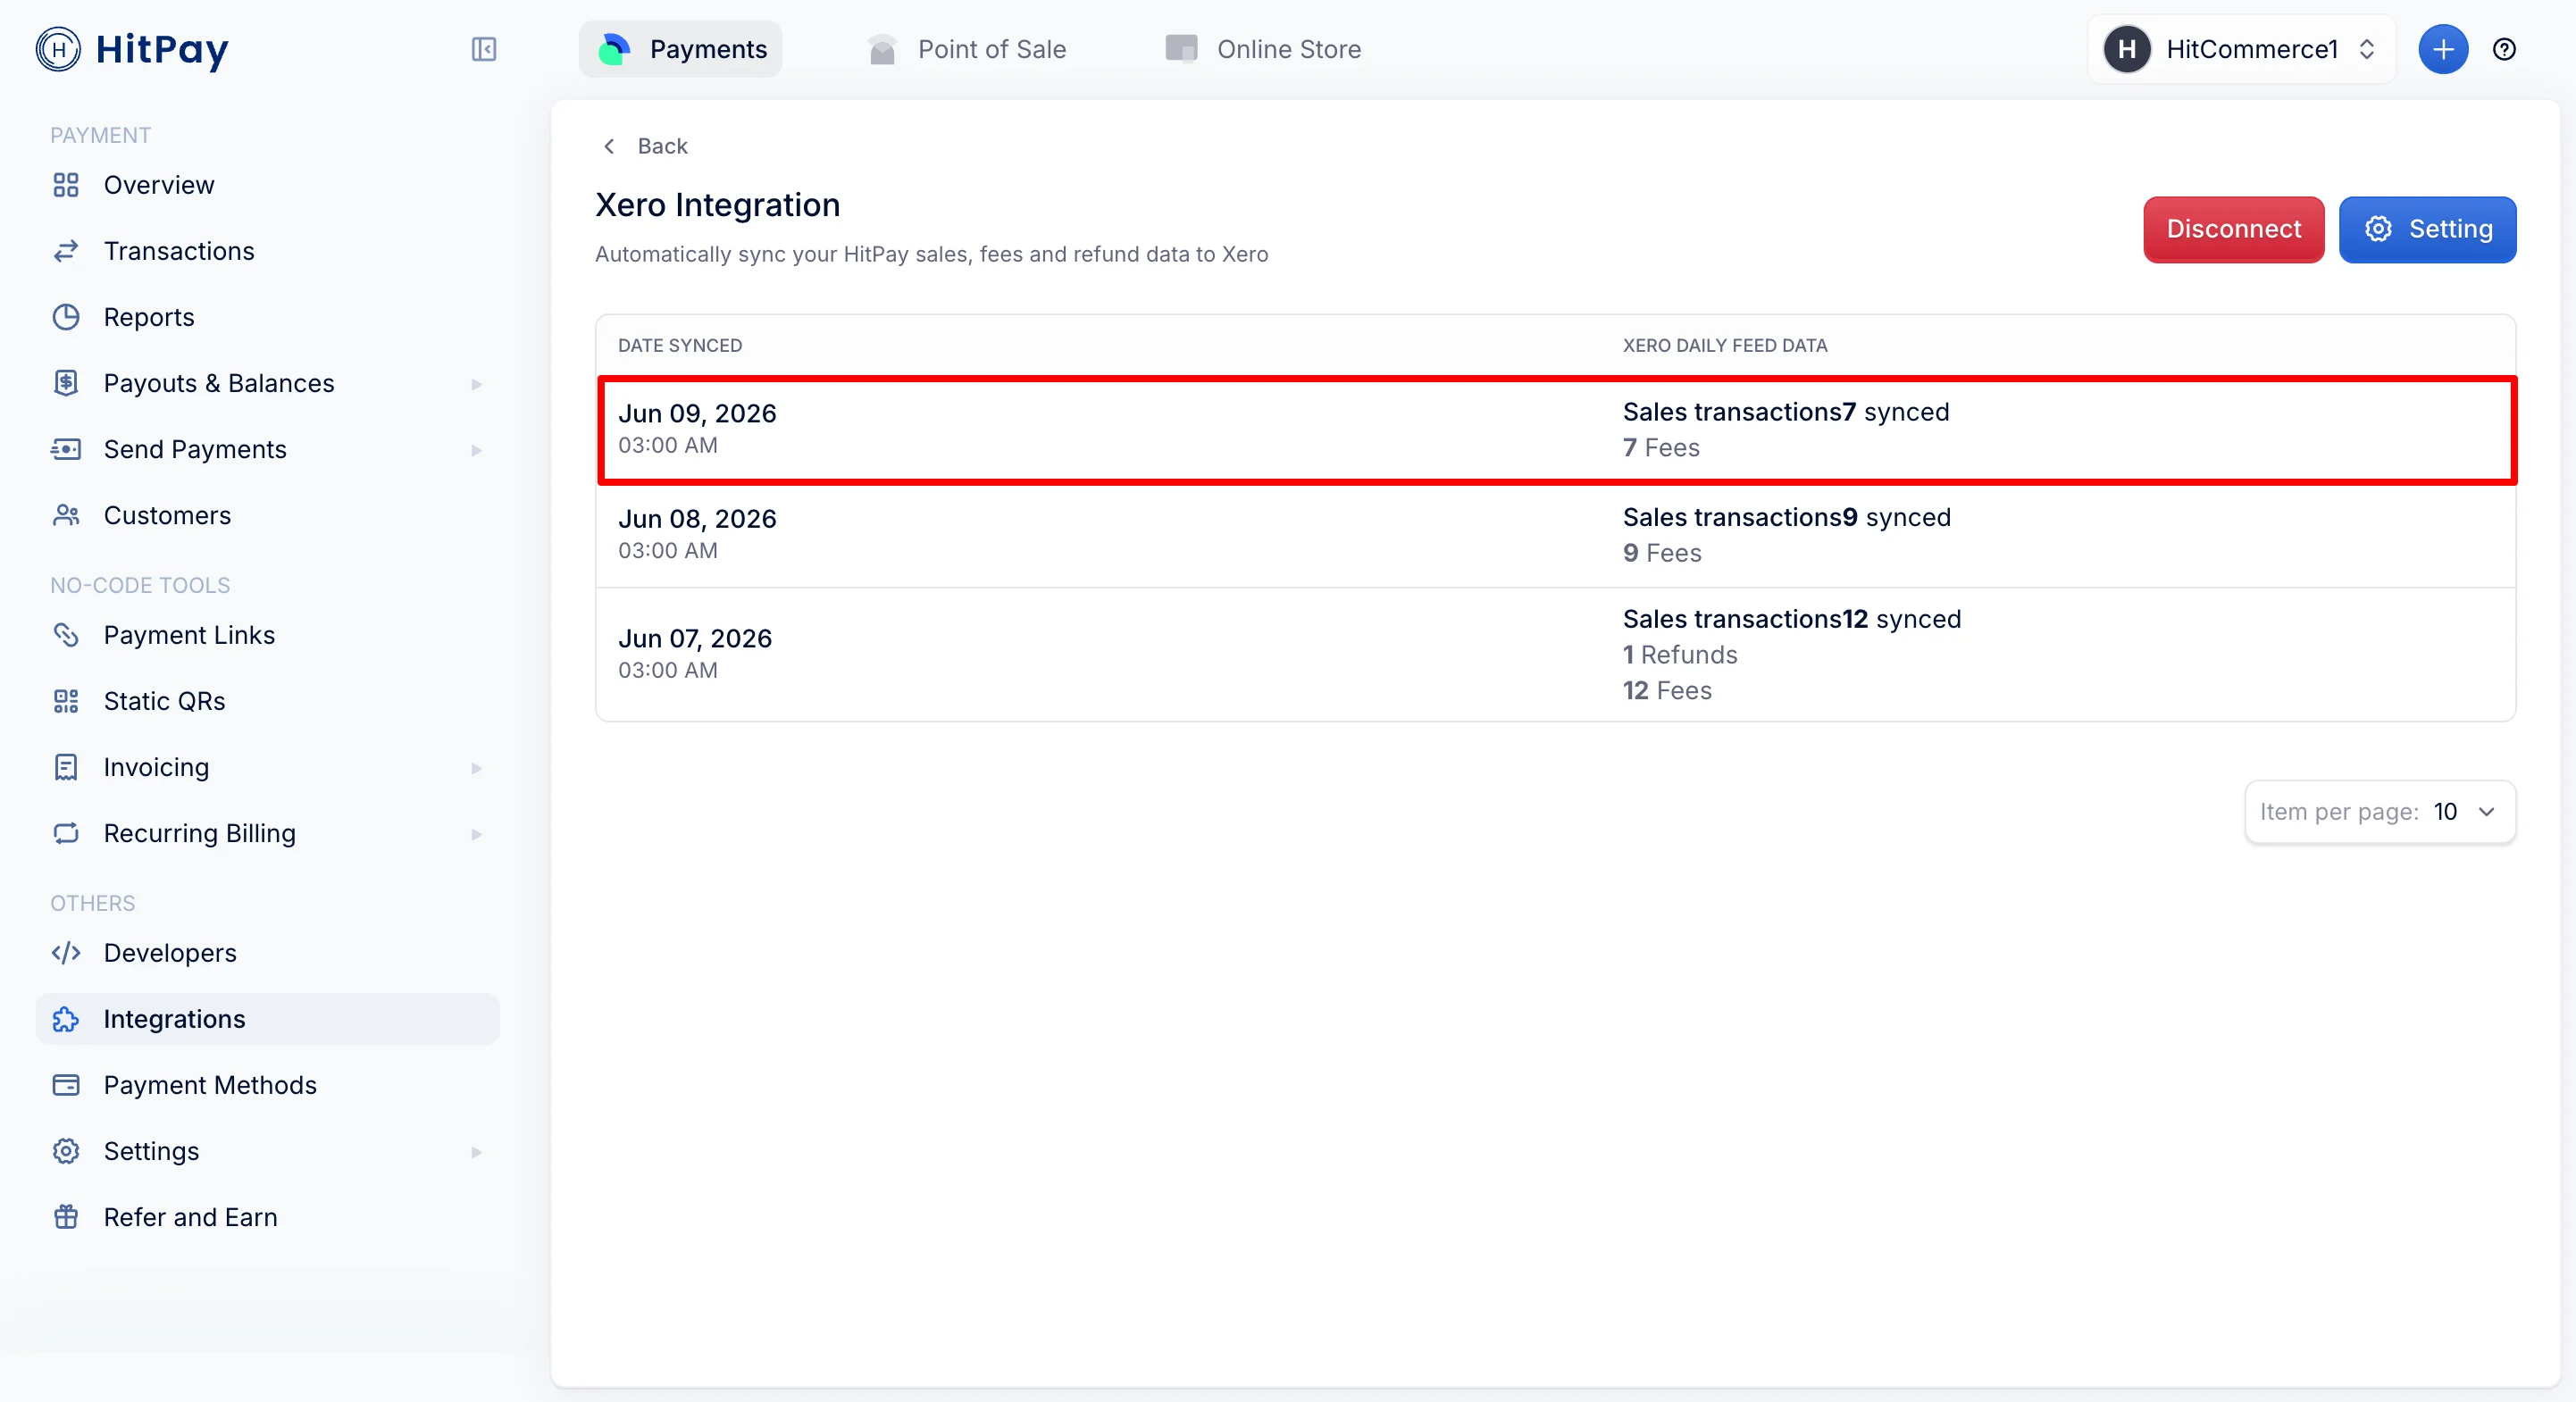
-
The Xero Integration page shows a daily feed history: the date synced and the number of sales, refunds, and fees pushed in each run.
Limitations
- Home currency only. Only transactions in your HitPay account’s home currency are fed to Xero. Foreign-currency transactions are skipped.
- Xero invoice payments are excluded. Payments your customers make on Xero invoices via Xero Invoices Payment are reconciled through the invoice itself, so the sales feed intentionally skips them to avoid double counting.
- One organisation per account. A Xero organisation cannot be connected to more than one HitPay account.
- Forward-looking. The feed starts from your Sync Start Date. Older transactions are not imported.
Disconnecting
On the Xero Integration page, click Disconnect and confirm. This stops the daily feed and removes the connection. Records already created in Xero are not deleted.Troubleshooting
The feed history shows 'No feed found' / no data is appearing in Xero
The feed history shows 'No feed found' / no data is appearing in Xero
Check these in order:
- Allow HitPay to Automatically Create Invoices is set to Yes in Setting — if it’s No, the feed never runs.
- Your Sync Start Date is set and is not in the future.
- Select Sales Channel Data for Data Import includes the channels you actually sell on — channels that aren’t ticked are skipped silently. Choose All Sales Channels if unsure.
- The transaction is in your home currency — foreign-currency transactions are not fed.
- The feed runs once a day — payments taken today appear after the next morning’s run, not immediately.
Some payments appear in Xero but others never do
Some payments appear in Xero but others never do
This is usually the sales channel filter: only ticked channels are included. Open Setting and select All Sales Channels. Foreign-currency transactions and payments made on Xero invoices (via Xero Invoices Payment) are also excluded by design.
I see duplicate entries in Xero
I see duplicate entries in Xero
HitPay never sends the same transaction twice. Duplicates usually mean the same transactions were also entered manually in Xero (or imported via another tool). If you’ve been recording HitPay sales manually, stop manual entry from the day the feed is enabled, and remove manual entries that overlap with fed data.
An account is missing from the Sales/Fee dropdowns
An account is missing from the Sales/Fee dropdowns
Only Xero accounts with “Enable payments to this account” ticked appear in the dropdowns. In Xero, go to Accounting > Chart of Accounts, open the account, tick the option and save — then reopen Setting in HitPay.
Connecting fails with 'already connected to another HitPay account'
Connecting fails with 'already connected to another HitPay account'
That Xero organisation is linked to a different HitPay account. Disconnect it from the other account first, or connect a different organisation.
I connected the wrong Xero organisation
I connected the wrong Xero organisation
Click Disconnect, then reconnect and grant access to only the correct organisation during the Xero authorisation step.