About HitPay on Zapier
HitPay is now available as a public integration on Zapier, allowing you to connect with thousands of popular apps to automate your payment workflows. HitPay is categorized as a Payment Processing app on Zapier.Step 1: Sign up and Log in to HitPay
If you haven’t already, sign up for a HitPay account at our website (www.hitpayapp.com). Once you’ve created an account, log in to your HitPay dashboard using your credentials.Step 2: Obtain API Keys
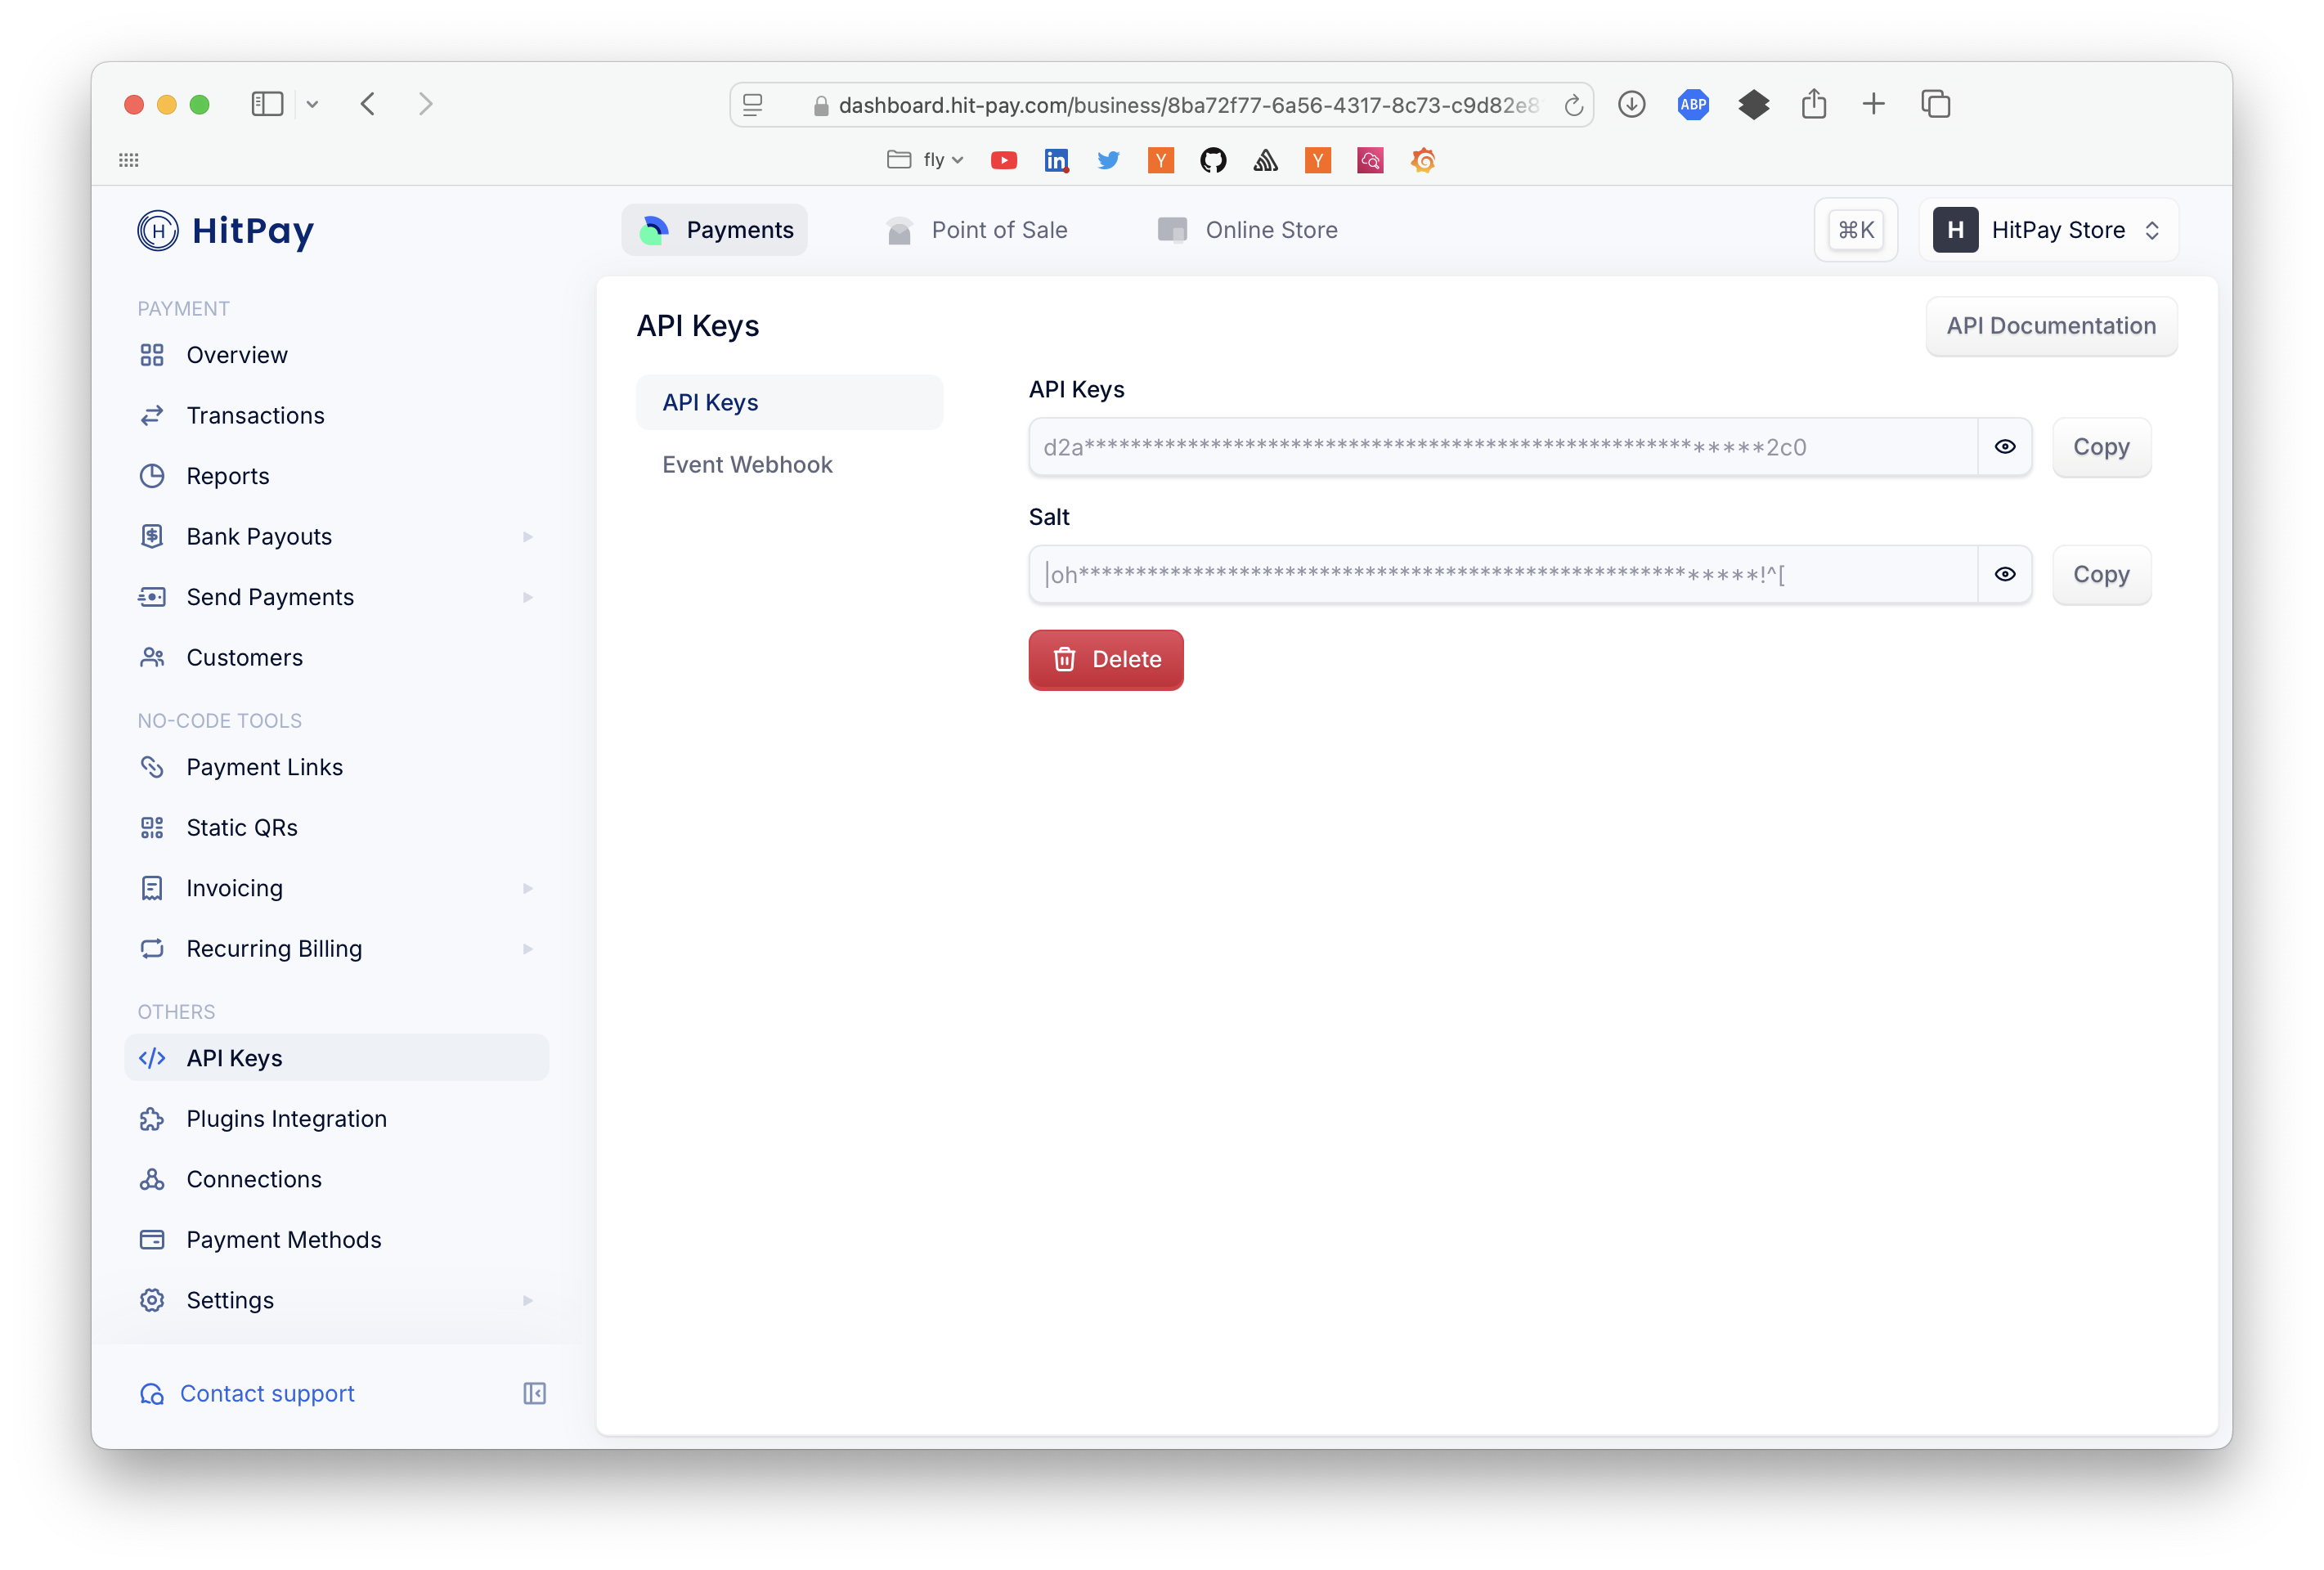
Before setting up the Zapier integration, you’ll need to obtain your API keys from the HitPay dashboard. These API keys will serve as the authentication method for connecting HitPay with Zapier.- In your HitPay dashboard, navigate to “Payment Gateway” and select “API Keys.”
- You will find your API Key which is used for identifying and authenticating your account. Keep these keys secure and do not share them publicly.
Step 3: Sign up and Log in to Zapier
To begin using the Zapier integration, sign up for a Zapier account at the Zapier website (www.zapier.com). If you already have an account, log in to your Zapier account using your credentials.Step 4: Connect HitPay to Zapier
HitPay is now available as a public integration on Zapier. You can connect HitPay directly through the Zapier platform:- Go to HitPay on Zapier
- Click “Start free with email” or “Continue with Google” to create a Zapier account
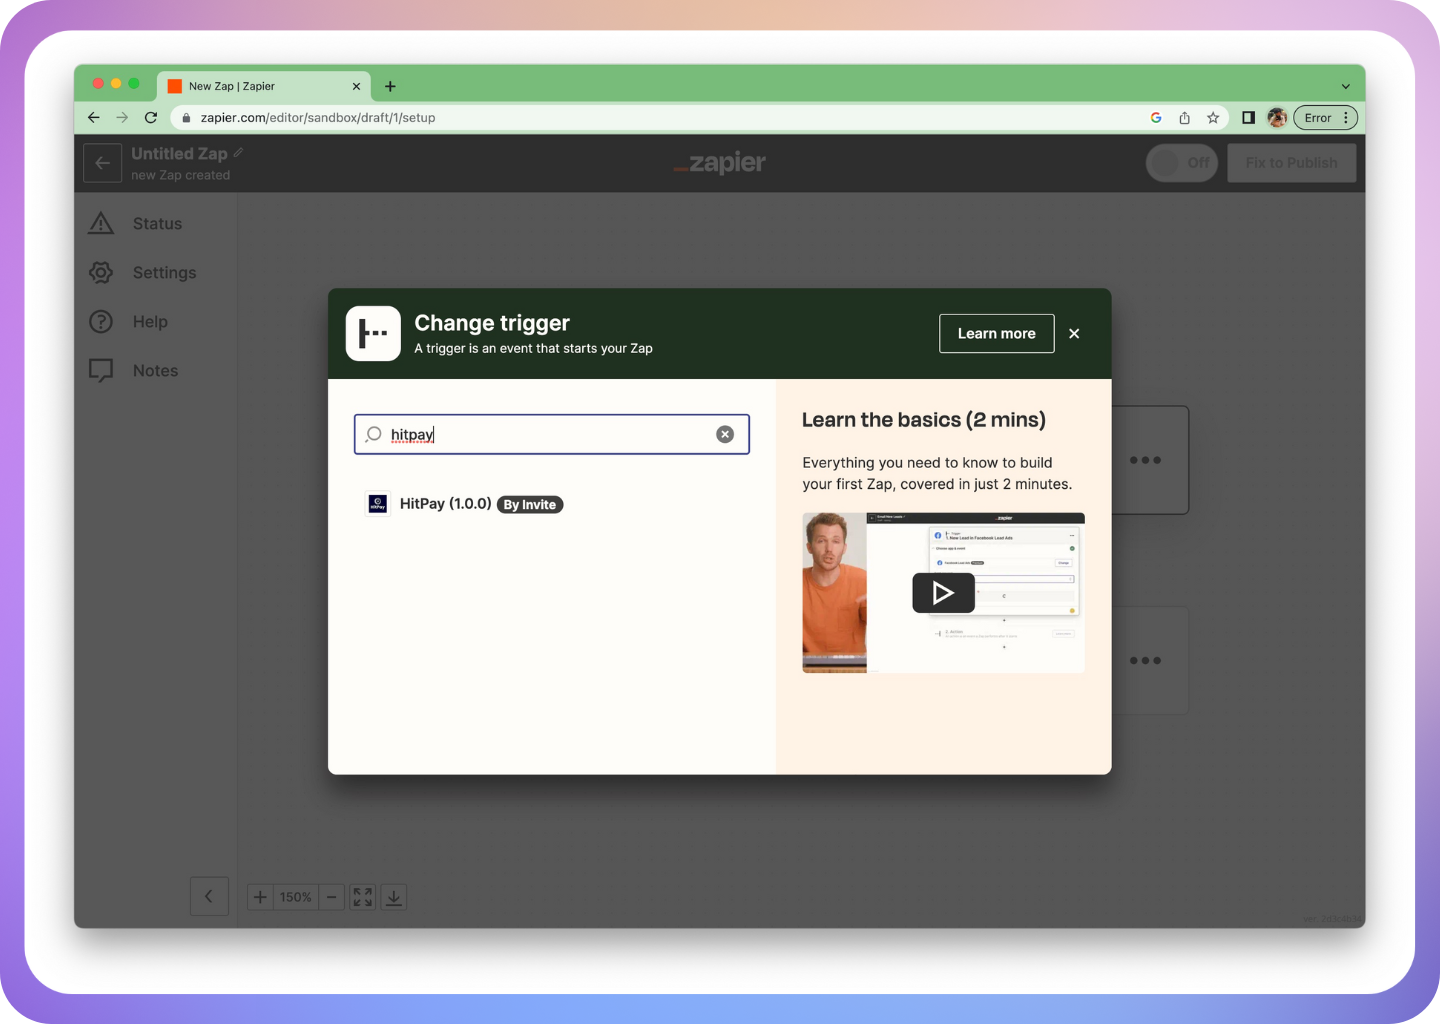
- Search for “HitPay” in the app directory
- Click on HitPay to begin the connection process
Step 5: Available Triggers and Actions
Triggers (Events that start your workflow)
HitPay offers the following triggers on Zapier:- Charge Created - Triggers when a payment is successfully completed
- Charge Updated - Triggers when a payment is refunded/partially refunded
- Invoice Created - Triggers when a new invoice is created
- Invoice Updated - Triggers when an invoice is marked as paid or partially paid
- Order Created - Triggers when an order is created successfully
- Order Updated - Triggers when an order status is updated
Actions (Tasks your Zap can perform)
HitPay offers the following actions on Zapier:-
Create Payment Request - Creates a payment request with customizable parameters including:
- Amount (Required)
- Currency (Required)
- Payment Methods (Required)
- Customer’s Email, Name, Phone Number
- Wifi Terminal ID, Staff ID
- Purpose, Reference Number
- Redirect URL, Webhook
- Allow Repeated Payments
- Expiry Date, Expires After
- Add Admin Fee
- Send Email, Send SMS
- Generate QR
- Get Payment Request Details - Gets the status of the specified payment request
- Update Payment Request - Updates an existing payment request
- Delete Payment Request - Deletes a payment request
- Refund Payment - Refunds a payment in the system
Step 6: Popular Integration Templates
Zapier provides pre-built templates for common HitPay workflows:- Create new Mailchimp subscribers when charges are posted in HitPay
- Add or update HubSpot contacts for new HitPay charges
Step 7: Popular App Integrations
HitPay integrates with thousands of apps on Zapier, including popular ones like:- Google Sheets
- Mailchimp
- Gmail
- Xero
- Airtable
- ActiveCampaign
- HubSpot
- Code by Zapier
Step 8: Create Your First Zap
- In Zapier, click on “Make a Zap” to start creating a new zap
- Choose “HitPay” as the trigger app
- Select the specific trigger event you want to use from the available options
- Follow the prompts to connect your HitPay account using your API Key
- Choose an action app and configure the desired action
- Test your zap with sample data
- Activate your zap
Step 9: Example Workflows
Here are some practical examples of how you can automate tasks with HitPay and Zapier:1. Send Thank You Emails
- Trigger: “Charge Created” in HitPay
- Action: “Send Email” in Gmail or Mailchimp
- Automatically send personalized thank you emails to customers for each new payment
2. Track Payments in Spreadsheets
- Trigger: “Charge Created” in HitPay
- Action: “Add Row to Google Sheets” in Zapier
- Keep track of all incoming payments by automatically adding payment details to a spreadsheet
3. Update CRM Systems
- Trigger: “Charge Created” in HitPay
- Action: “Create Contact” in HubSpot or Salesforce
- Automatically create or update customer records in your CRM system
4. Team Notifications
- Trigger: “Charge Created” in HitPay
- Action: “Send Message” in Slack or Microsoft Teams
- Get real-time notifications when new payments are received
5. Accounting Integration
- Trigger: “Charge Created” in HitPay
- Action: “Create Invoice” in Xero or QuickBooks
- Automatically sync payment data with your accounting software
Step 10: Best Practices
- Test your zaps before activating them with real data
- Monitor your zaps regularly to ensure they’re working correctly
- Use filters to only trigger zaps for specific conditions
- Set up error notifications to be alerted when zaps fail
- Review and update your zaps periodically as your business needs change
Support and Resources
- Zapier Help Center: help.zapier.com
- HitPay Support: Contact our support team for HitPay-specific questions
- Zapier Community: Connect with other users in the Zapier Community
Pricing
Zapier offers:- Free plan: Core features available forever
- Premium plans: Advanced features and unlimited zaps
- 14-day trial: Try premium features before committing
Congratulations! You’ve successfully set up the HitPay Zapier Integration. Your HitPay account is now connected with thousands of applications, enabling seamless automation of your payment workflows. Remember to explore different triggers and actions to find the perfect automation for your business needs.