> ## Documentation Index
> Fetch the complete documentation index at: https://docs.hitpayapp.com/llms.txt
> Use this file to discover all available pages before exploring further.
# WordPress
> HitPay Payment Gateway Plugin allows HitPay merchants to accept PayNow QR, Cards, Apple Pay, Google Pay, WeChatPay, AliPay and GrabPay Payments.,This plugin would communicate with 3rd party HitPay payment gateway(https://www.hitpayapp.com/) in order to process the payments.,Merchant must create an account with HitPay payment gateway(https://www.hitpayapp.com/).,Pay only per transaction. No monthly, setup, admin or any hidden service fees.
## Account Setup
Before you begin integrating HitPay Payment Gateway Plugin into your your Wordpress site, you need to set up your HitPay account and ensure some prerequisites are met:
1. Merchant once created an account with [HitPay payment gateway](https://www.hitpayapp.com/), they can go to their HitPay dashboard and choose the payment options they would to avail for their site.
2. And merchant need to copy the API keys and Salt values from the HitPay Web Dashboard under Settings > Payment Gateway > API Keys
3. HitPay Payment Gateway for WordPress Info:
* HitPay Tags: HitPay, payment gateway, woocommerce
* QR code Requires at least: `4.0` Tested up to: `6.8` Stable tag: `4.1.9`
* Requires PHP: `5.5` WC requires at least: `2.4` WC tested up to: `9.8.1` License: MIT
## Integration Guide
## Uploading in WordPress Dashboard
1.Navigate to the 'Add New' in the plugins dashboard
2\. Navigate to the 'Upload' area
3\. Select hitpay-payment-gateway-for-wordpress.zip from your computer
4\. Click 'Install Now'
5\. Activate the plugin in the Plugin dashboard
## Using FTP
1. Download `hitpay-payment-gateway-for-wordpress.zip`
2. Extract the `hitpay-payment-gateway-for-wordpress` directory to your computer 3. Upload the `hitpay-payment-gateway-for-wordpress` directory to the `/wp-content/plugins/` directory 4. Activate the plugin in the Plugin dashboard
**Updating:** Automatic updates should work like a charm; as always though, ensure you backup your site just in case.
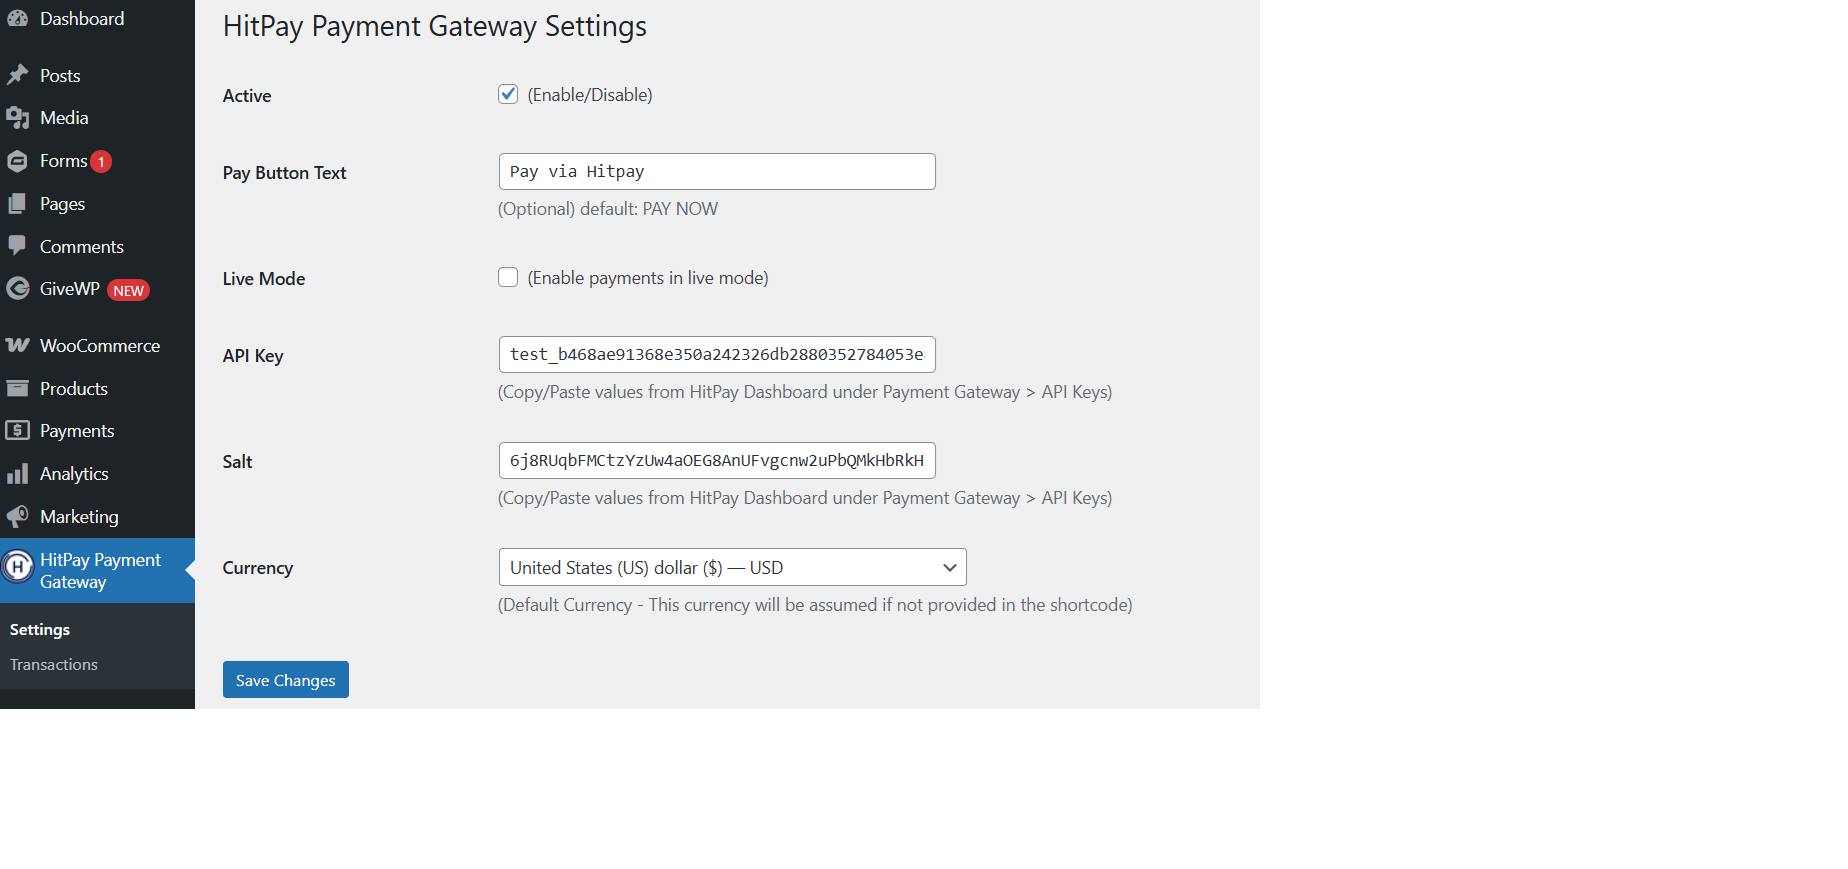
1. Go to HitPay Payment Gateway => Settings
2. Active: Enable/Disable this payment option
3. Pay Button Text: If button text is not provided in the short code, this default button text will be used.(for example: "HitPay or Credit card or PayNow")
4. Live: Enable payments in live mode
5. Copy the API keys and Salt values from the HitPay Web Dashboard under `Settings > Payment Gateway > API Keys`
6. Currency: If currency is not provided in the short code, this default currency will be used.
7. Click "Save Changes"
 Insert the shortcode anywhere on your page or post that you want the form to be displayed to the user.
1. **Basic**: For the below code, requires the user to enter amount and email to complete payment, default button text and currency will be used.
\[hitpay-paynow-button]
2. **With button text**: For the below code, requires the user to enter amount and email to complete payment, provided button text and default currency will be used.
\[hitpay-paynow-button]HitPay Cards\[/hitpay-paynow-button]
3. **With attributes**: email or `use_current_user_email` with value `"yes"`, amount.
\[hitpay-paynow-button amount=100 email="[customer@email.com](mailto:customer@email.com)" ]
or
\[hitpay-paynow-button amount=100 use\_current\_user\_email="yes" ]
4. **With attributes email, amount and currency with button text**:
\[hitpay-paynow-button amount=100 email="[customer@email.com](mailto:customer@email.com)" currency=EUR ]HitPay Cards\[/hitpay-paynow-button]
Insert the shortcode anywhere on your page or post that you want the form to be displayed to the user.
1. **Basic**: For the below code, requires the user to enter amount and email to complete payment, default button text and currency will be used.
\[hitpay-paynow-button]
2. **With button text**: For the below code, requires the user to enter amount and email to complete payment, provided button text and default currency will be used.
\[hitpay-paynow-button]HitPay Cards\[/hitpay-paynow-button]
3. **With attributes**: email or `use_current_user_email` with value `"yes"`, amount.
\[hitpay-paynow-button amount=100 email="[customer@email.com](mailto:customer@email.com)" ]
or
\[hitpay-paynow-button amount=100 use\_current\_user\_email="yes" ]
4. **With attributes email, amount and currency with button text**:
\[hitpay-paynow-button amount=100 email="[customer@email.com](mailto:customer@email.com)" currency=EUR ]HitPay Cards\[/hitpay-paynow-button]
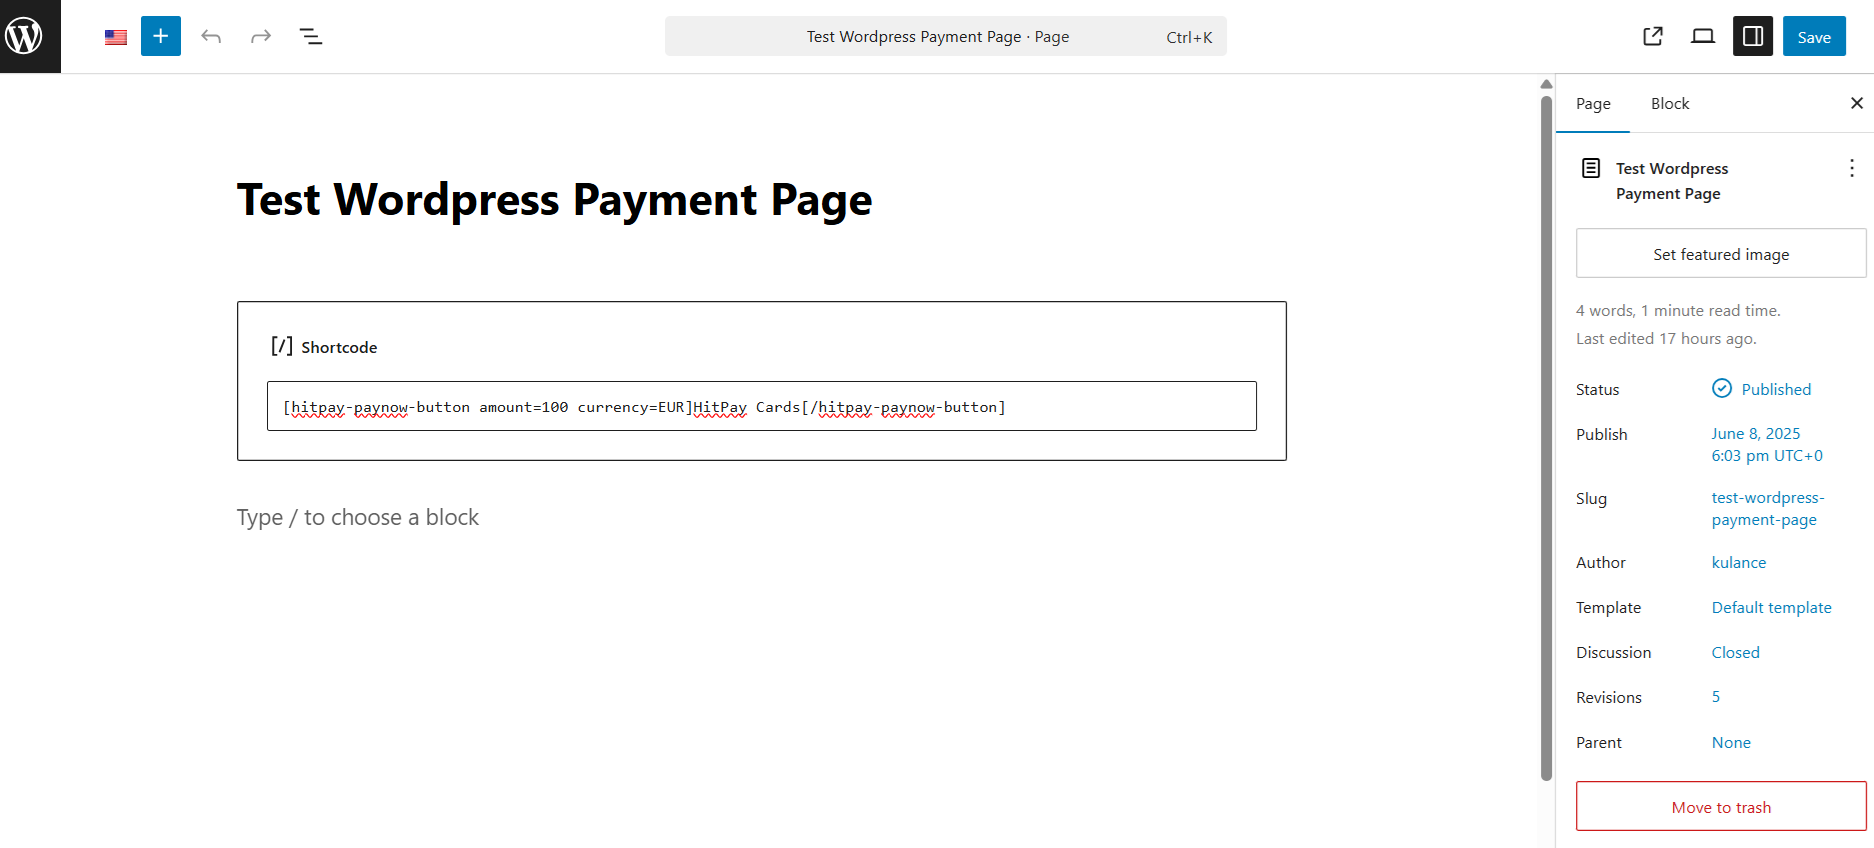 1. For HitPay Card
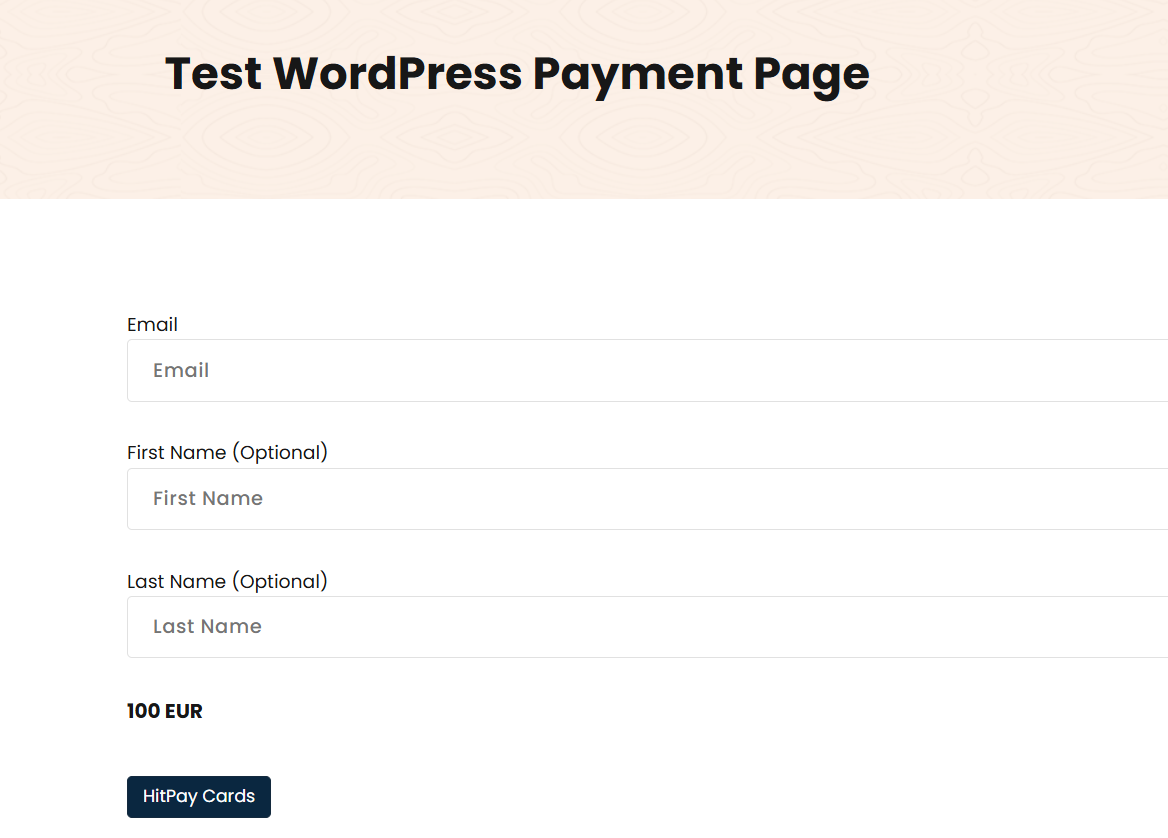 2. PayNow
 That's it! You're all set up with HitPay Payment Gateway Plugin. 🎉
### Manage Payment Transactions
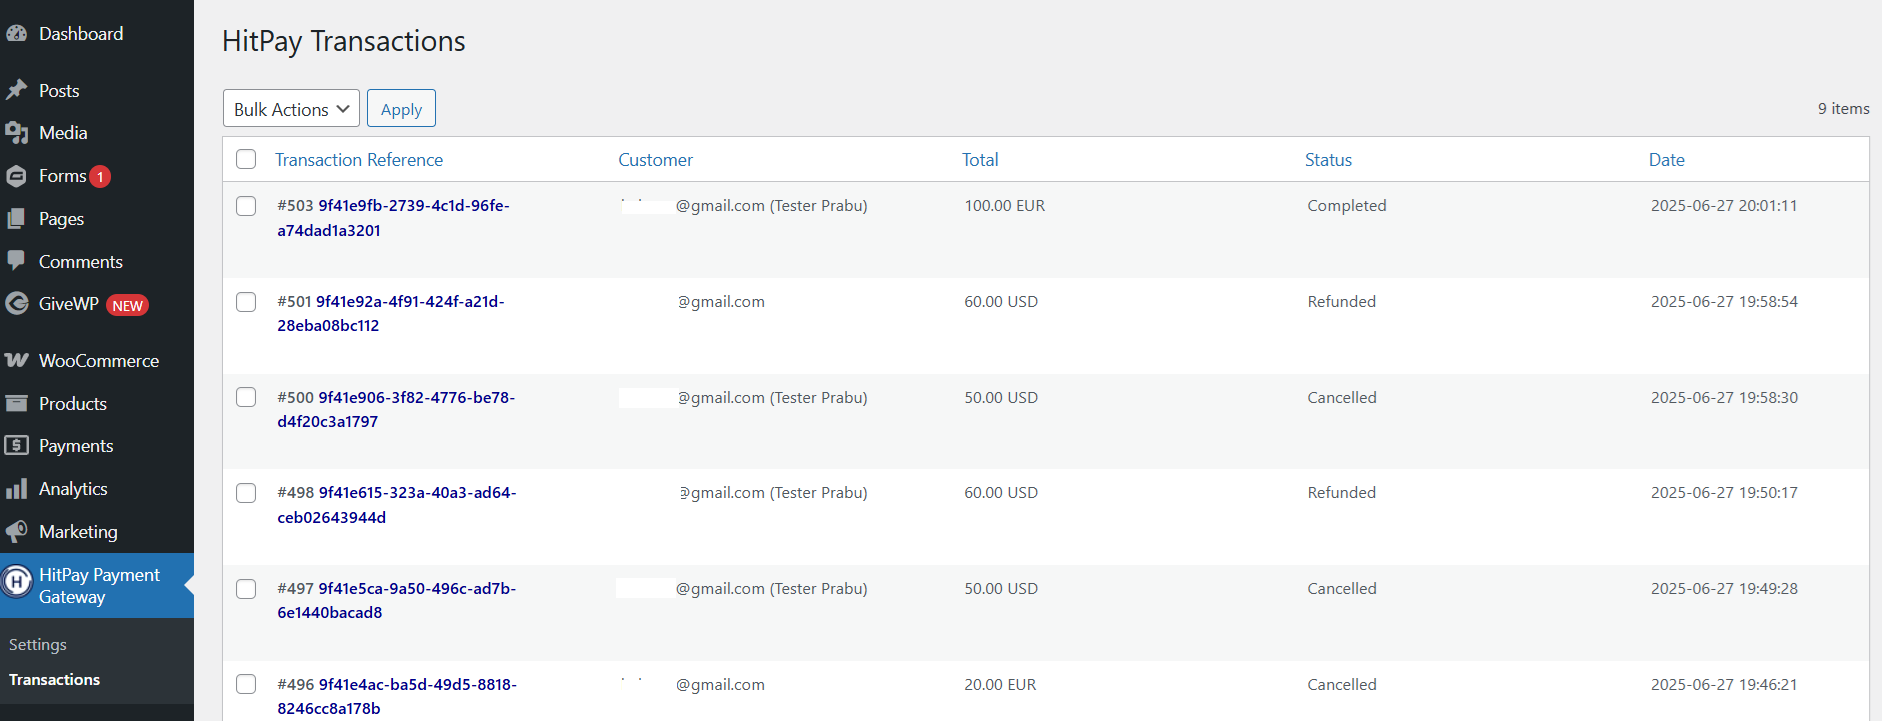
The user can manage the payment transactions from WordPress Admin.
1. Go to `HitPay Payment Gateway => Transactions`
2. Click view link to Transaction details
3. Admin can change the payment status
That's it! You're all set up with HitPay Payment Gateway Plugin. 🎉
### Manage Payment Transactions
The user can manage the payment transactions from WordPress Admin.
1. Go to `HitPay Payment Gateway => Transactions`
2. Click view link to Transaction details
3. Admin can change the payment status
 ### Refund
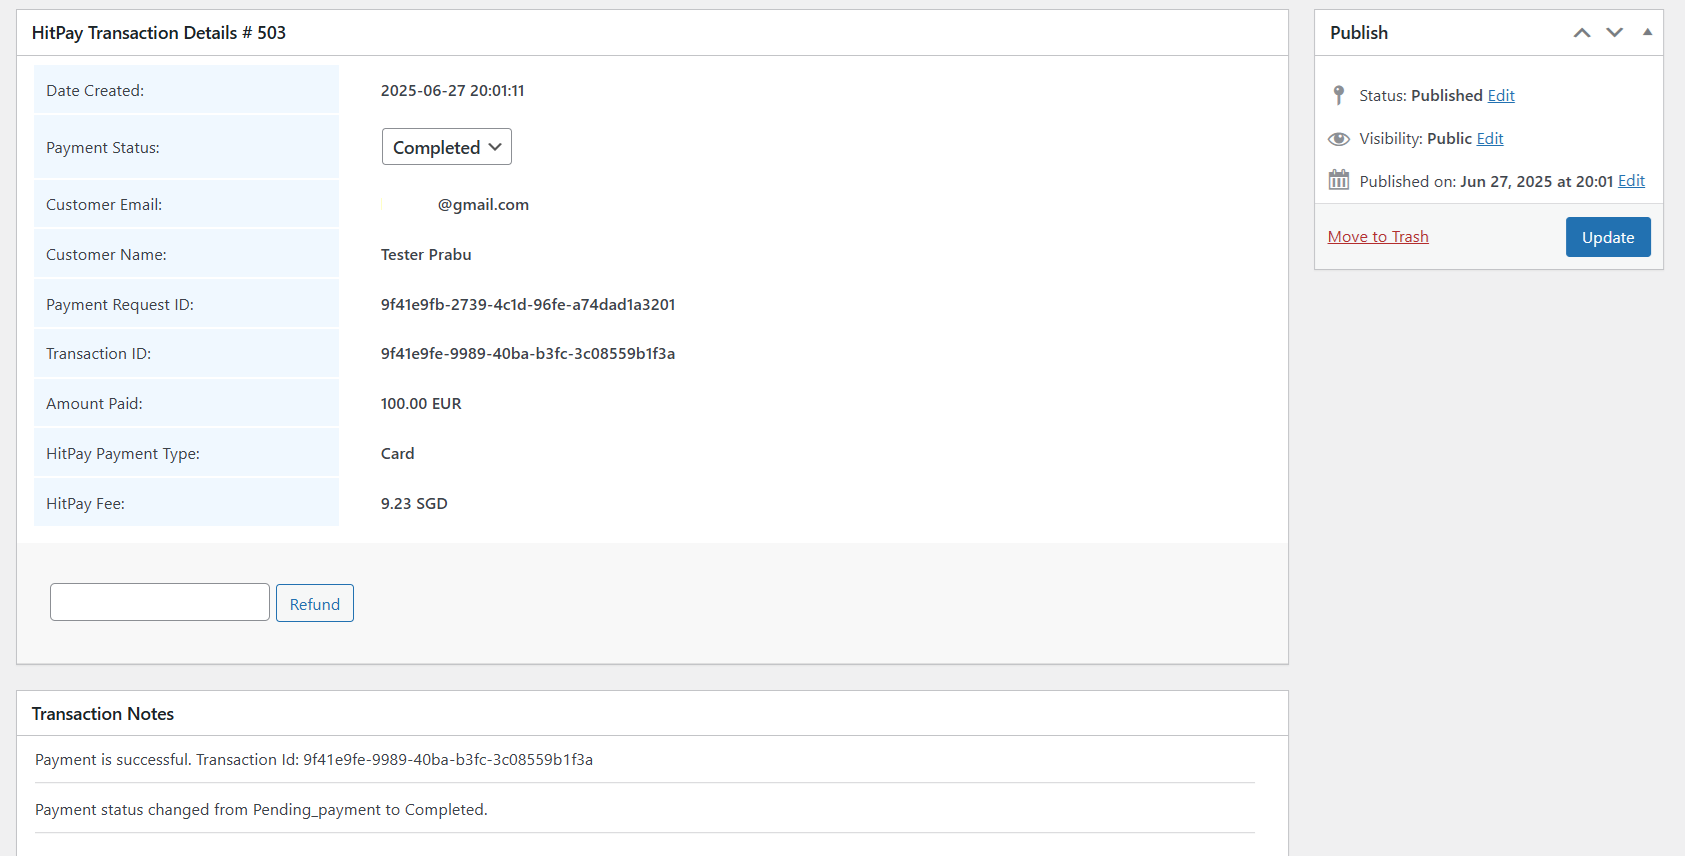
The user can refund the payment transactions from WordPress Admin.
1. Go to `HitPay Payment Gateway => Transactions`
2. Click view link to Transaction details
3. Enter the amount and click refund button
### Refund
The user can refund the payment transactions from WordPress Admin.
1. Go to `HitPay Payment Gateway => Transactions`
2. Click view link to Transaction details
3. Enter the amount and click refund button
 Refunds will only be successful if they meet the criteria of the payment
method used. Click
[Here](https://docs.hitpayapp.com/payments/refund#refund-process) for more
details. If the refund fails, please try to refund directly from the HitPay
dashboard under "Transactions > Select > Refund" to know the exact error.
## FAQs
You can copy the API keys and Salt values from the HitPay Web Dashboard
under `Settings > Payment Gateway > API Keys`.
Refunds will only be successful if they meet the criteria of the payment
method used. Click
[Here](https://docs.hitpayapp.com/payments/refund#refund-process) for more
details. If the refund fails, please try to refund directly from the HitPay
dashboard under "Transactions > Select > Refund" to know the exact error.
## FAQs
You can copy the API keys and Salt values from the HitPay Web Dashboard
under `Settings > Payment Gateway > API Keys`.