> ## Documentation Index
> Fetch the complete documentation index at: https://docs.hitpayapp.com/llms.txt
> Use this file to discover all available pages before exploring further.
# WooCommerce POS Plugin
> Connect a card reader to your WooCommerce Point of Sale
## Overview
Here's a step-by-step guide on how to install and enable the HitPay plugin on WooCommerce for accepting in-person payments using a card reader.
If you are looking for payments, please refer to this [guide](/plugins/woocommerce).
## Ideal setup for this plugin
* If you have an existing WooCommerce store and your customers wish to make in-person card payments.
* If you are using a POS plugin for your WooCommerce and want to integrate a card reader. Works well with plugins like [wePOS](https://wordpress.org/plugins/wepos/) and [WooCommerce POS](https://wordpress.org/plugins/woocommerce-pos/).
### Requirements
Before you can start using this plugin, ensure you have the following:
1. Create a HitPay Account.
2. Activate card payment methods.
3. Order and set up your card reader.
## Procedure
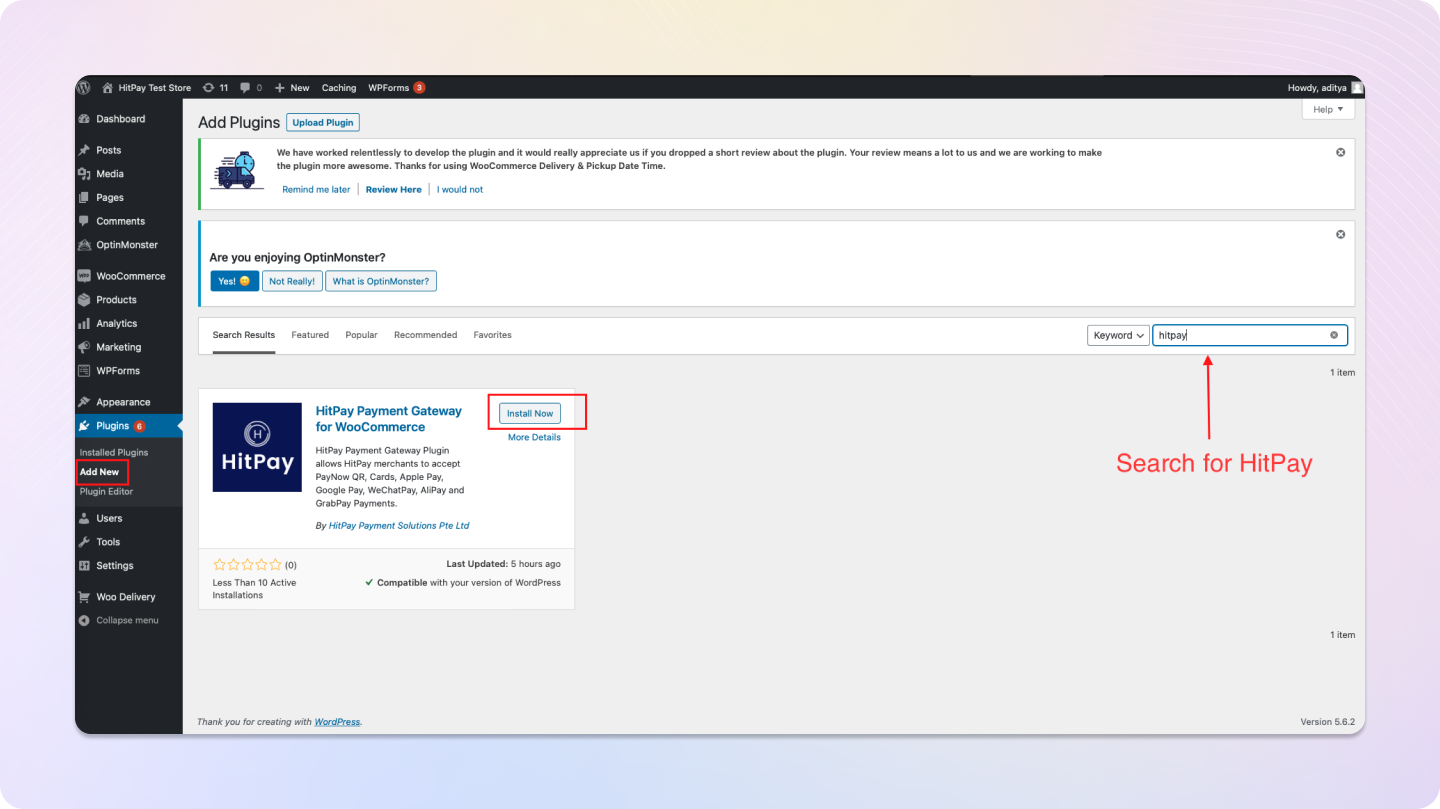
Search for HitPay in the keyword search field and install the plugin.
 Navigate to `WooCommerce > Settings > Payments > Manage` next to the HitPay payment method.
!\[Configur
Navigate to `WooCommerce > Settings > Payments > Manage` next to the HitPay payment method.
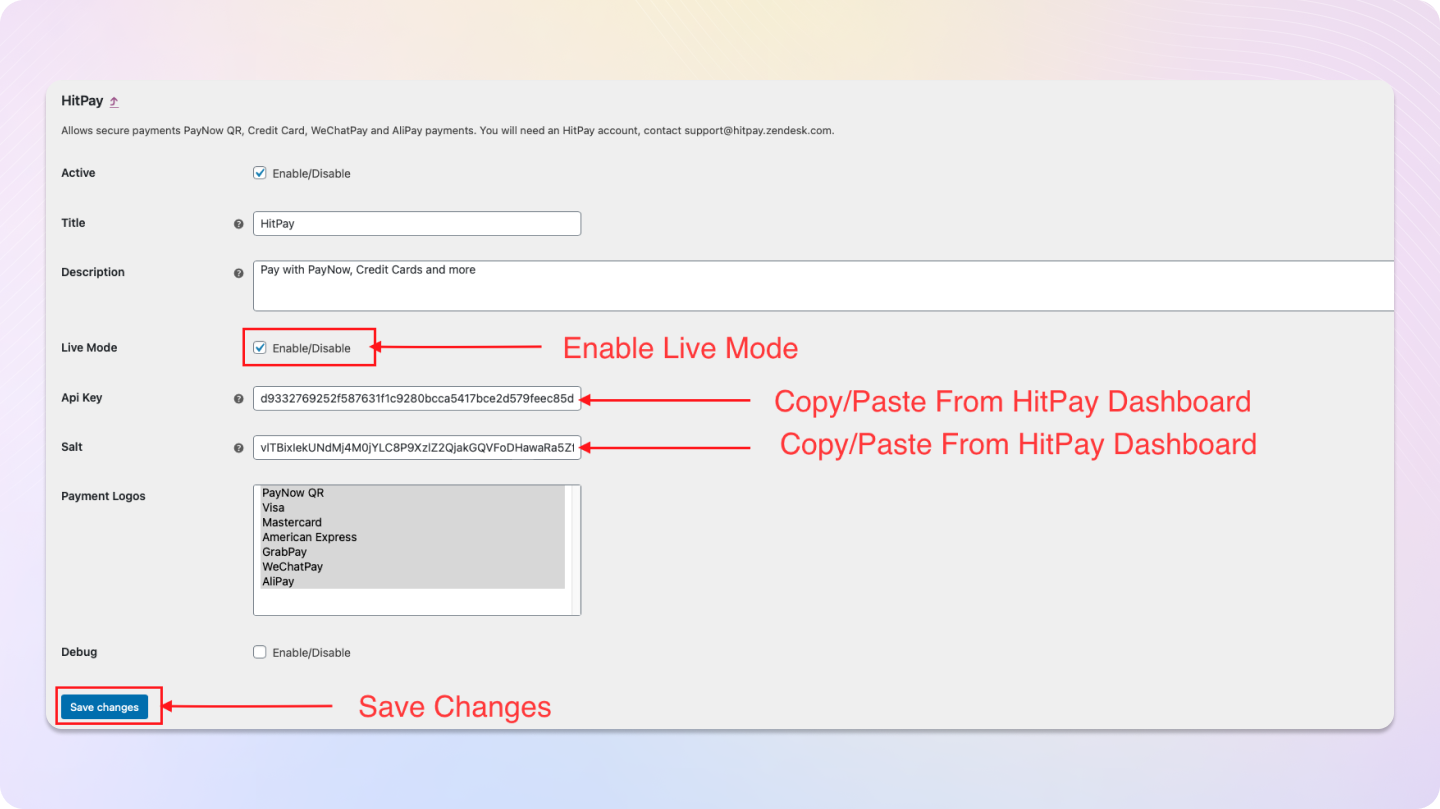
!\[Configur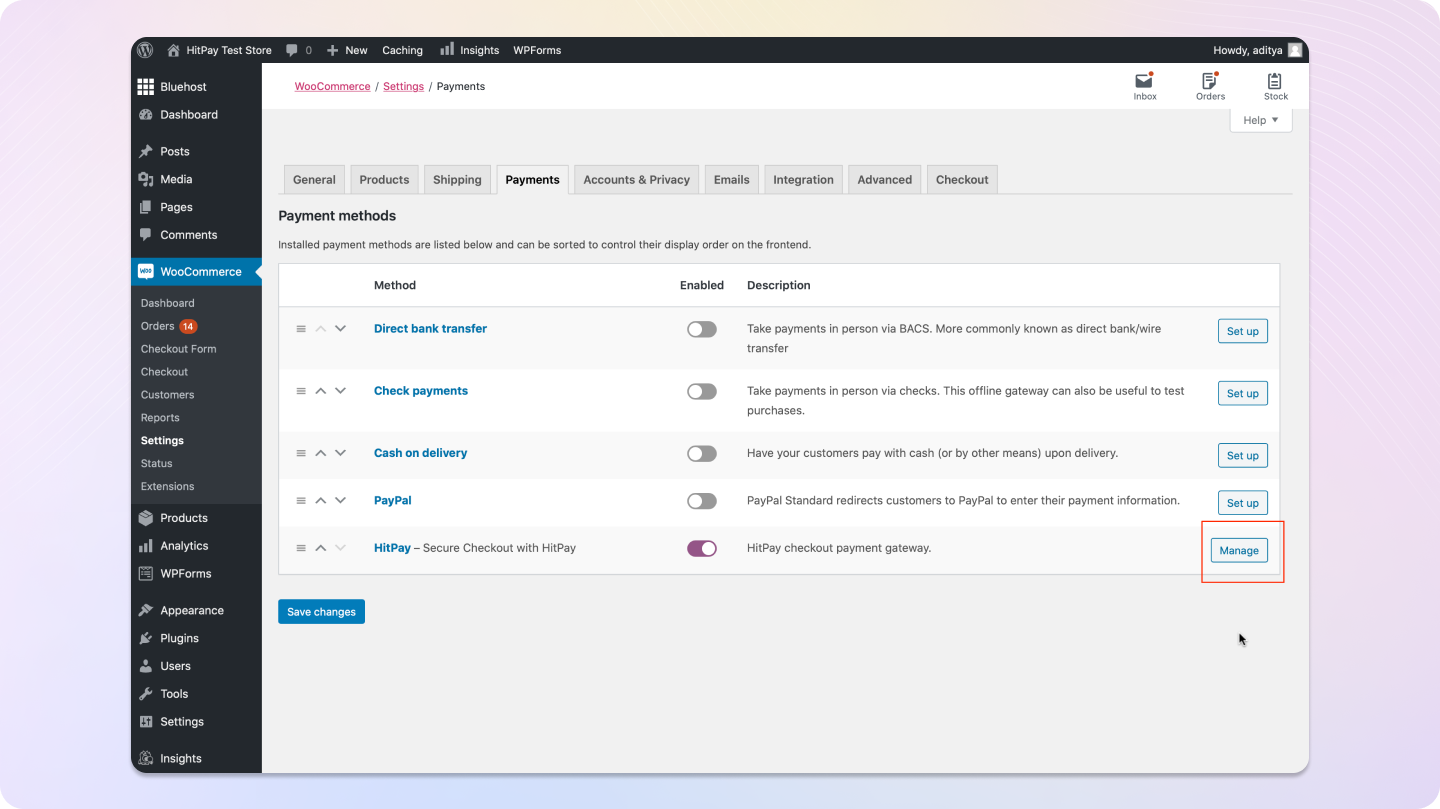 Copy your API keys from your HitPay dashboard and paste them in the respective fields.
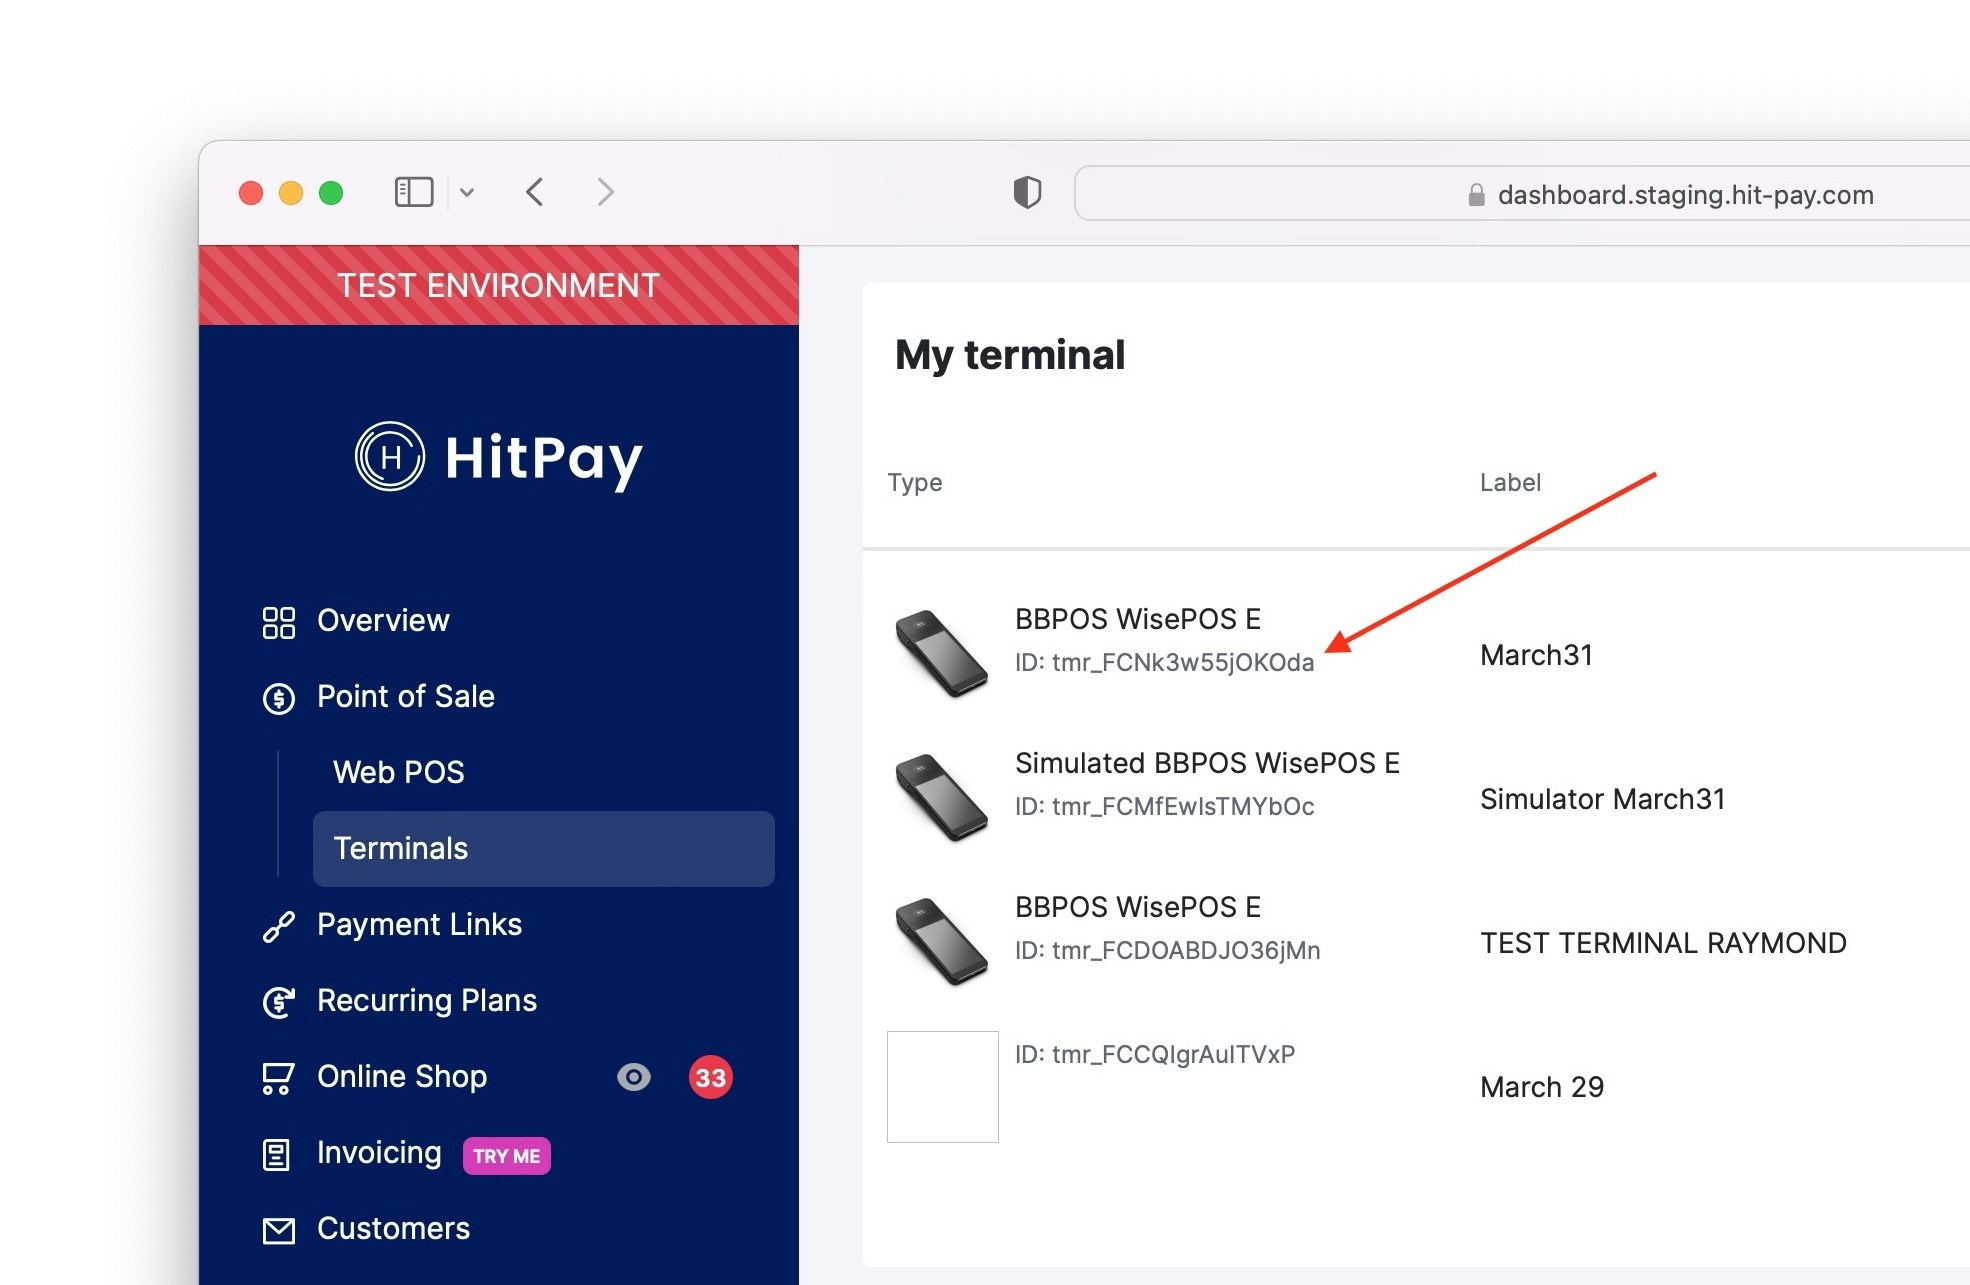
 Link the card reader to your WooCommerce plugin by copying the terminal ID from your HitPay dashboard and pasting it into your WooCommerce plugin.
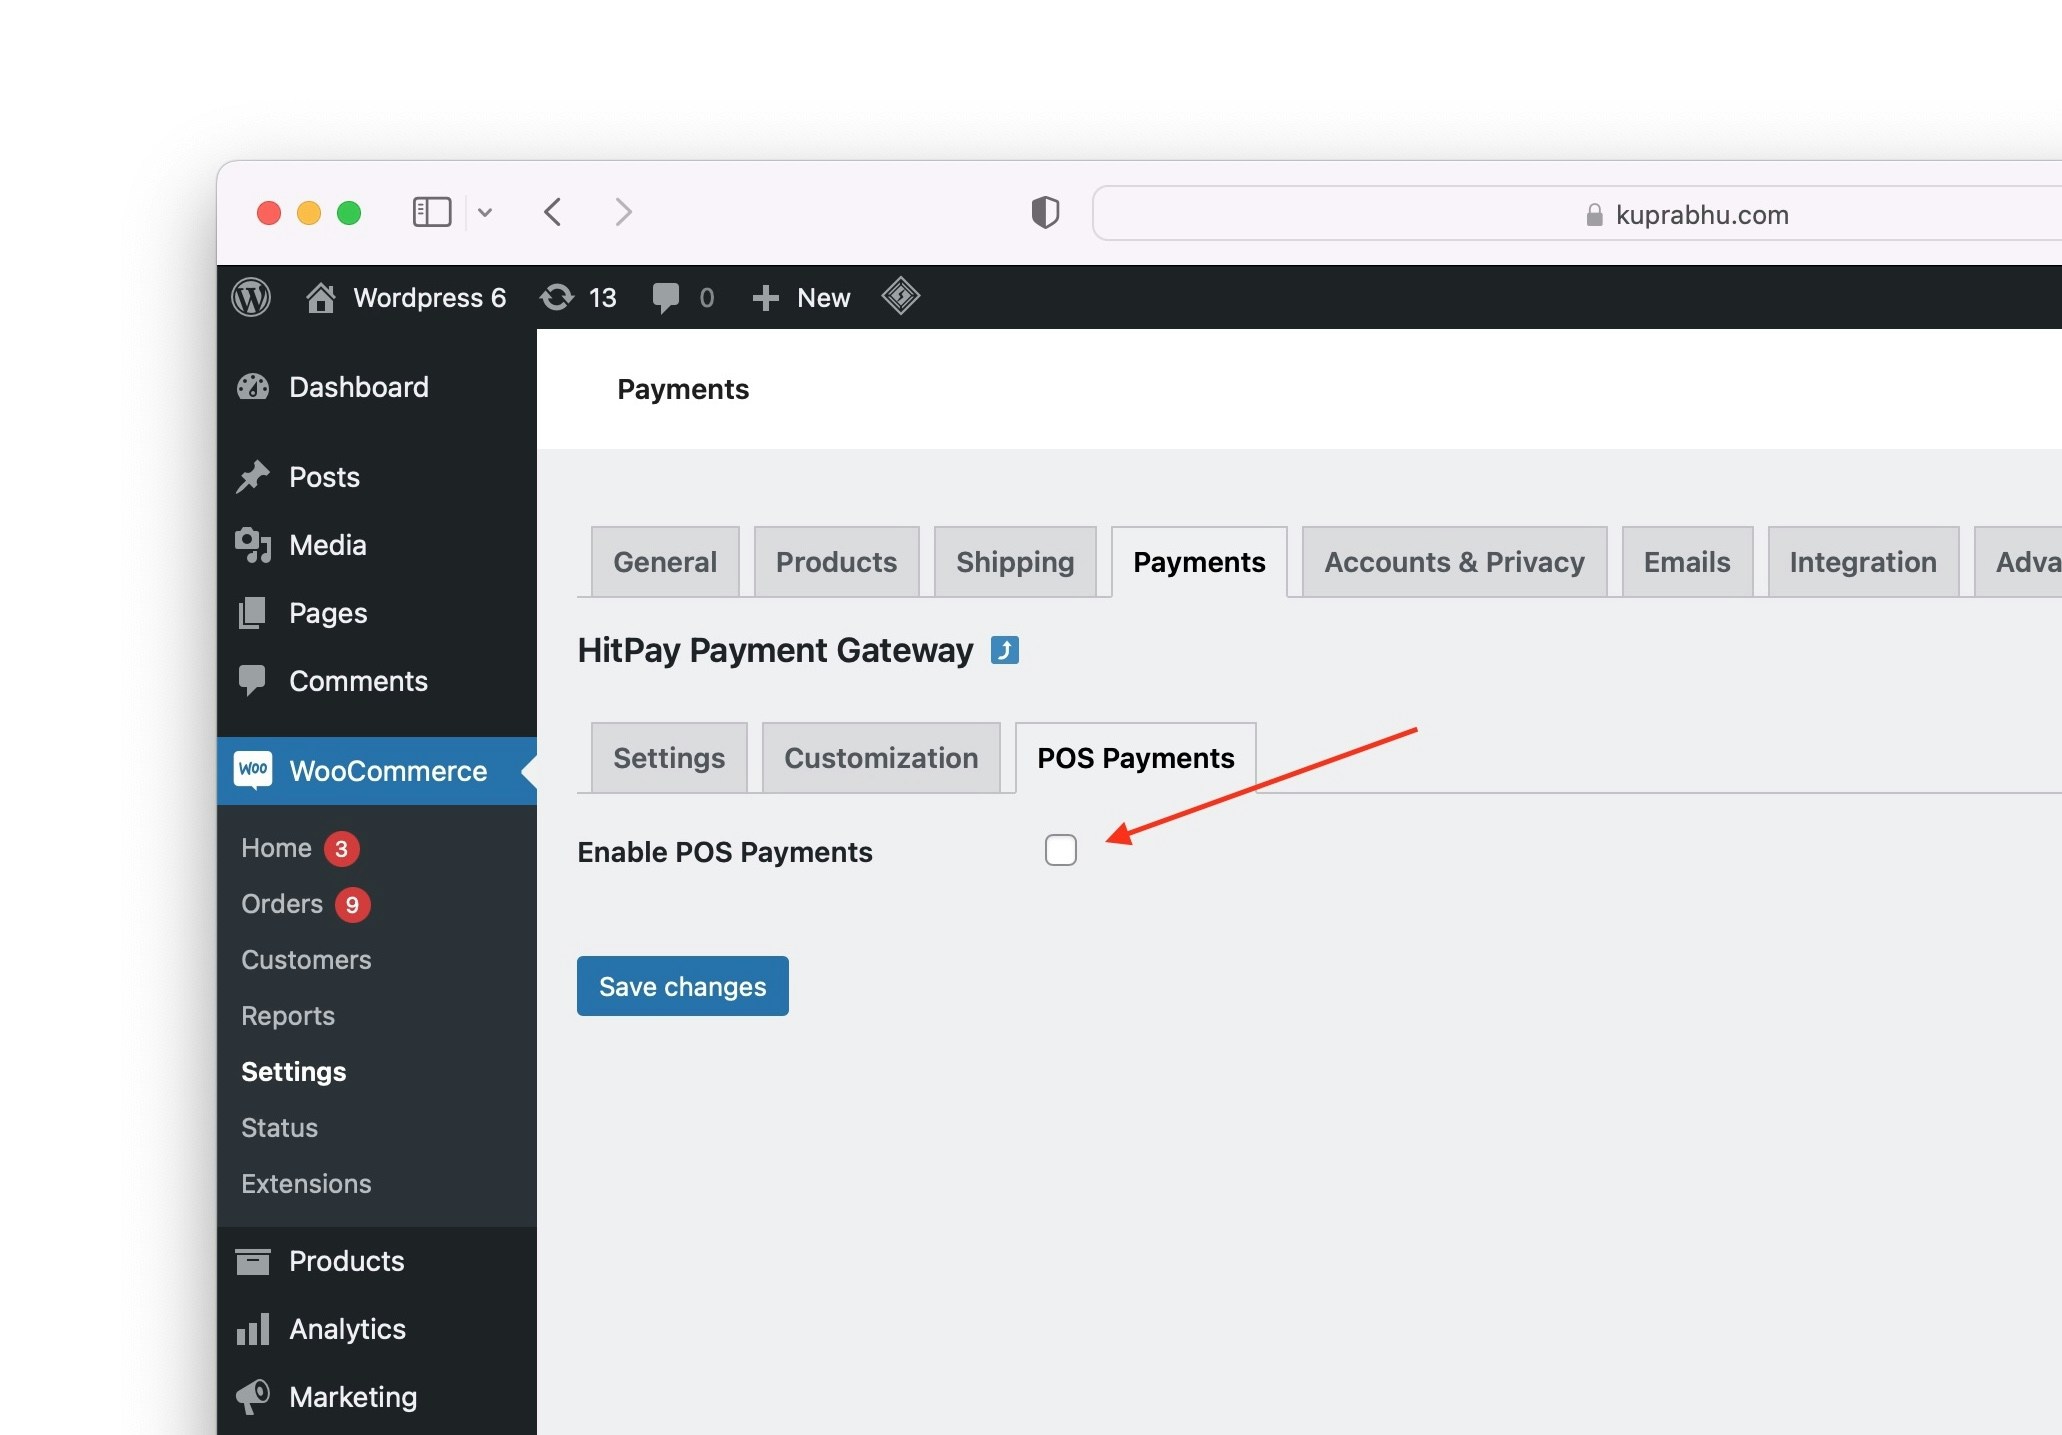
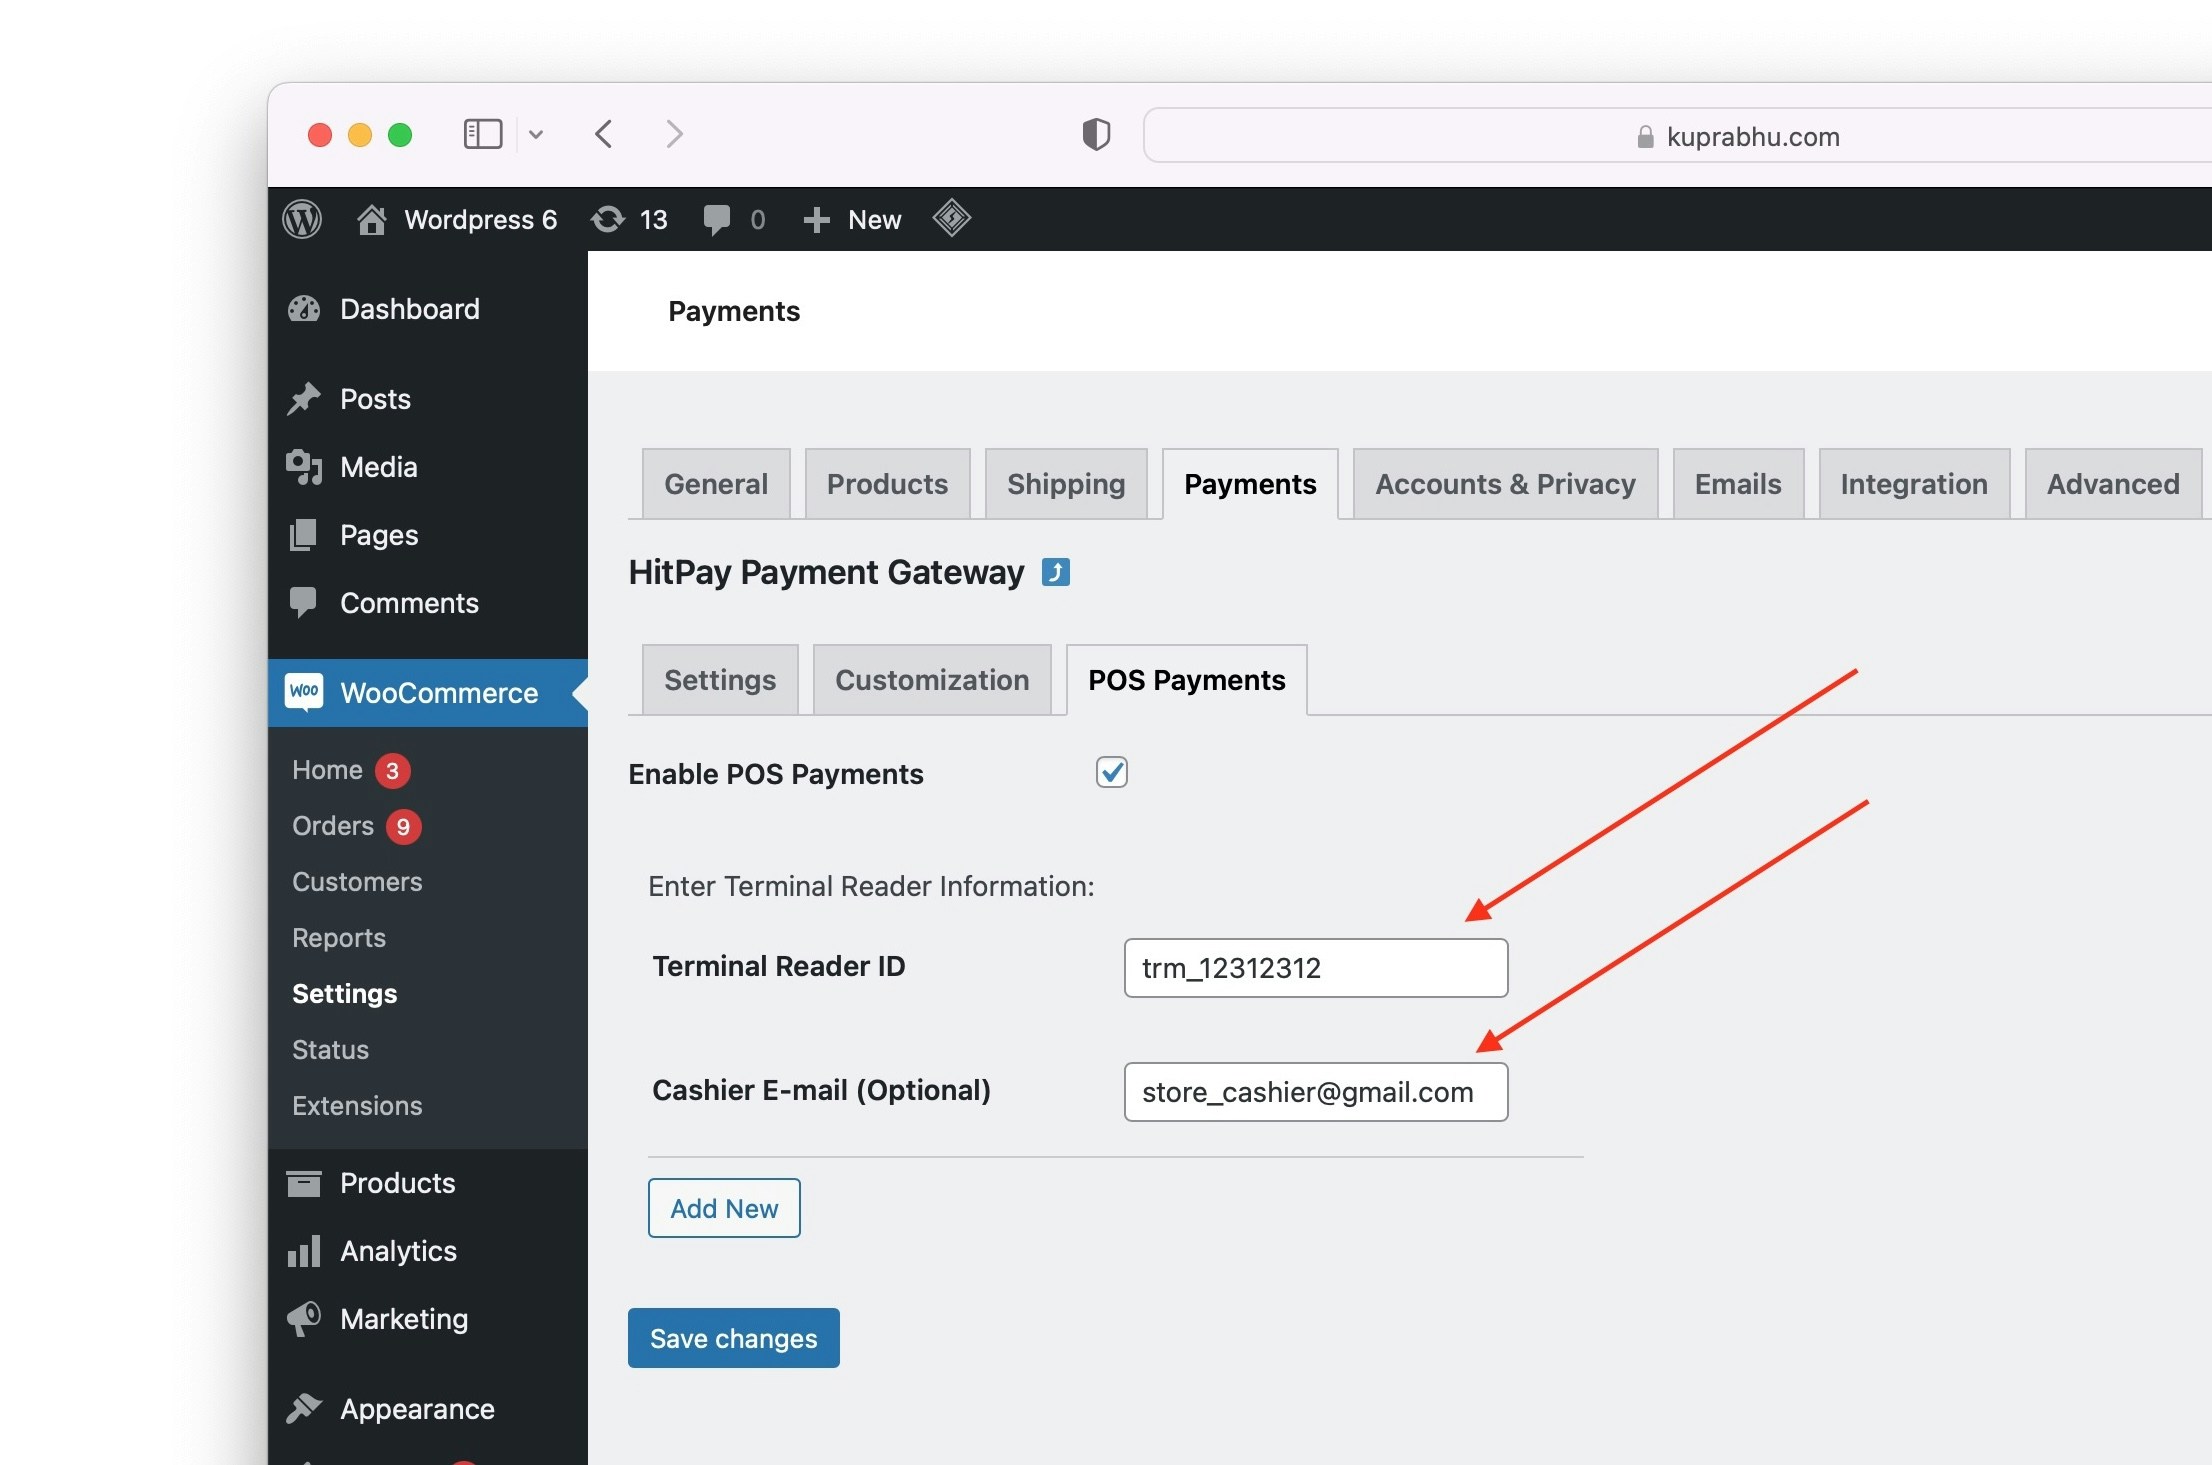
Enable POS payments in your WooCommerce plugin settings.
Link the card reader to your WooCommerce plugin by copying the terminal ID from your HitPay dashboard and pasting it into your WooCommerce plugin.
Enable POS payments in your WooCommerce plugin settings.
 Copy the terminal ID under `Point of Sale > Terminals` from your hitpay dashboard.
 Paste the terminal ID in the Terminal Reader ID section and click `Save Changes`.
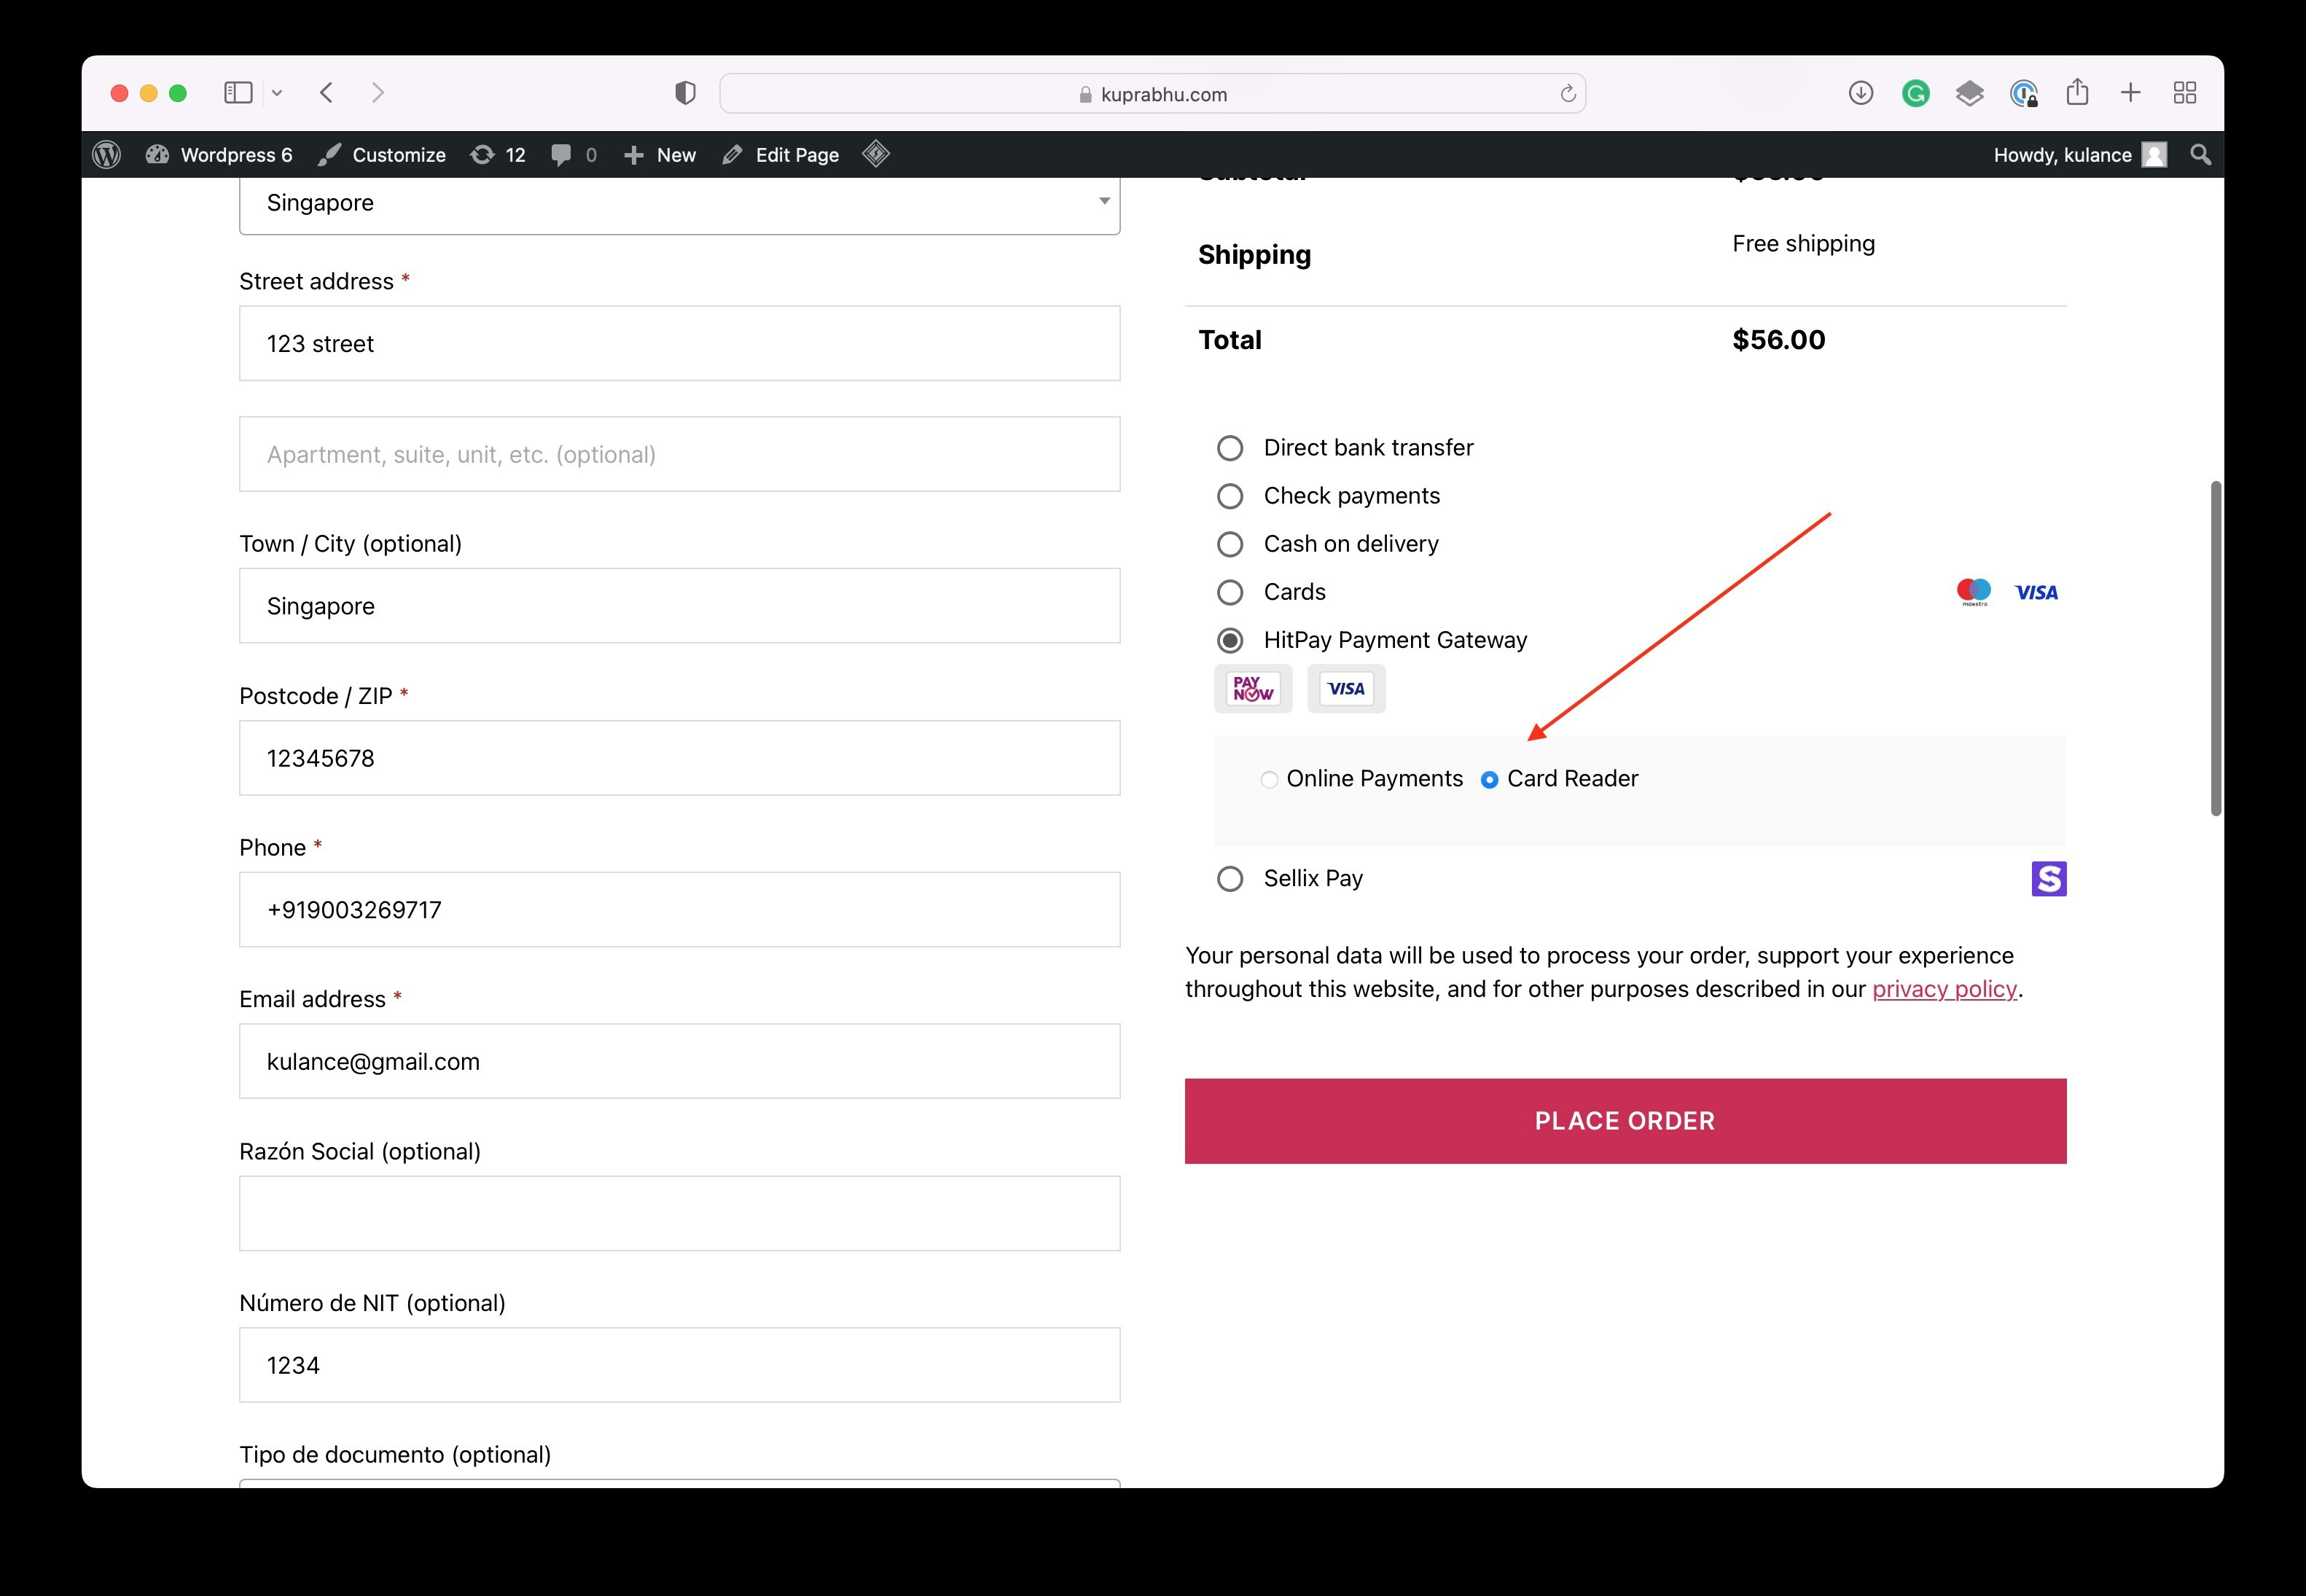
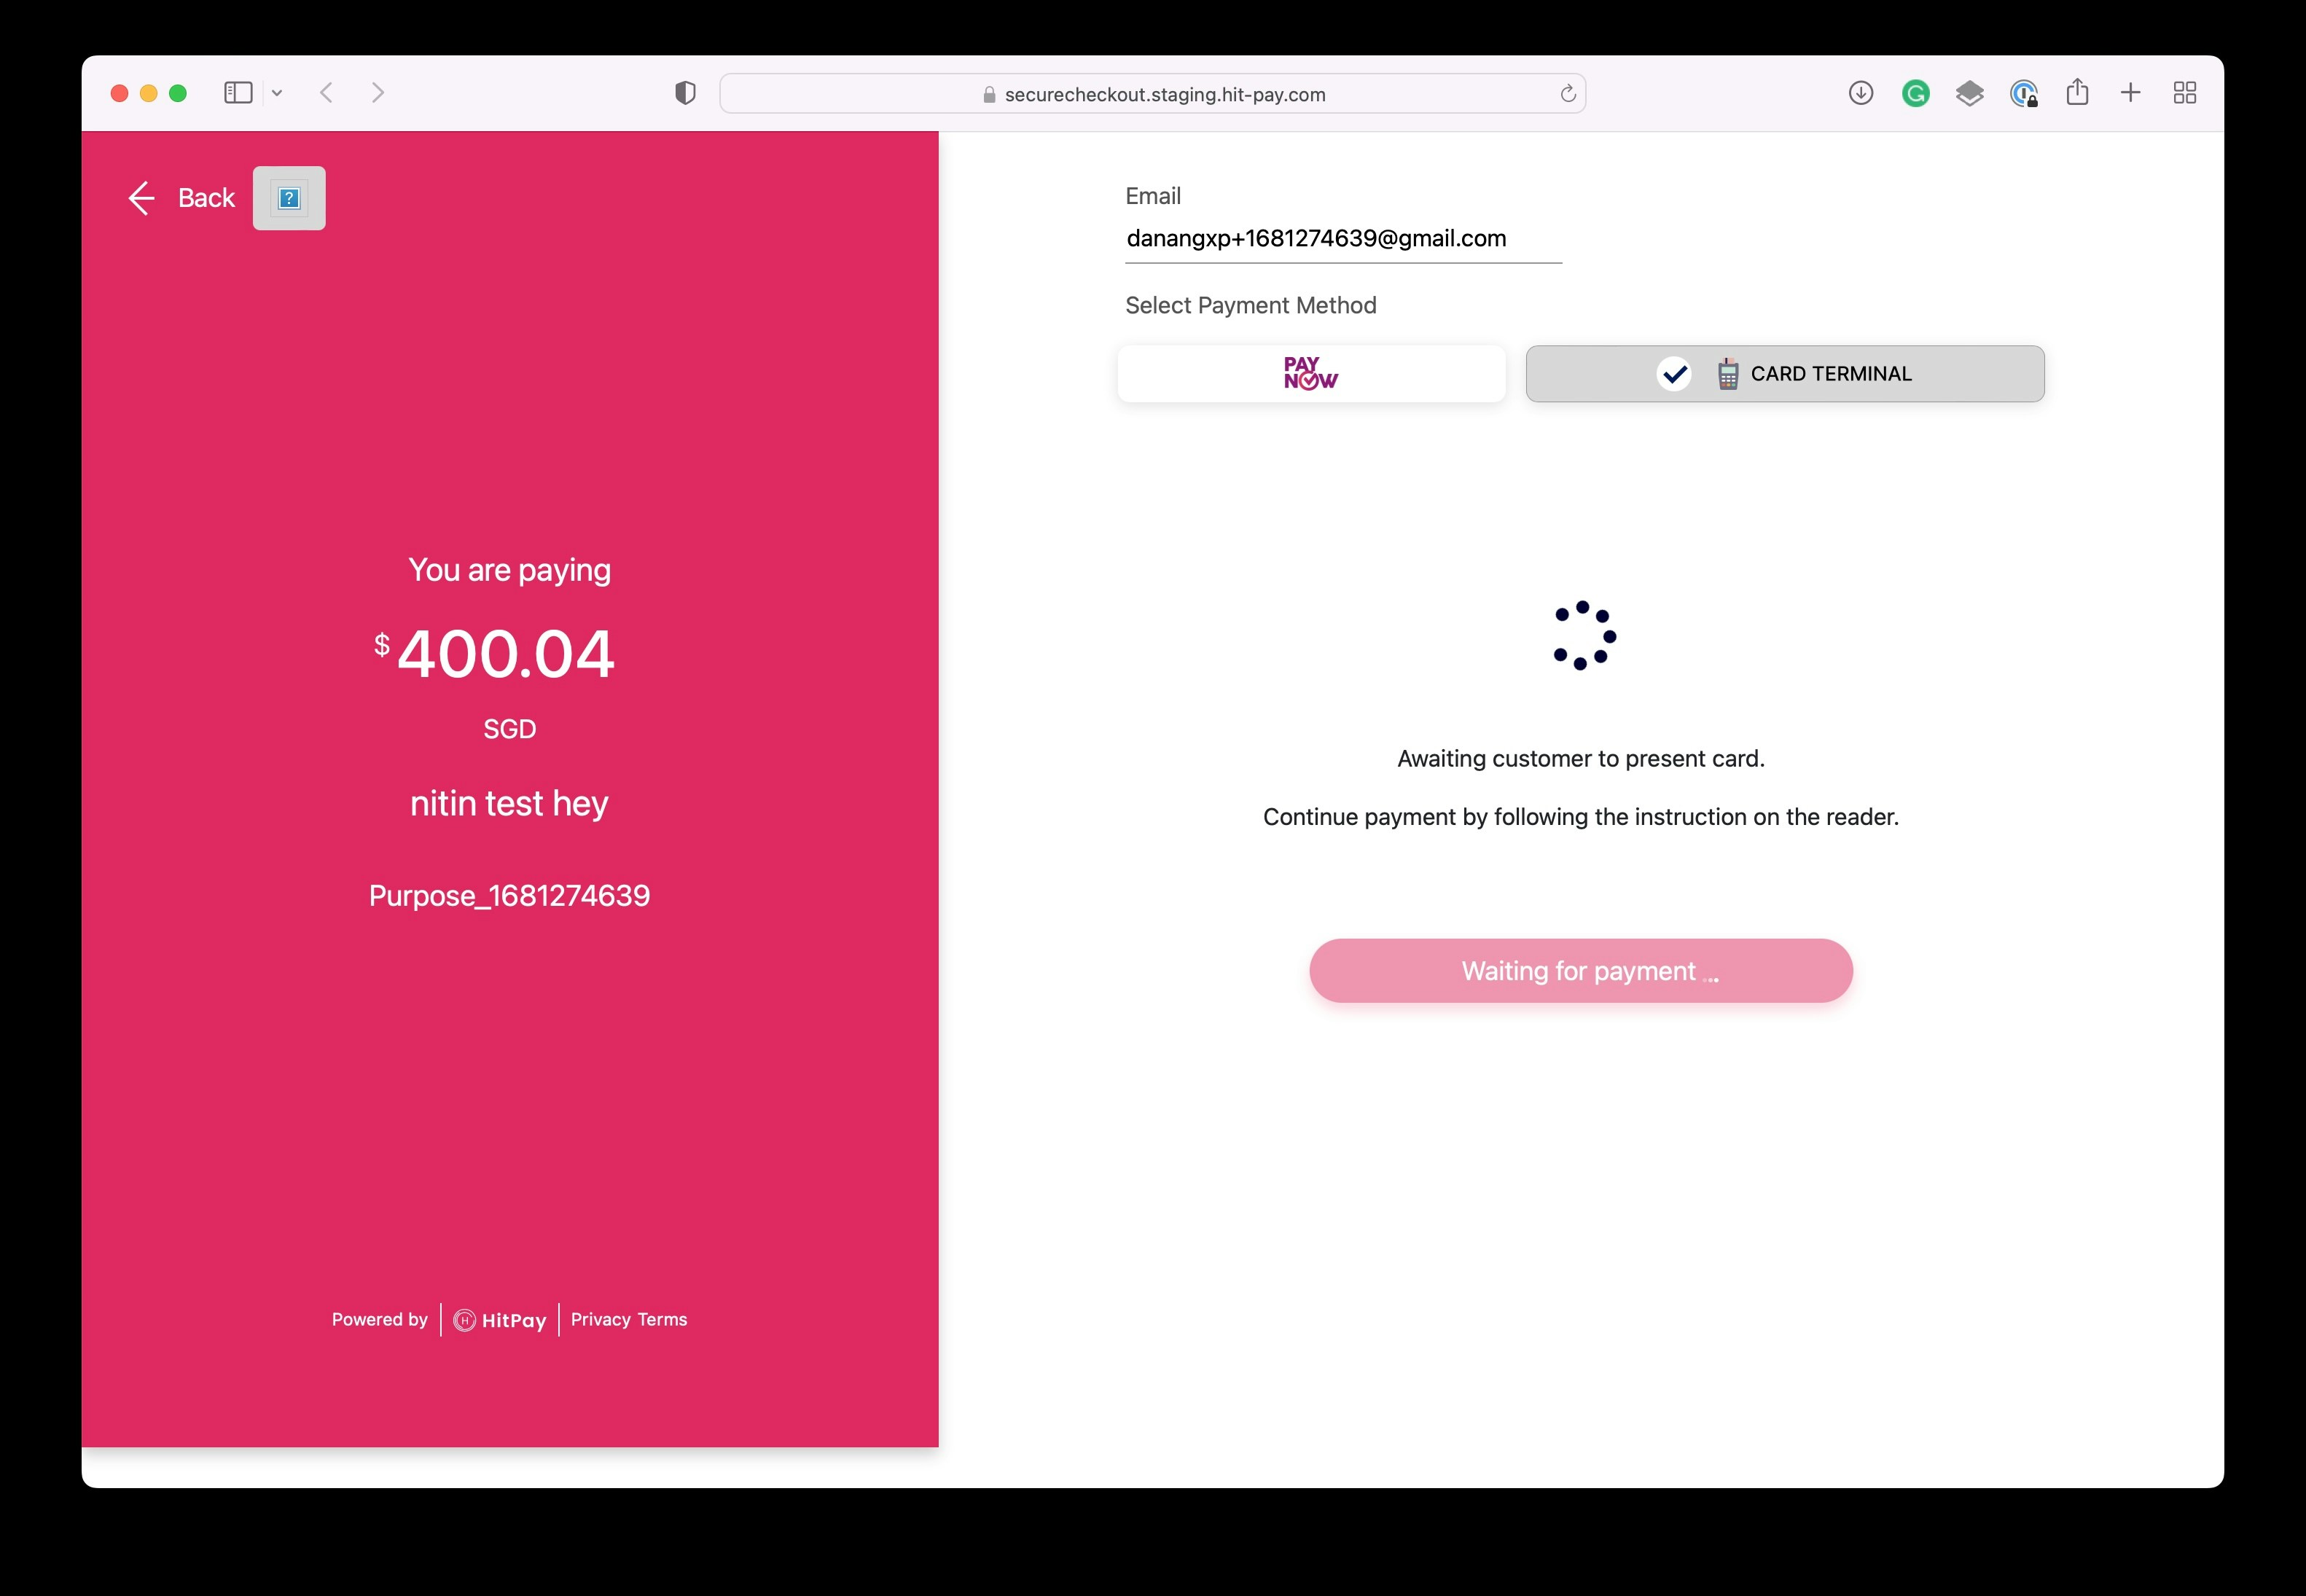
 A new `Card Reader` option will now appear in the payments section of your checkout page. Select this option and click `Place Order` to complete the transaction.
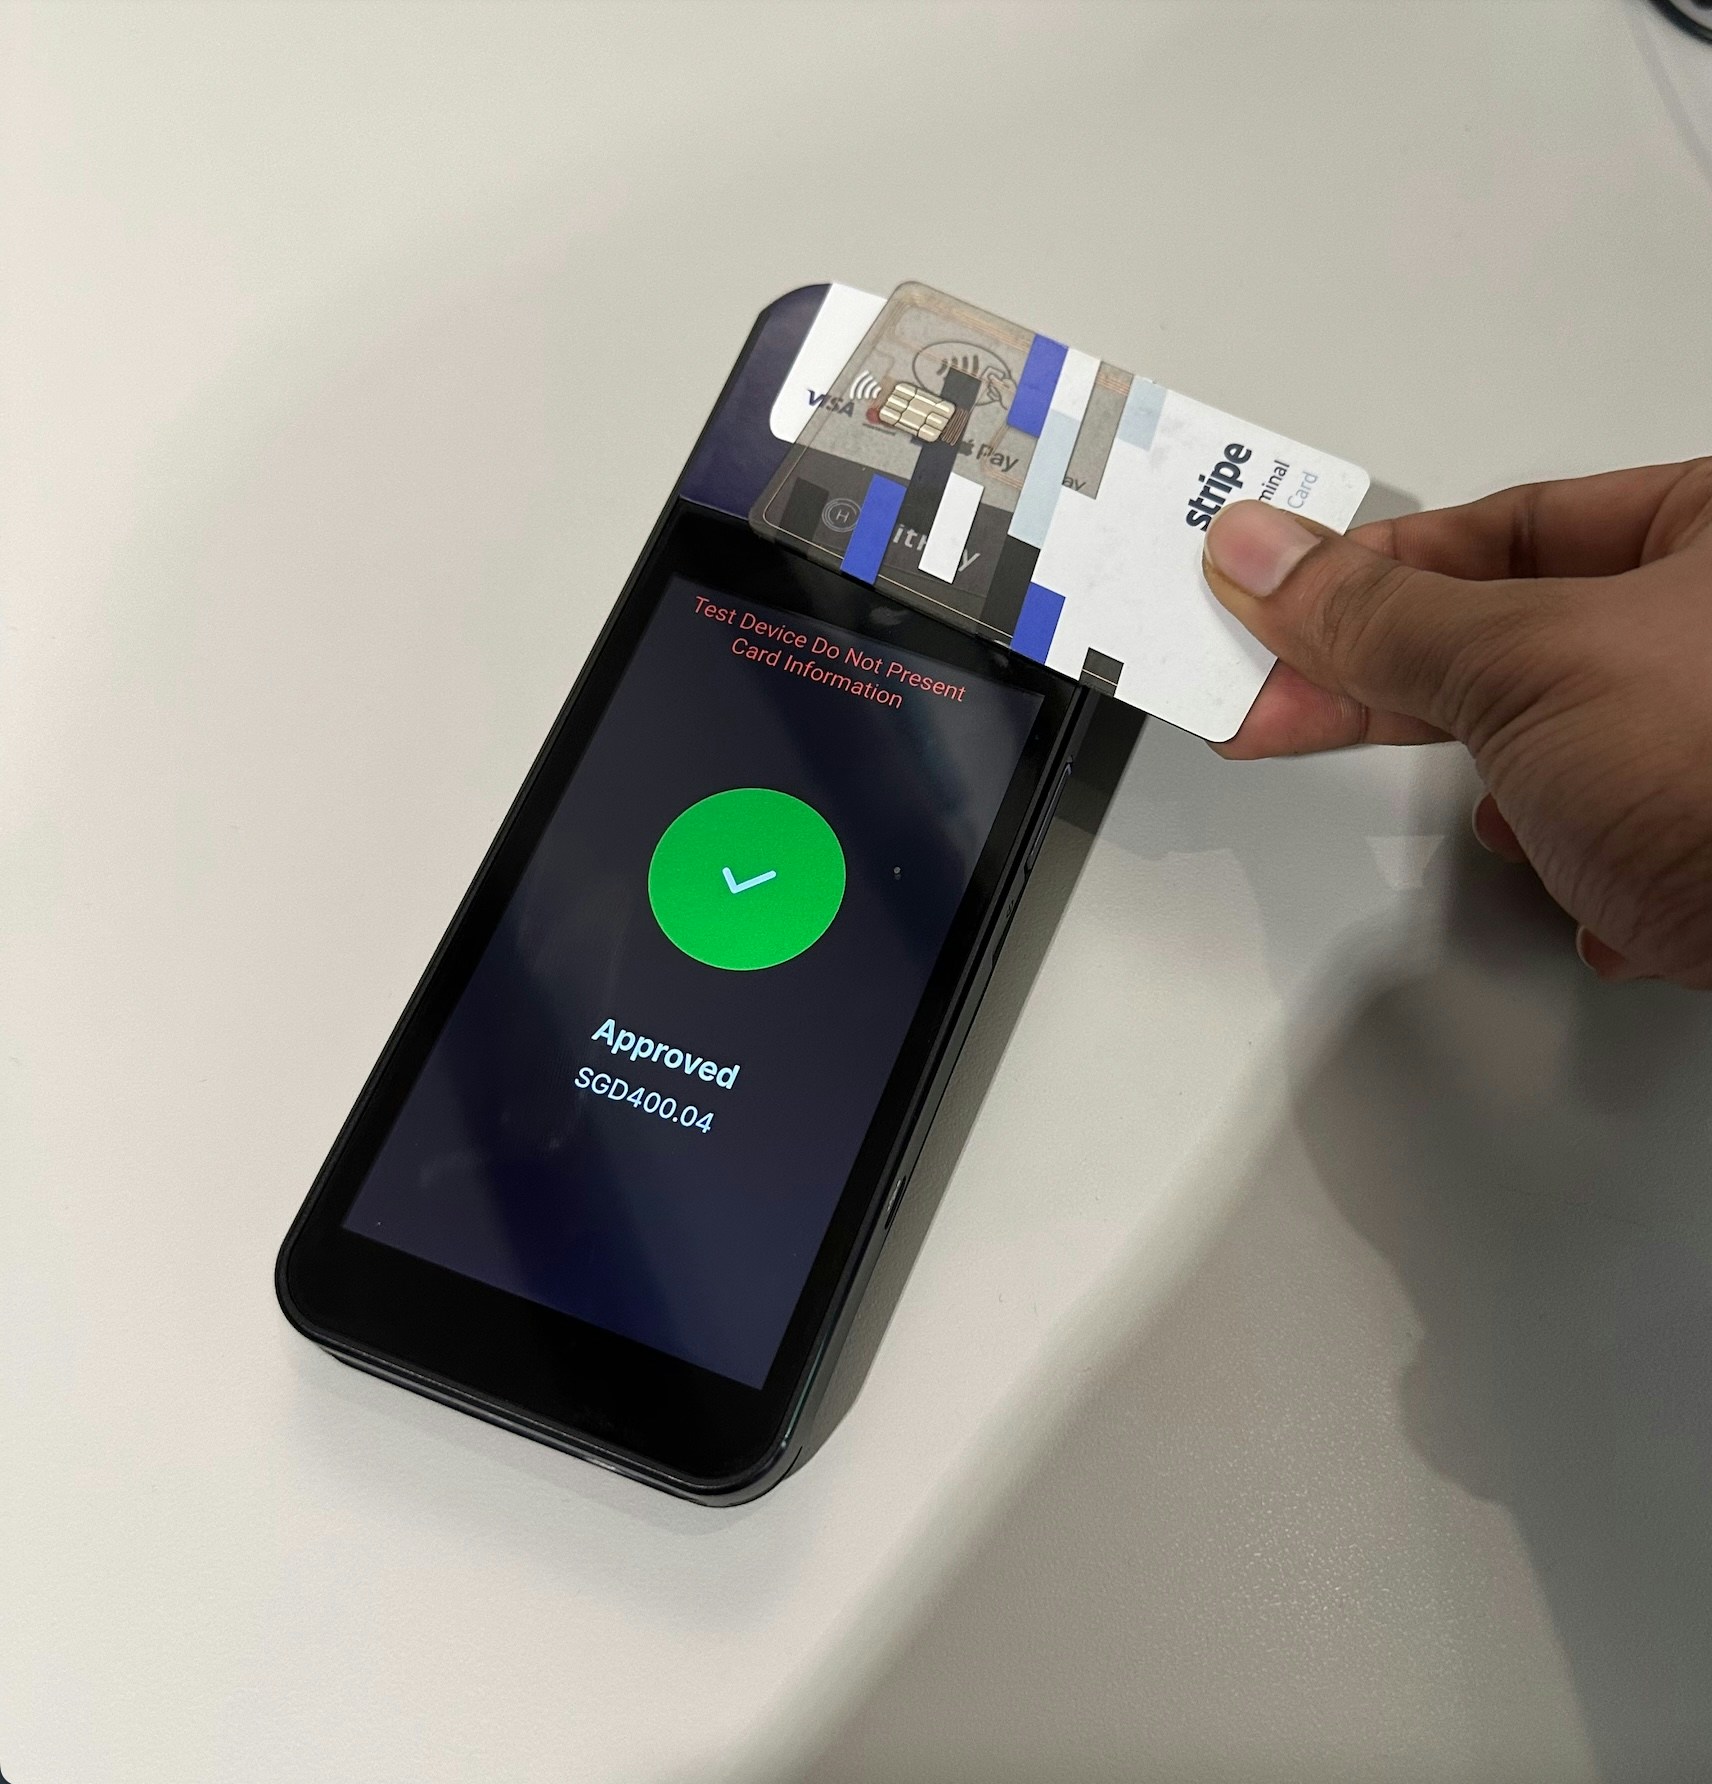 Congratulations! Your setup is complete, and your WooCommerce store is now integrated with the card reader. Customers can enjoy a seamless checkout experience, and you can manage payments through your HitPay dashboard.
## FAQs
The cashier's email is used to determine when to present the card reader option at the checkout:
1. If the cashier's email is entered, the card reader option is only shown if the logged-in user is the cashier. This will also help to avoid showing the card reader option to your online checkout store users.
2. If you have more than 1 POS setup in your physical store, the cashier email can be used to map the reader with the POS.
No, HitPay does not send an email confirmation to your customer if the payment is made through WooCommerce. This is because WooCommerce, by default, sends an email to your customer with the order details. To prevent duplicate emails, HitPay does not send an additional email to your customers. As a merchant, you will receive a payment alert email.
If you are unable to resolve the WooCommerce issues, you can request HitPay support to help with your debugging. But before that, make sure the following checks are completed:
* Ensure that your credentials are correct, both the API Key and Salt.
* Ensure that you are testing with an amount greater than \$1 (or equivalent).
* Make sure the webhook in the HitPay dashboard shows "Success."
Please provide the following details to the HitPay team:
1. Debug logs from your WooCommerce store.
2. Admin access to your WooCommerce test store (Since our team will be debugging, please avoid sending access to your live store).
3. SFTP access to your test store.
You can send the details to [support@hit-pay.com](mailto:support@hit-pay.com) (Approximate debug time would be 3 to 5 business days).
Congratulations! Your setup is complete, and your WooCommerce store is now integrated with the card reader. Customers can enjoy a seamless checkout experience, and you can manage payments through your HitPay dashboard.
## FAQs
The cashier's email is used to determine when to present the card reader option at the checkout:
1. If the cashier's email is entered, the card reader option is only shown if the logged-in user is the cashier. This will also help to avoid showing the card reader option to your online checkout store users.
2. If you have more than 1 POS setup in your physical store, the cashier email can be used to map the reader with the POS.
No, HitPay does not send an email confirmation to your customer if the payment is made through WooCommerce. This is because WooCommerce, by default, sends an email to your customer with the order details. To prevent duplicate emails, HitPay does not send an additional email to your customers. As a merchant, you will receive a payment alert email.
If you are unable to resolve the WooCommerce issues, you can request HitPay support to help with your debugging. But before that, make sure the following checks are completed:
* Ensure that your credentials are correct, both the API Key and Salt.
* Ensure that you are testing with an amount greater than \$1 (or equivalent).
* Make sure the webhook in the HitPay dashboard shows "Success."
Please provide the following details to the HitPay team:
1. Debug logs from your WooCommerce store.
2. Admin access to your WooCommerce test store (Since our team will be debugging, please avoid sending access to your live store).
3. SFTP access to your test store.
You can send the details to [support@hit-pay.com](mailto:support@hit-pay.com) (Approximate debug time would be 3 to 5 business days).