> ## Documentation Index
> Fetch the complete documentation index at: https://docs.hitpayapp.com/llms.txt
> Use this file to discover all available pages before exploring further.
# GiveWP
> Integrate the HitPay payment gateway into your GiveWP forms
## Account Setup
Before you begin integrating HitPay payments into your WordPress store, you need to set up your HitPay account and ensure some prerequisites are met:
1. If you haven't already, create an account on [HitPay](/setup/account_creation).
2. Ensure that you have the necessary payment methods [activated](/payments/online_payments#how-to-activate-payment-methods) in your HitPay account.
3. Make sure the payment methods you want to offer are [enabled](/payments/online_payments#how-to-enable-payment-methods) in your WordPress sales channel.
## Description
The HitPay Payment Gateway for GiveWP allows merchants to accept donations through various payment methods including PayNow QR, Cards, Apple Pay, Google Pay, WeChatPay, AliPay, and GrabPay. This plugin interfaces with HitPay, a third-party payment gateway, to process these payments efficiently.
Merchants must first create an account with HitPay and choose their desired payment options via the HitPay dashboard. API keys and Salt values must be retrieved from the HitPay Web Dashboard under Settings > Payment Gateway > API Keys.
There are no monthly, setup, admin, or hidden service fees, as merchants pay only per transaction.
## Installation
1. Navigate to the 'Add New' in the plugins dashboard.
2. Navigate to the 'Upload' area.
3. Download the latest zip file from here: [https://github.com/hit-pay/givewp/tags](https://github.com/hit-pay/givewp/tags)
4. Select `hitpay-payment-gateway-for-givewp.zip` from your computer.
5. Click 'Install Now'.
6. Activate the plugin in the Plugin dashboard.
### Using FTP
1. Download `hitpay-payment-gateway-for-givewp.zip`.
2. Extract the directory to your computer.
3. Upload the directory to the `/wp-content/plugins/` directory.
4. Activate the plugin in the Plugin dashboard.
## Configuration
Go to Donations settings.
Select the "Payment Gateways" tab.
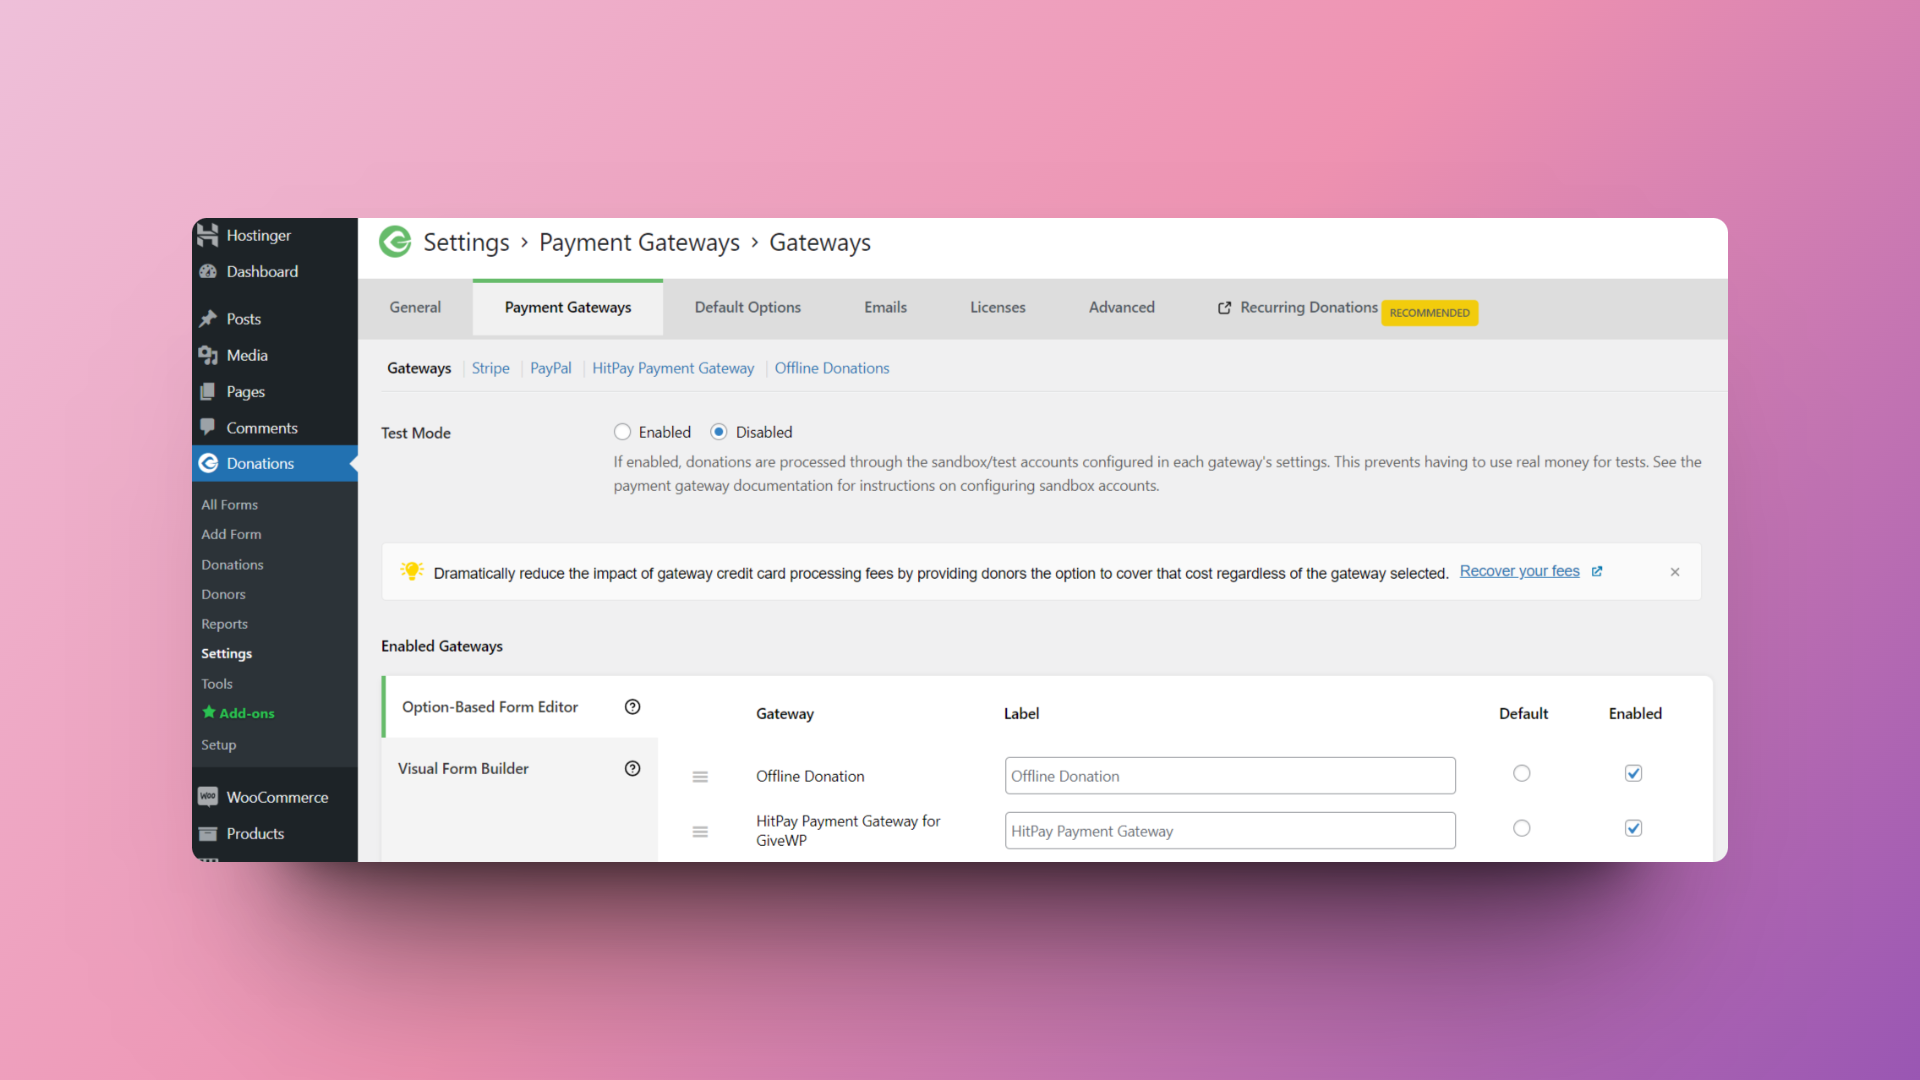 Activate the payment method (if inactive) in the Option-Based Form Editor by ticking the Enabled checkbox field.
 Set the name you wish to show your users on Checkout (for example: "Creditcard or PayNow").
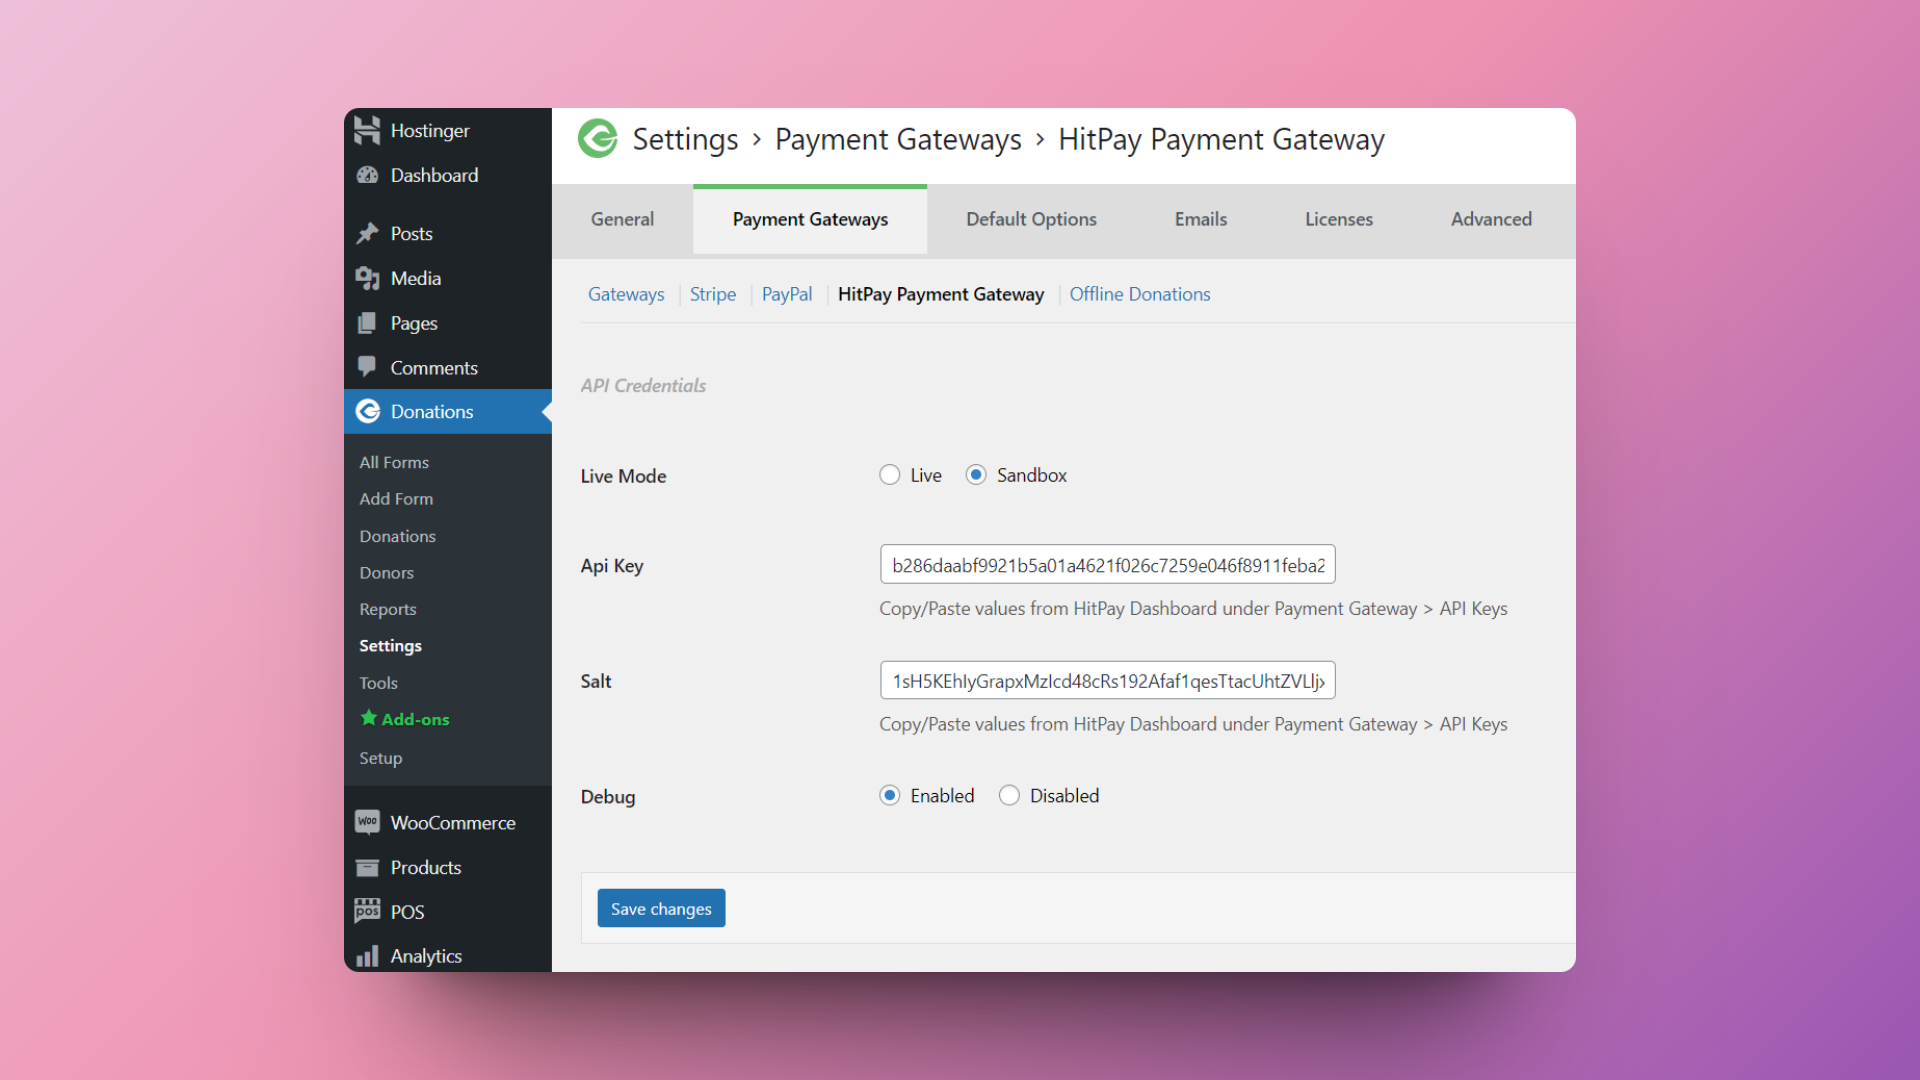
Click the link 'HitPay Payment Gateway' under the tabs.
Copy and paste the API keys and Salt values from the HitPay settings.
Click "Save Changes".
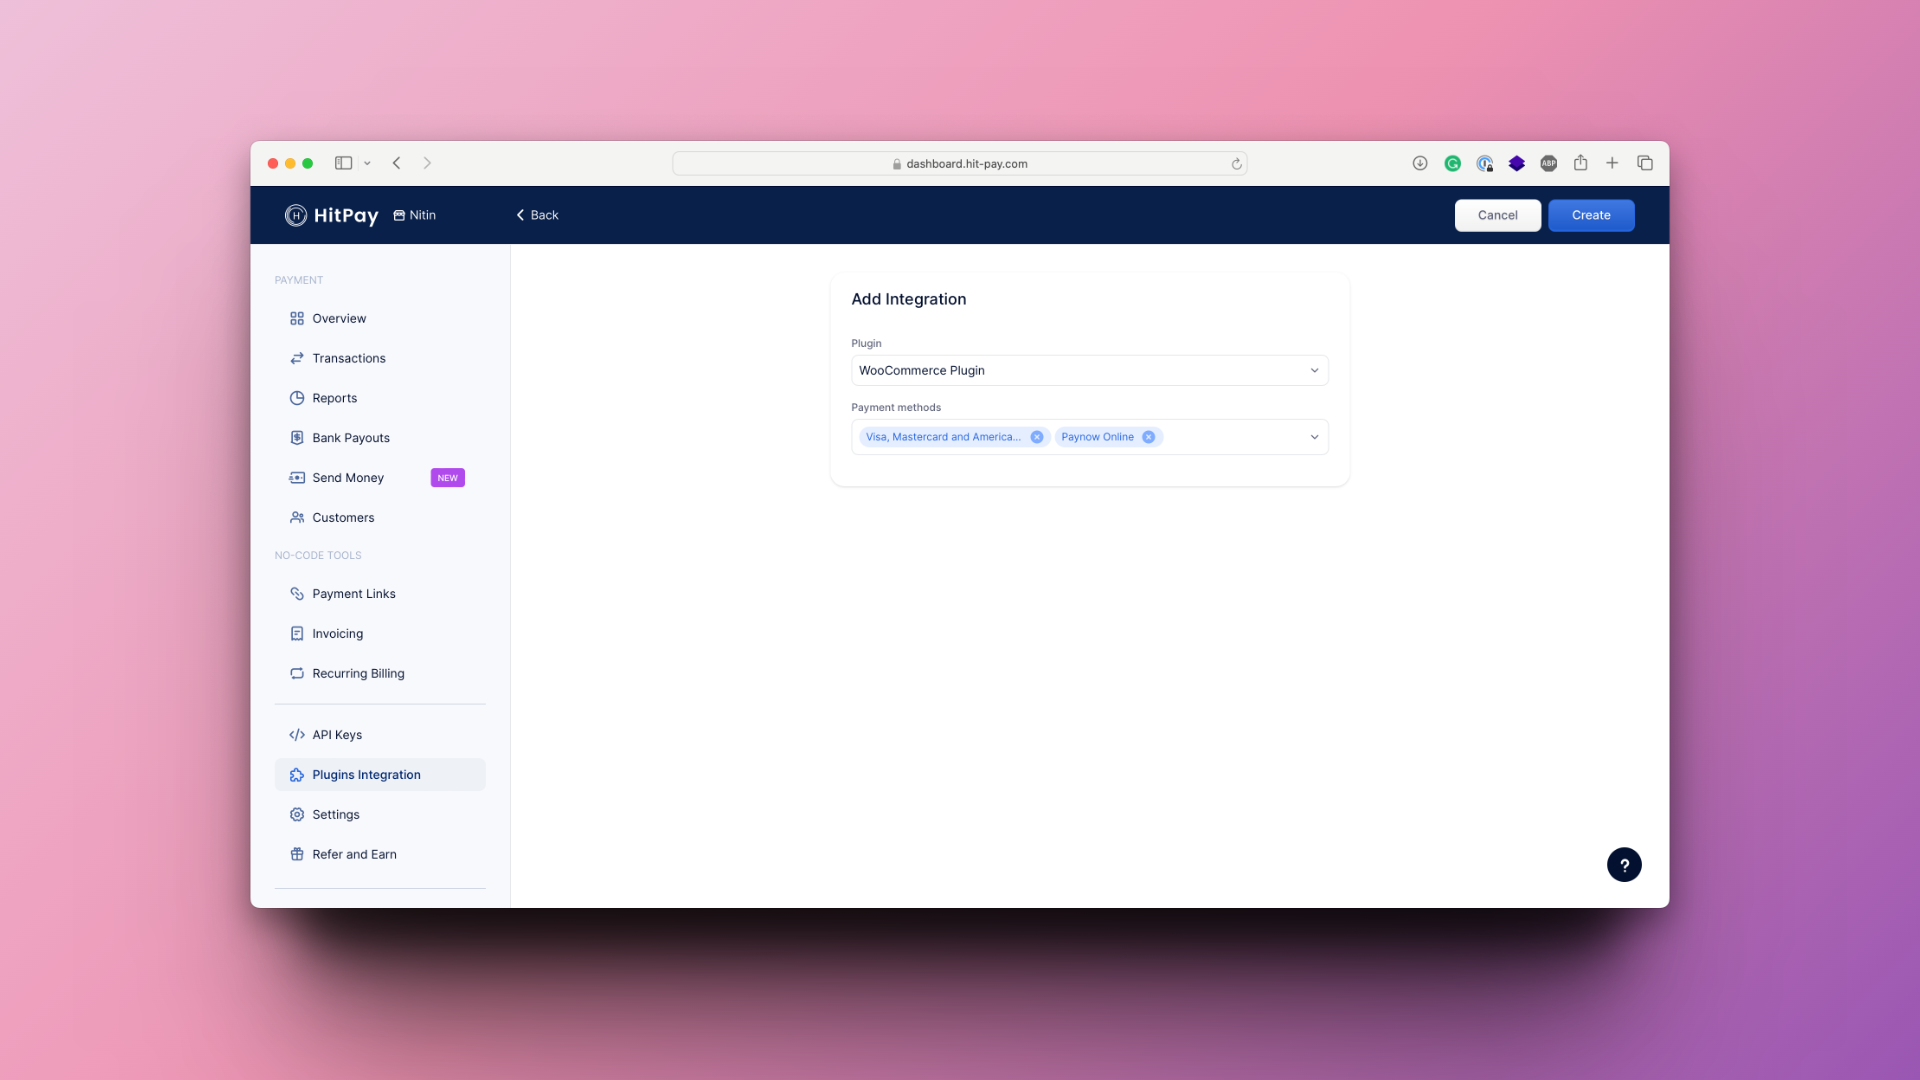
Navigate back to the HitPay dashboard, go to **Integrations** > **Available** tab > select **WooCommerce**, and choose your payment methods.
Set the name you wish to show your users on Checkout (for example: "Creditcard or PayNow").
Click the link 'HitPay Payment Gateway' under the tabs.
Copy and paste the API keys and Salt values from the HitPay settings.
Click "Save Changes".
Navigate back to the HitPay dashboard, go to **Integrations** > **Available** tab > select **WooCommerce**, and choose your payment methods.
 ## Donation
Direct donors to the donation page on your website.
## Donation
Direct donors to the donation page on your website.
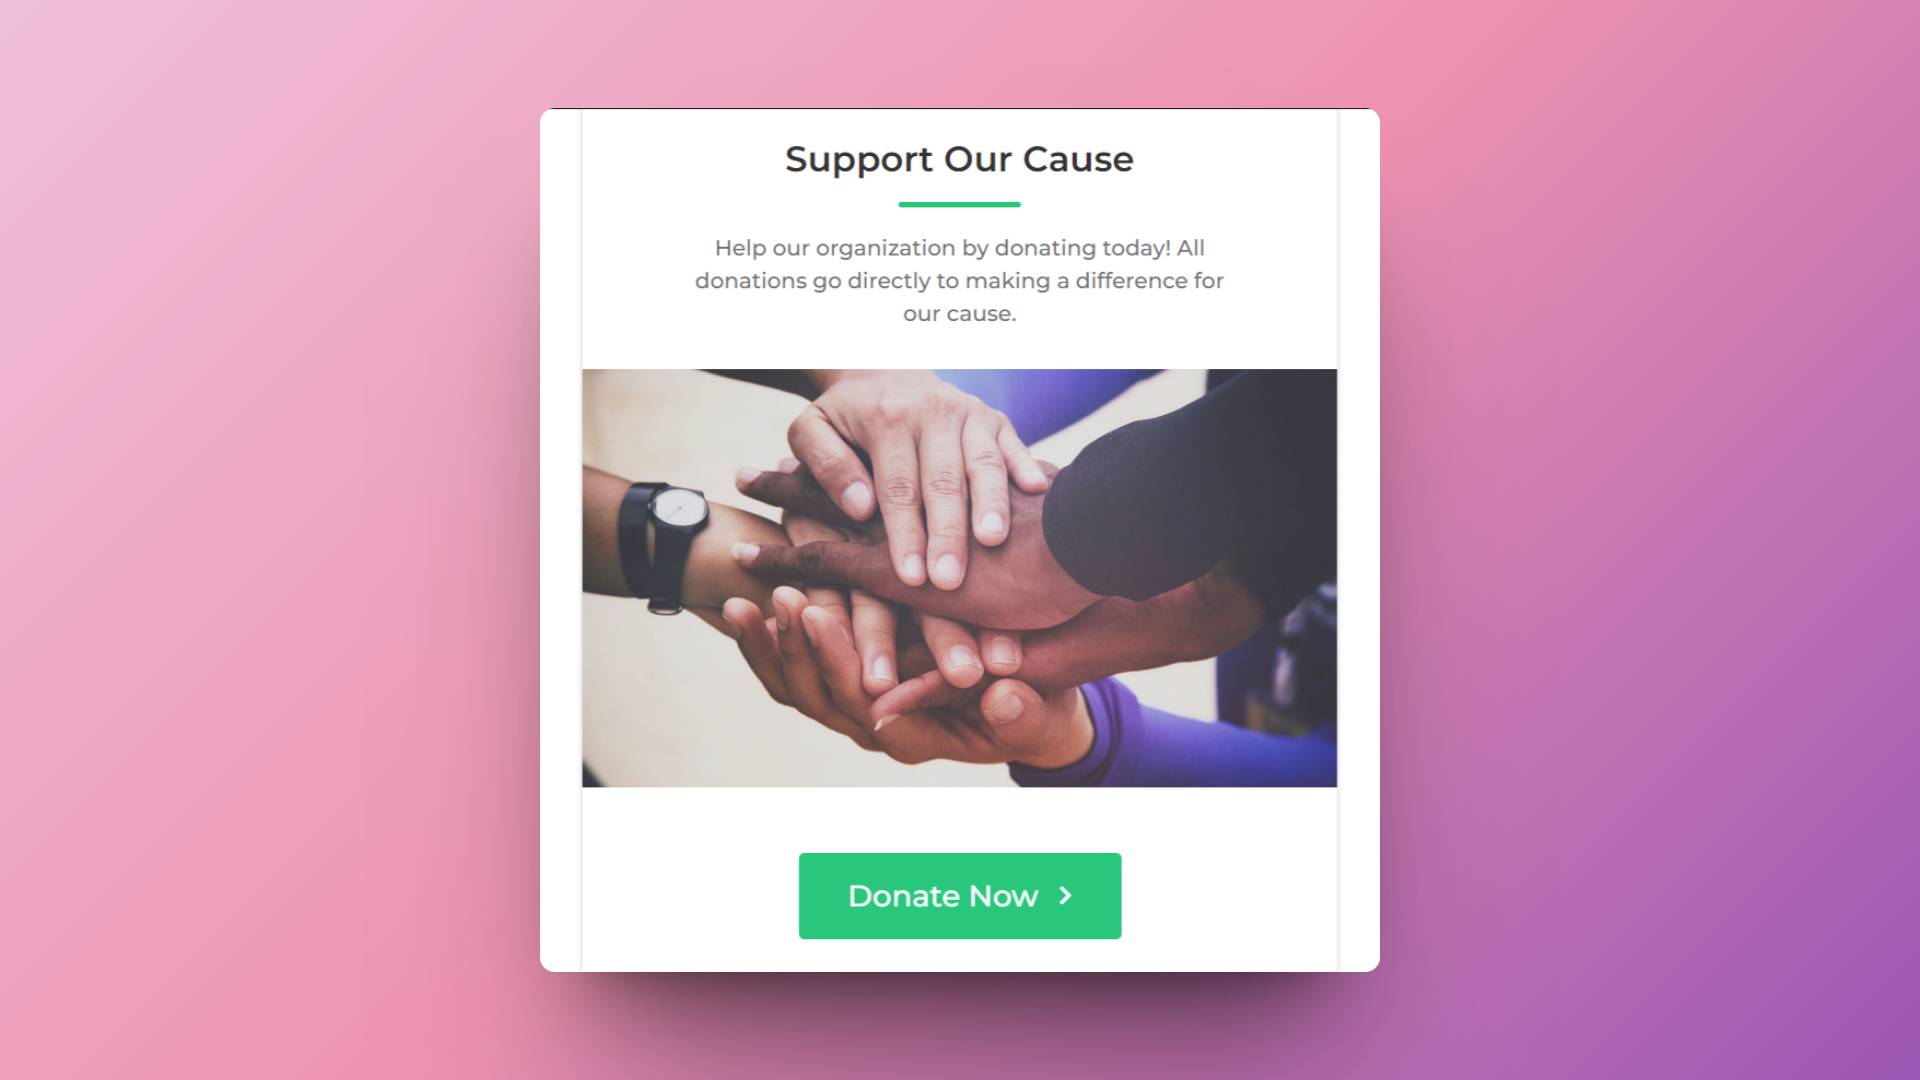 Donors choose their donation amount and select their preferred payment method.
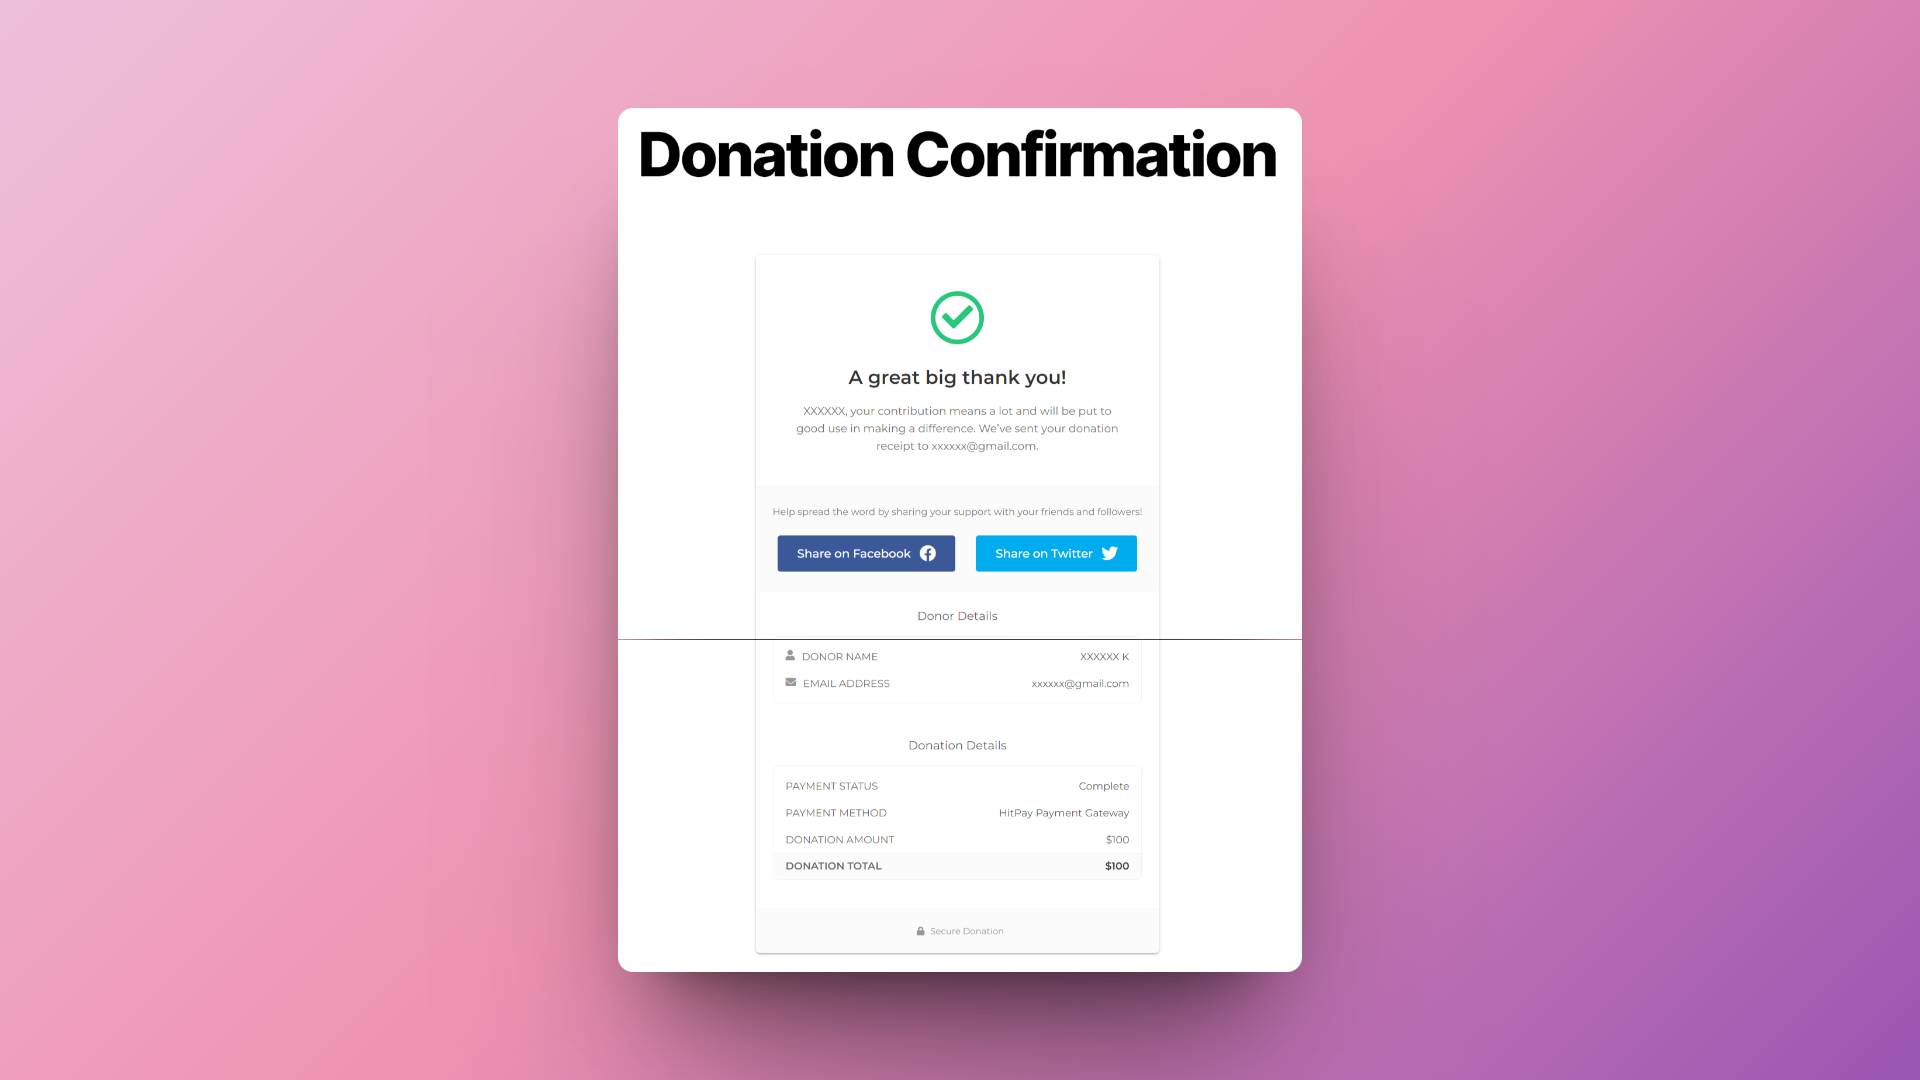
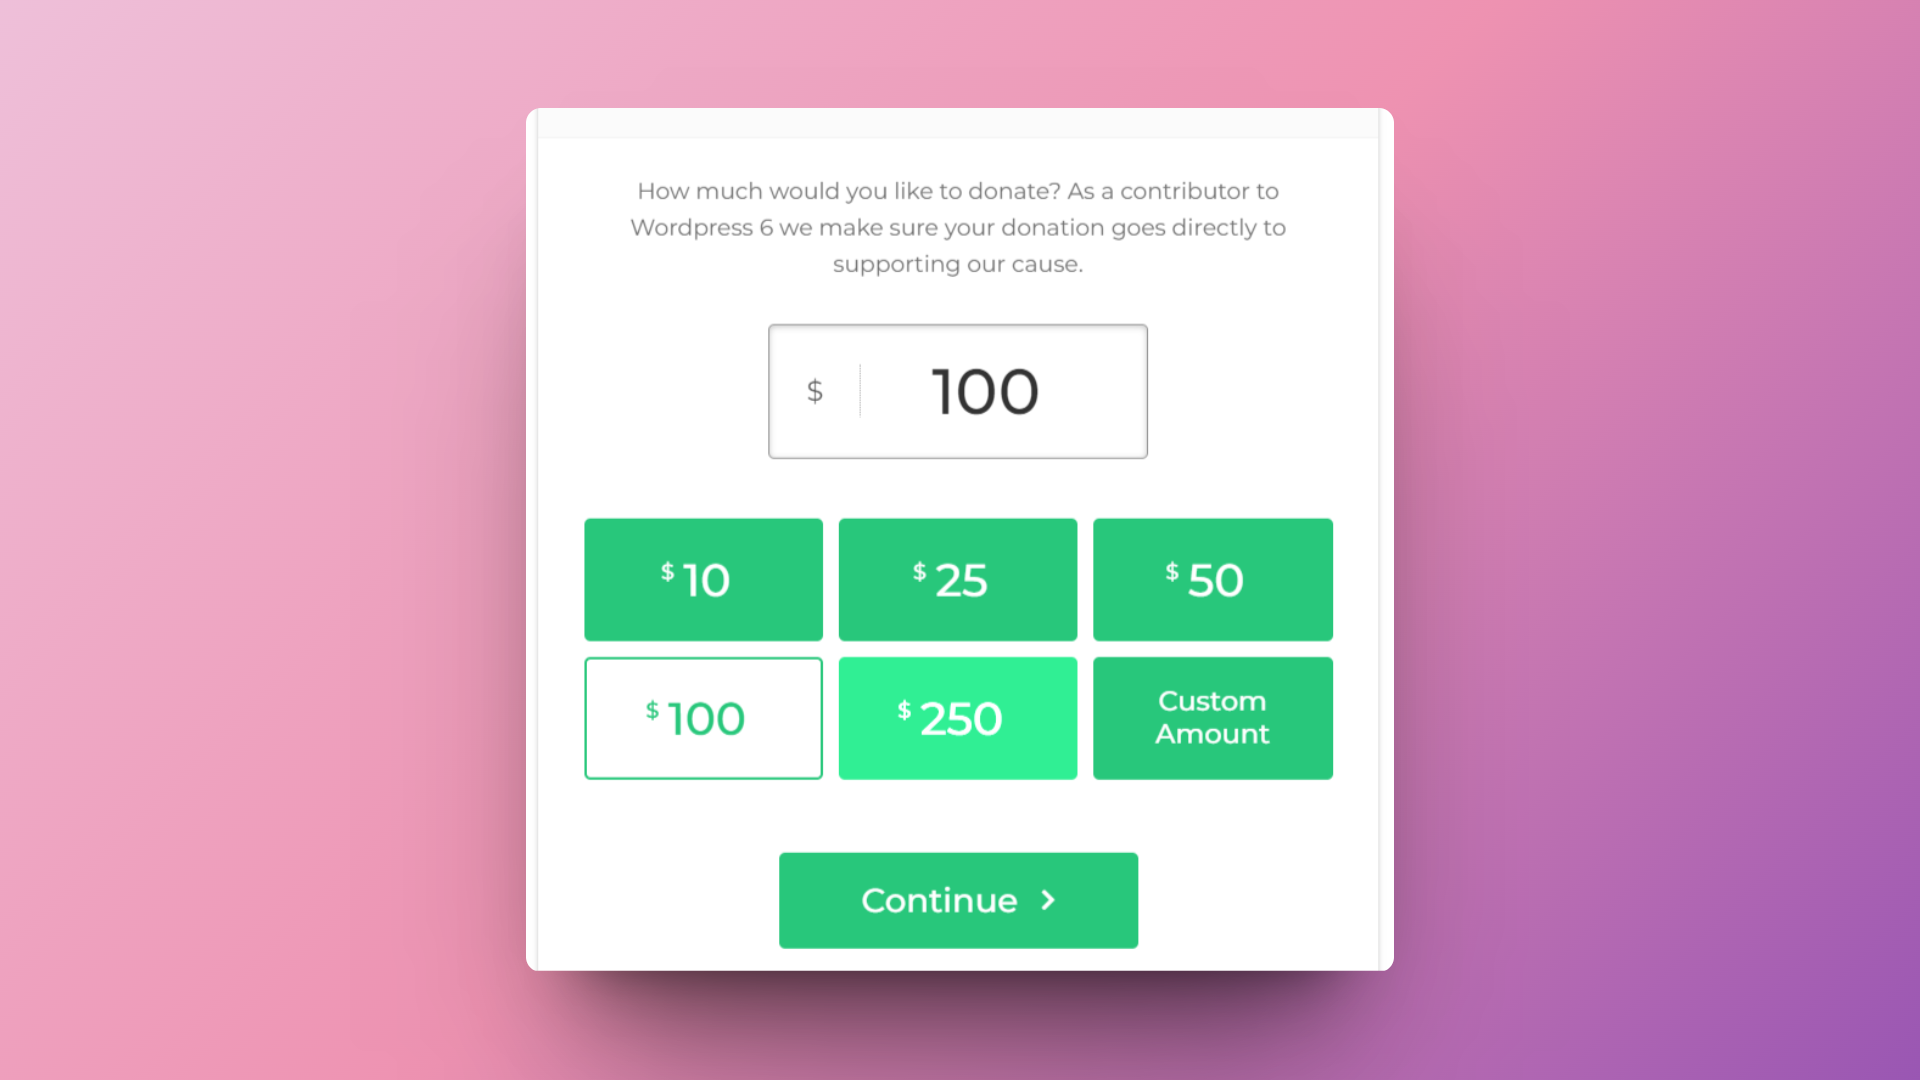 Donors complete their payment using their selected method.
 ## Refunds
Log in to your admin panel to manage donations.
Navigate to Donations ⇒ Donations.
Click the edit link to navigate to the Donation Payment Details page.
If the donation is paid via 'HitPay Payment Gateway', then the 'Refund via HitPay Payment Gateway' button will be displayed.
Click this button to process the refund.
Confirm the refund details which will be added to the donation payment note. Note that only one refund is allowed per transaction.
## FAQs
No, HitPay does not send an email confirmation to your customer if the payment is made through WordPress. This is because WordPress, by default, sends an email to your customer with the order details. To prevent duplicate emails, HitPay does not send an additional email to your customers. As a merchant, you will receive a payment alert email.
If you are unable to resolve the WordPress issues, you can request HitPay support to help with your debugging. But before that, make sure the following checks are completed:
* Ensure that your credentials are correct, both the API Key and Salt.
* Ensure that you are testing with an amount greater than \$1 (or equivalent).
* Make sure the webhook in the HitPay dashboard shows "Success."
Please provide the following details to the HitPay team:
1. Debug logs from your WordPress store.
2. Admin access to your WordPress test store (Since our team will be debugging, please avoid sending access to your live store).
3. SFTP access to your test store.
You can send the details to [support@hit-pay.com](mailto:support@hit-pay.com) (Approximate debug time would be 3 to 5 business days).
## Refunds
Log in to your admin panel to manage donations.
Navigate to Donations ⇒ Donations.
Click the edit link to navigate to the Donation Payment Details page.
If the donation is paid via 'HitPay Payment Gateway', then the 'Refund via HitPay Payment Gateway' button will be displayed.
Click this button to process the refund.
Confirm the refund details which will be added to the donation payment note. Note that only one refund is allowed per transaction.
## FAQs
No, HitPay does not send an email confirmation to your customer if the payment is made through WordPress. This is because WordPress, by default, sends an email to your customer with the order details. To prevent duplicate emails, HitPay does not send an additional email to your customers. As a merchant, you will receive a payment alert email.
If you are unable to resolve the WordPress issues, you can request HitPay support to help with your debugging. But before that, make sure the following checks are completed:
* Ensure that your credentials are correct, both the API Key and Salt.
* Ensure that you are testing with an amount greater than \$1 (or equivalent).
* Make sure the webhook in the HitPay dashboard shows "Success."
Please provide the following details to the HitPay team:
1. Debug logs from your WordPress store.
2. Admin access to your WordPress test store (Since our team will be debugging, please avoid sending access to your live store).
3. SFTP access to your test store.
You can send the details to [support@hit-pay.com](mailto:support@hit-pay.com) (Approximate debug time would be 3 to 5 business days).