> ## Documentation Index
> Fetch the complete documentation index at: https://docs.hitpayapp.com/llms.txt
> Use this file to discover all available pages before exploring further.
# Cal.com
> Integrate Cal.com with HitPay to manage bookings and accept payments.
## Overview
Easily manage bookings for services like workshops, consultations, and fitness classes with Cal.com integration. Support both in-person and virtual appointments, sync with Google Calendar, and let customers book directly through a dedicated page. Payments are processed through HitPay, and you can embed the booking page in your online shop for a seamless experience.
### Setup Steps
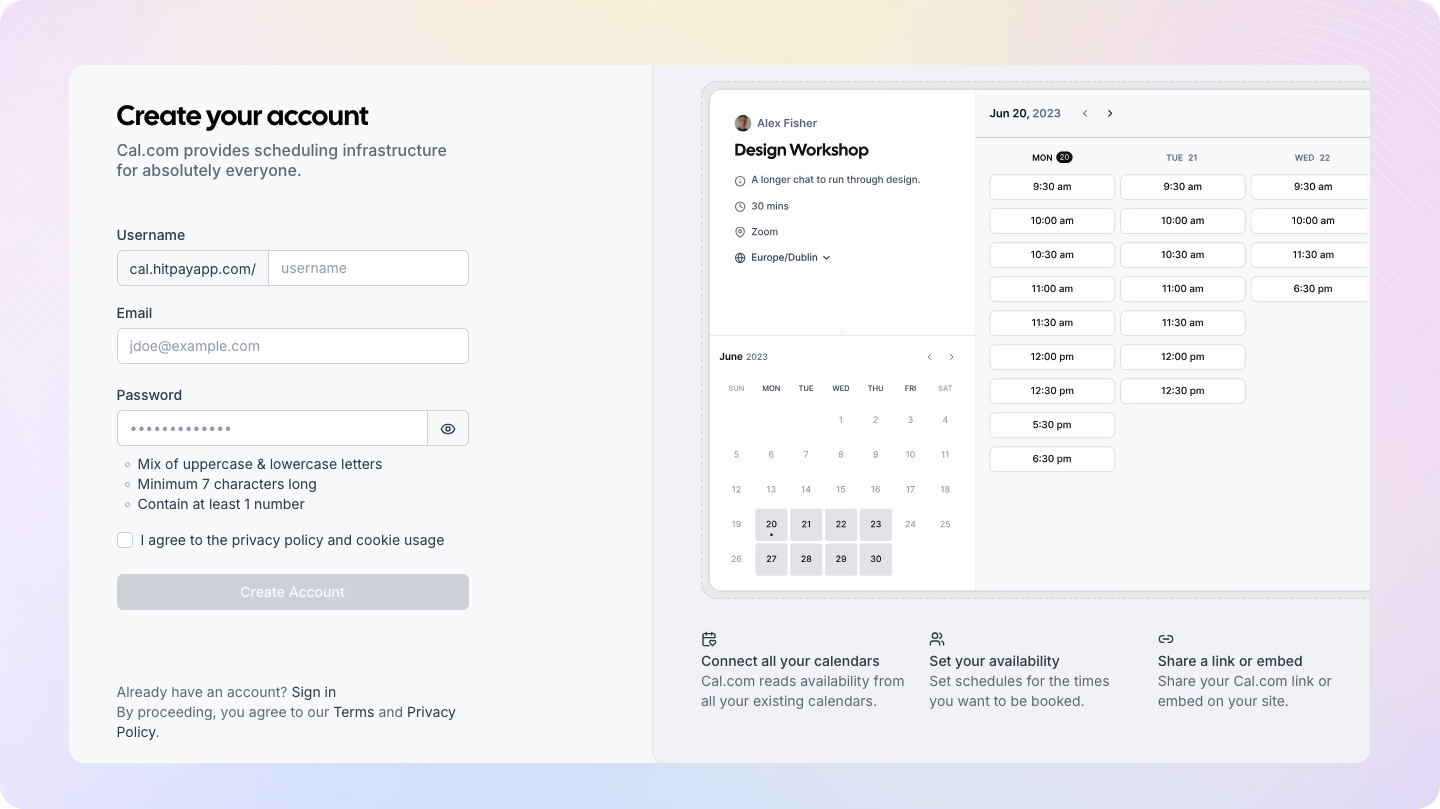
1. **Create Your Cal.com Account**
* Go to [cal.com](https://cal.com) and sign up for a free account.
 2. **Install HitPay in [cal.com](https://cal.com)**
* Go to the [HitPay app on Cal.com](https://cal.com/apps/hitpay).
* Click on **Install App** to connect HitPay with your Cal.com account.
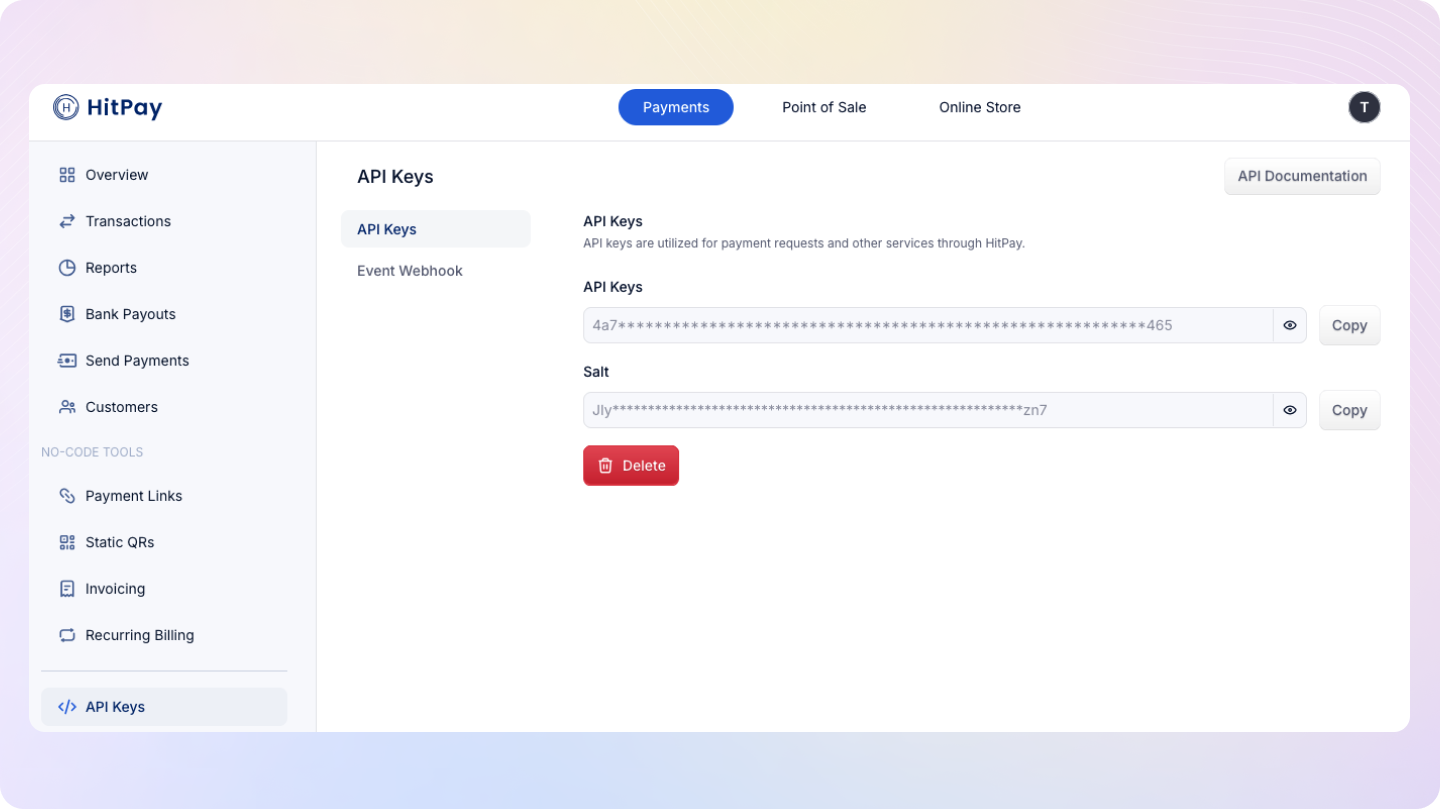
3. **Retrieve Your API Key and Salt from HitPay**
* Open your HitPay dashboard, navigate to **Developers > API and Salt Keys.**
* Copy the **API Key** and **Salt** values, which will be used to authenticate your account in Cal.com.
* **Important**: Keep these keys secure and do not share them publicly.
2. **Install HitPay in [cal.com](https://cal.com)**
* Go to the [HitPay app on Cal.com](https://cal.com/apps/hitpay).
* Click on **Install App** to connect HitPay with your Cal.com account.
3. **Retrieve Your API Key and Salt from HitPay**
* Open your HitPay dashboard, navigate to **Developers > API and Salt Keys.**
* Copy the **API Key** and **Salt** values, which will be used to authenticate your account in Cal.com.
* **Important**: Keep these keys secure and do not share them publicly.
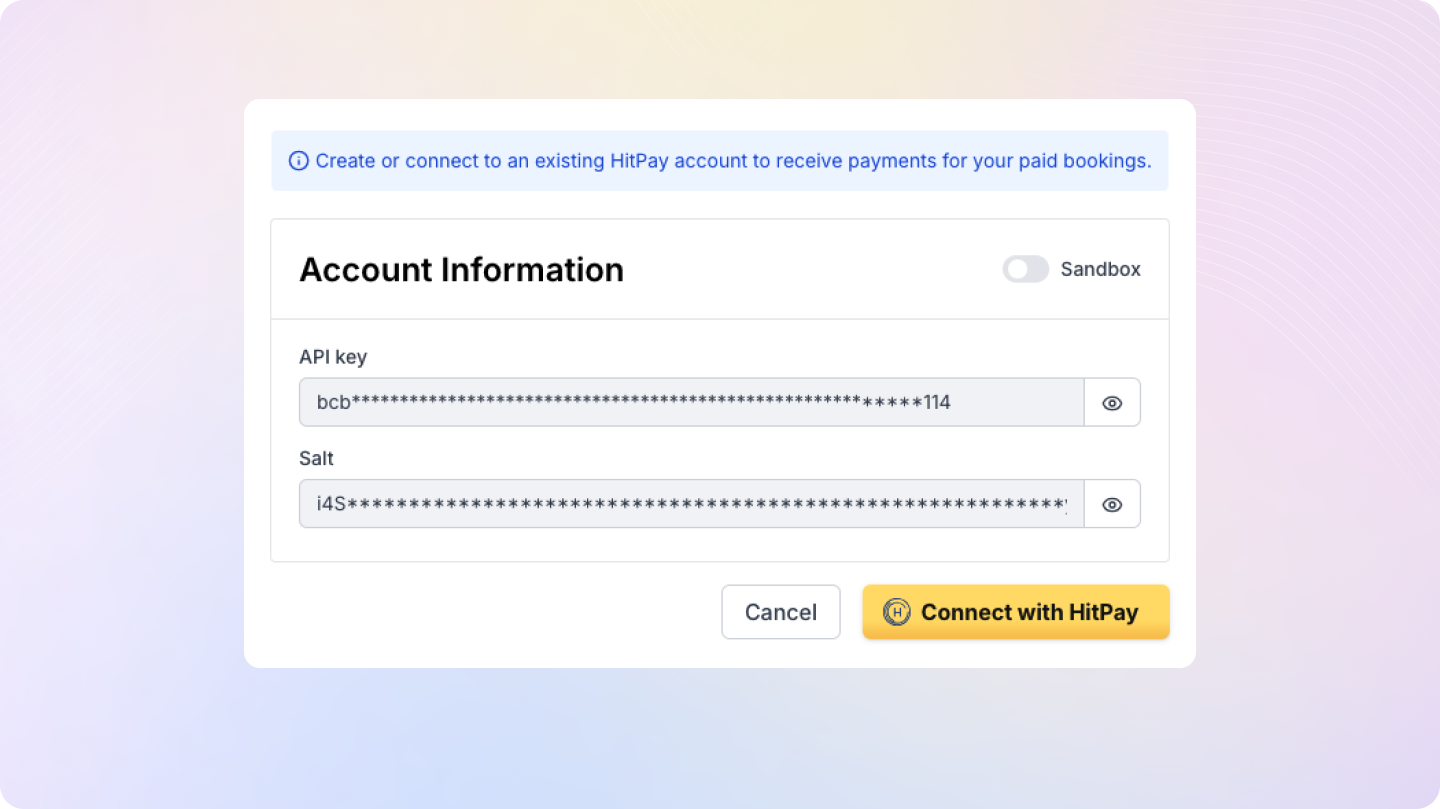
 4. **Enter Your API Key and Salt in [cal.com](https://cal.com)**
* Return to [HitPay app on Cal.com](https://cal.com/apps/hitpay/setup).
* Paste the **API Key** and **Salt** values you copied from HitPay.
4. **Enter Your API Key and Salt in [cal.com](https://cal.com)**
* Return to [HitPay app on Cal.com](https://cal.com/apps/hitpay/setup).
* Paste the **API Key** and **Salt** values you copied from HitPay.
 5. **Optional - Sync with Google Calendar and Virtual Meeting Apps**
* To sync with a calendar, connect your **Google Calendar** to automatically reflect your availability.
* For virtual appointments, connect to **Google Meet** or other supported platforms for seamless virtual meetings.
6. **Set Up Your Event in [cal.com](https://cal.com)**
* Go to **Event Types** and select **Create New Event**.
* Enter event details such as the **Title**, **Duration**, and **Availability**. Configure any advanced settings as needed.
7. **Enable HitPay for Payments and Set Pricing**
* Within your event setup, go to the **Apps** section and enable **HitPay** for payment processing.
* Set a currency and price for the event, allowing customers to book and pay directly.
8. **Share or Embed Your Booking Page**
* To share your booking page with customers:
* Go to dashboard and click **Copy Public Page Link** to provide a link displaying all your booking options.
* To embed the event on your online store:
* Click the three dots next to the event, select **Inline Embed**, and copy the embed code.
* In the HitPay dashboard, go to **Online Shop > Store Design > Sections > Embed Code** and paste the code to integrate booking directly into your online shop.
5. **Optional - Sync with Google Calendar and Virtual Meeting Apps**
* To sync with a calendar, connect your **Google Calendar** to automatically reflect your availability.
* For virtual appointments, connect to **Google Meet** or other supported platforms for seamless virtual meetings.
6. **Set Up Your Event in [cal.com](https://cal.com)**
* Go to **Event Types** and select **Create New Event**.
* Enter event details such as the **Title**, **Duration**, and **Availability**. Configure any advanced settings as needed.
7. **Enable HitPay for Payments and Set Pricing**
* Within your event setup, go to the **Apps** section and enable **HitPay** for payment processing.
* Set a currency and price for the event, allowing customers to book and pay directly.
8. **Share or Embed Your Booking Page**
* To share your booking page with customers:
* Go to dashboard and click **Copy Public Page Link** to provide a link displaying all your booking options.
* To embed the event on your online store:
* Click the three dots next to the event, select **Inline Embed**, and copy the embed code.
* In the HitPay dashboard, go to **Online Shop > Store Design > Sections > Embed Code** and paste the code to integrate booking directly into your online shop.
 #### Customer Booking Experience
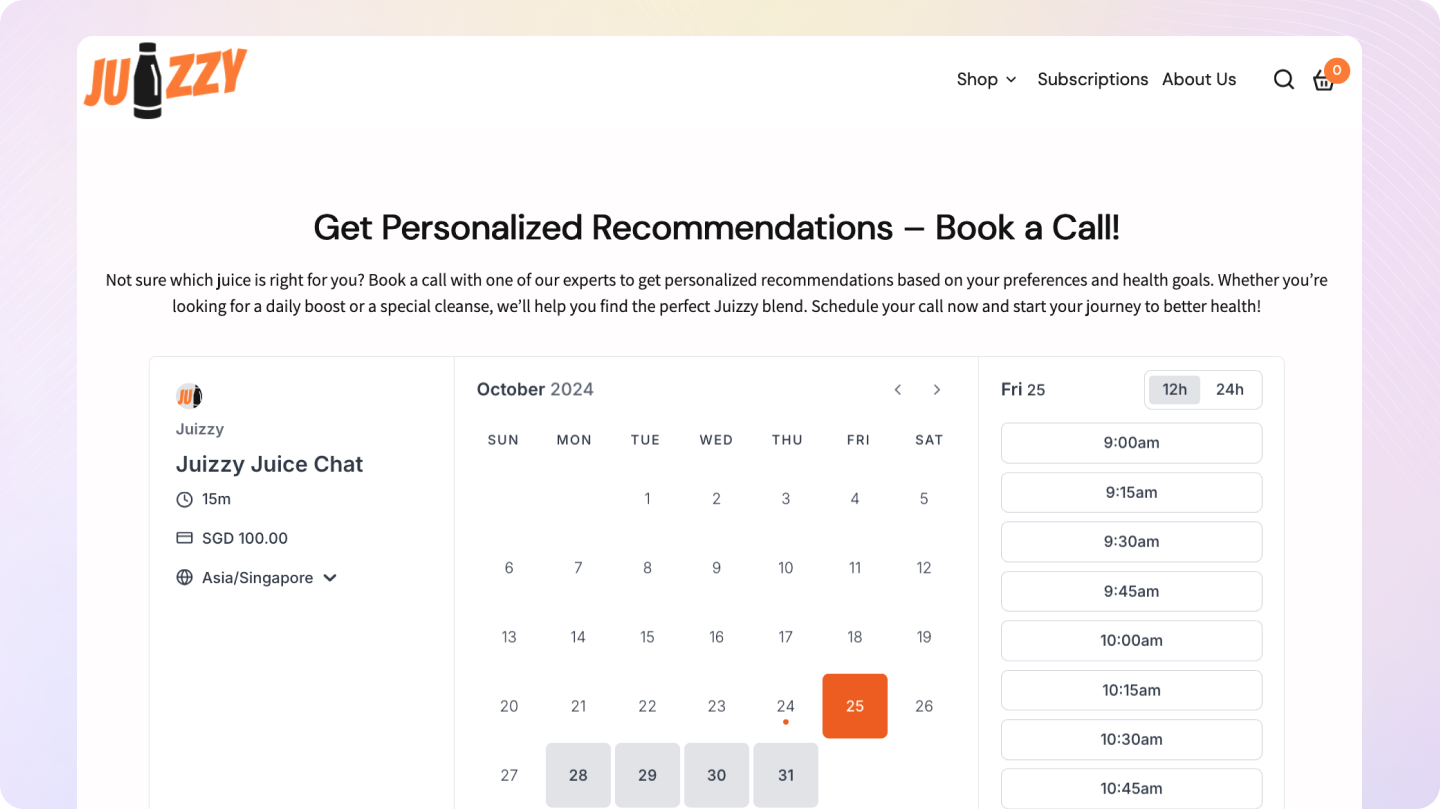
1. **Booking a Session**
* When customers visit the booking page, they can select their preferred date and time, fill in their details, and click **Pay to Book**.
2. **Payment Process**
* After clicking **Pay to Book**, customers will be redirected to the HitPay checkout page to complete their payment.
3. **Booking and Payment Confirmation**
* Upon successful booking and payment, customers will receive confirmation, and you will see the booking details in the **Booking Table** within [cal.com](https://cal.com).
#### Viewing Bookings and Payments
* **View Bookings**: All bookings will appear in the **Booking Table** within [cal.com](https://cal.com/bookings/upcoming).
* **View Payments**: Payments can be tracked on your HitPay dashboard under **Transactions** or in your online shop under **Bookings**.
## FAQs
Currently, the HitPay payment integration for embedded booking pages is only available on [cal.hitpayapp.com](https://cal.hitpayapp.com). To use this feature, please create your account on this site.
The HitPay payment embed functionality will soon be available on the main Cal.com platform.
Basic customisation options are available directly on Cal.com.
No, booking management (e.g., rescheduling, cancellations) must be handled through Cal.com. Only payment details are accessible on the HitPay dashboard.
If a customer cancels their booking, you will need to manually process the refund. Go to your HitPay dashboard, navigate to **Transactions**, find the relevant transaction, and issue the refund from there. Refunds are not processed automatically for canceled bookings.
#### Customer Booking Experience
1. **Booking a Session**
* When customers visit the booking page, they can select their preferred date and time, fill in their details, and click **Pay to Book**.
2. **Payment Process**
* After clicking **Pay to Book**, customers will be redirected to the HitPay checkout page to complete their payment.
3. **Booking and Payment Confirmation**
* Upon successful booking and payment, customers will receive confirmation, and you will see the booking details in the **Booking Table** within [cal.com](https://cal.com).
#### Viewing Bookings and Payments
* **View Bookings**: All bookings will appear in the **Booking Table** within [cal.com](https://cal.com/bookings/upcoming).
* **View Payments**: Payments can be tracked on your HitPay dashboard under **Transactions** or in your online shop under **Bookings**.
## FAQs
Currently, the HitPay payment integration for embedded booking pages is only available on [cal.hitpayapp.com](https://cal.hitpayapp.com). To use this feature, please create your account on this site.
The HitPay payment embed functionality will soon be available on the main Cal.com platform.
Basic customisation options are available directly on Cal.com.
No, booking management (e.g., rescheduling, cancellations) must be handled through Cal.com. Only payment details are accessible on the HitPay dashboard.
If a customer cancels their booking, you will need to manually process the refund. Go to your HitPay dashboard, navigate to **Transactions**, find the relevant transaction, and issue the refund from there. Refunds are not processed automatically for canceled bookings.